Via S3
OVERVIEW
NotifyVisitors enables you to import events and users' data through the AWS S3 import feature. You can import the data from your AWS S3 bucket to NotifyVisitors.
Configure S3 bucket in AWS
You can configure the AWS S3 feature to import data for all or any specific events.
A. Create AWS S3 bucket
-
Firstly, you are required to create an AWS S3 bucket. For that, you should create an account in the same
region as the NotifyVisitors data hosting region. -
Next, log in to your AWS account and search for S3 in the AWS services box.
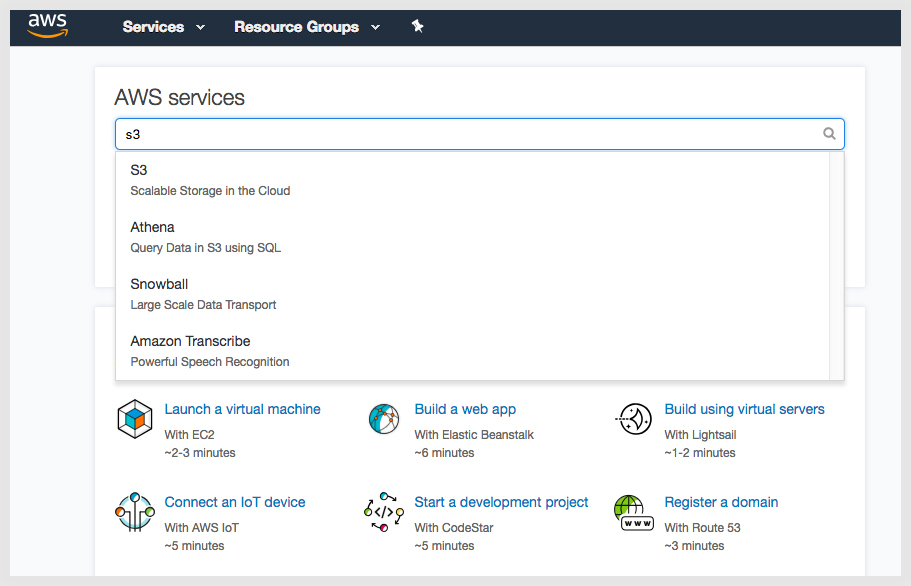
- Enter the bucket name and other settings.
B. Create API key for S3 bucket
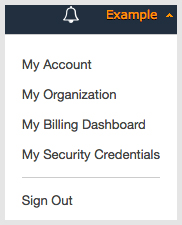
Once the bucket is created, create an AWS API Key to import data to the S3 bucket. Now, click on your account (AWS)name and navigate to security credentials.
C. Create a policy
Follow the below steps to create a policy in your AWS account.
-
Click on the “add users” in your account.
-
Add the user name.
-
Choose the access type and click “add user” to the group.
-
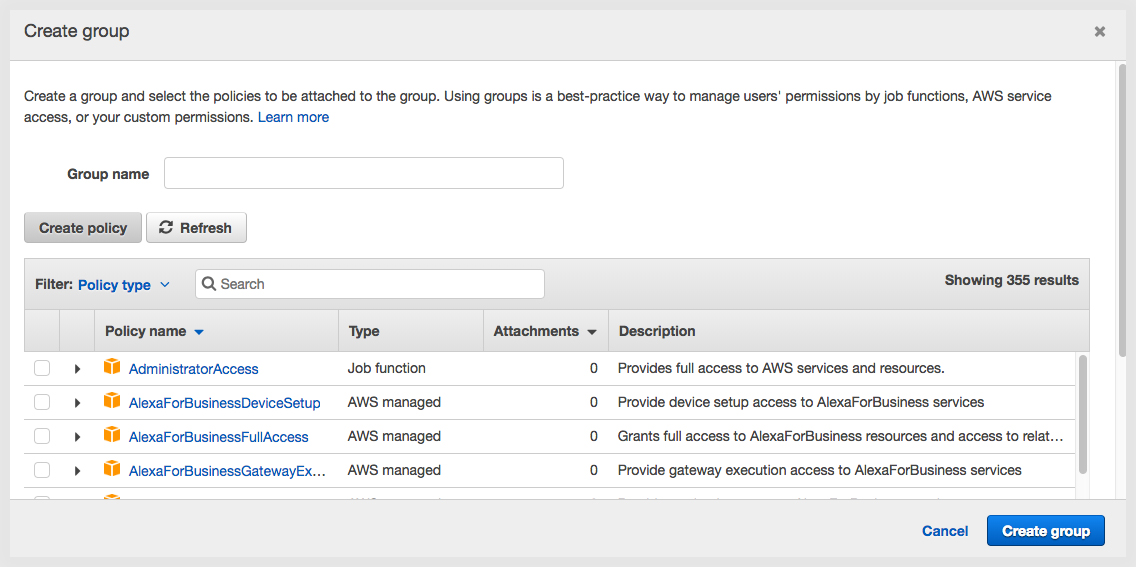
Enter the group name and create a policy.
-
Click on the JSON tab.
-
Add the following JSON in the box below and replace “NotifyVisitors-Example” with the name of the S3
bucket which you created above. The permissions you specified in the policy will allow NotifyVisitors to catch all the necessary information about the bucket.
{
    "Version": "2012-10-17",
    "Statement": [
        {
            "Sid": "VisualEditor0",
            "Effect": "Allow",
            "Action": "s3:ListBucket",
            "Resource": "arn:aws:s3:::bucket_name"
        },
        {
            "Sid": "VisualEditor1",
            "Effect": "Allow",
            "Action": [
                "s3:PutObject",
                "s3:GetObject",
                "s3:DeleteObject"
            ],
            "Resource": "arn:aws:s3::: bucket_name/*"
        }
    ]
}
- Upload the JSON file and click on the REVIEW button.
D. Get access to the credentials
-
Once you create the policy, you need to follow the below steps to get access to the credentials to upload a file to S3 bucket.
-
Navigate to the GROUP PAGE and assign the policy you just created to the NEW GROUP and click on the CREATE GROUP further.
-
You will now be navigated to the “add a user to the group” page. Click on the review button and create the USER.
-
Clicking on CREATE THE USER will land you on the next page and you can receive the credentials for ACCESS KEY ID and SECRET ACCESS KEY.
Configure S3 bucket in NotifyVisitors
Navigate to the Settings> Partner> Integration section > Click on S3 keys.
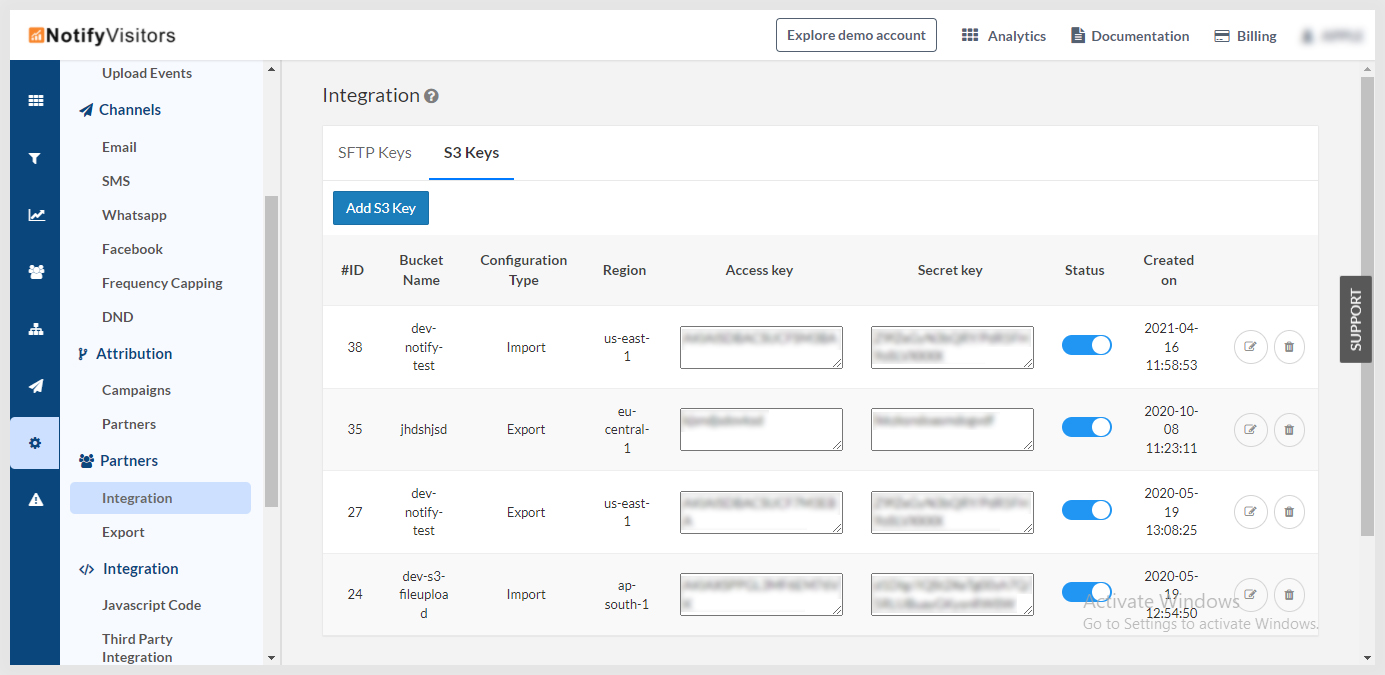
Select import option from the configuration type. Enter the credentials that you have got in the above step.
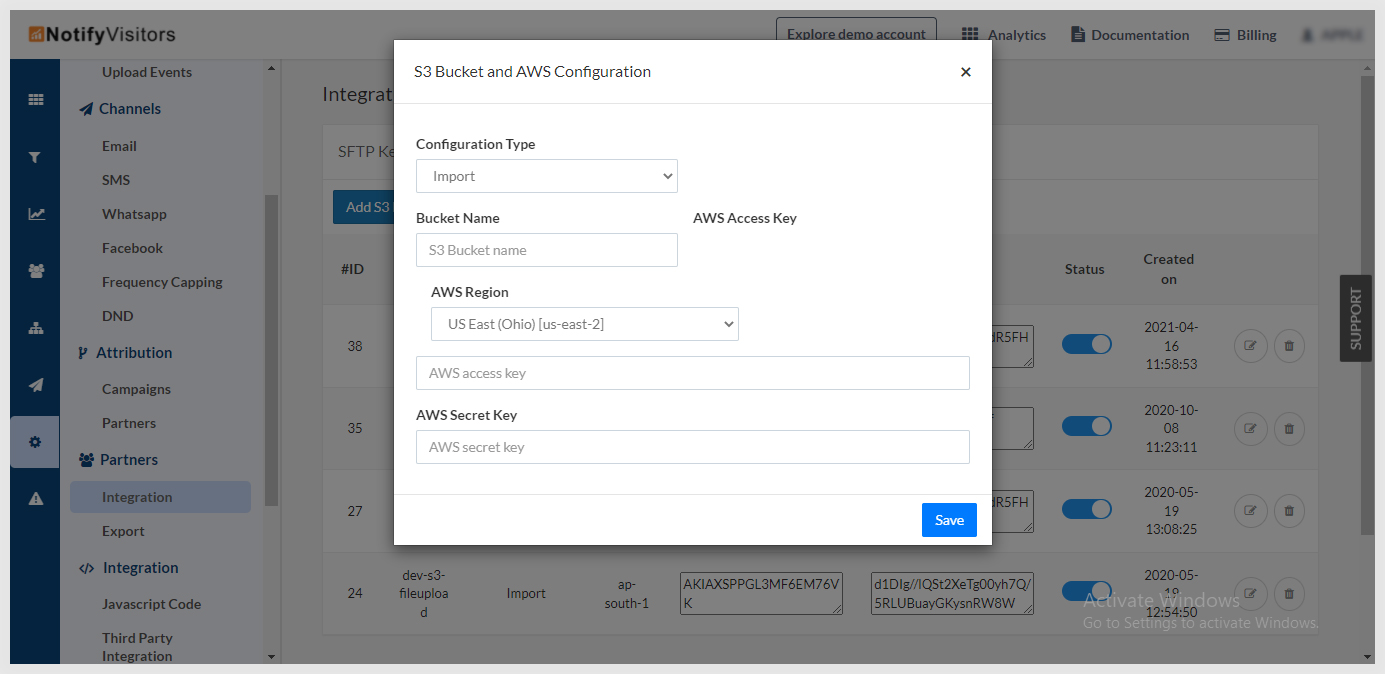
Once you enter all the required fields, click on the SAVE button.
Upload CSV and Manifest file to bucket
Now, you can upload your CSV file to the AWS S3 bucket.
You are required to create a manifest file, after you upload the CSV file in order to check the uploaded data with NotifyVisitors properties. Manifest file allows you to map out the data. It is usually created in the JSON format.
Validate the upload status
You can check the status of your uploaded file by navigating to the NotifyVisitors > Settings > Upload section.
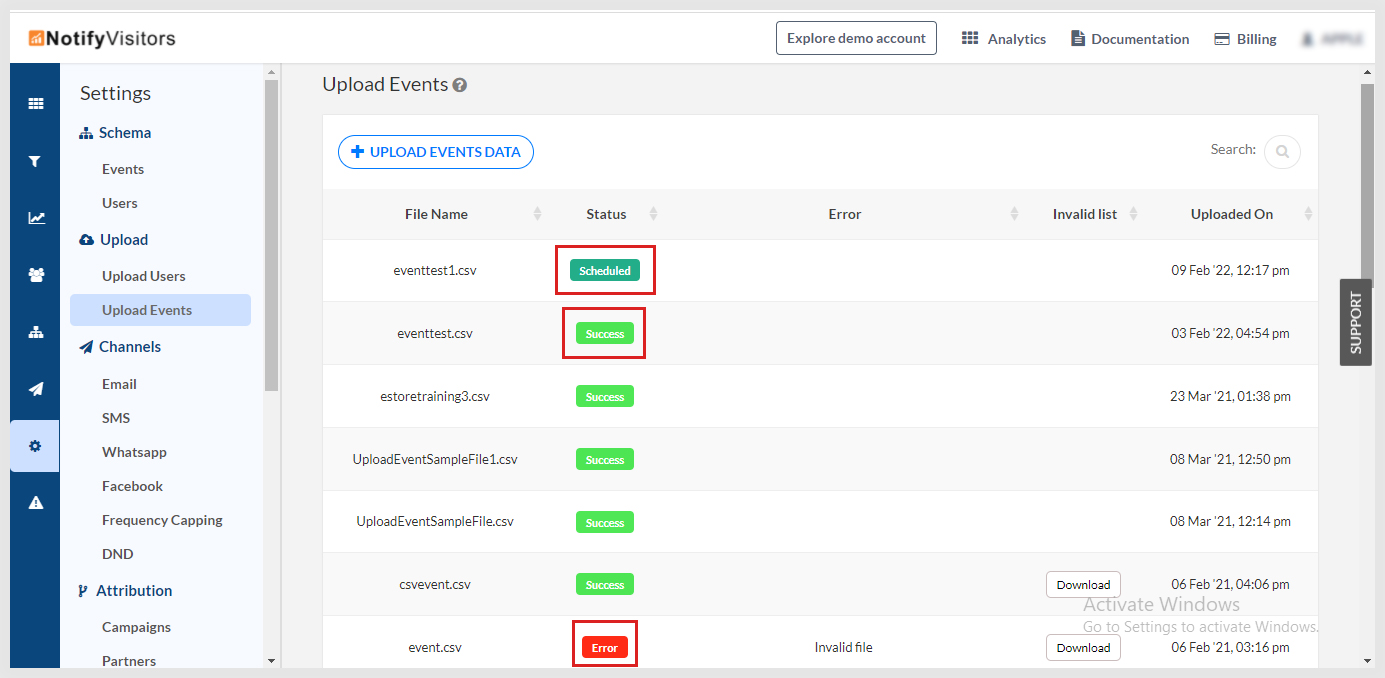
You can view the errors and the required resolutions for it in the table given below :
| Error Name | Resolution |
|---|---|
| The data file has not been found | The data file has not been uploaded. Upload it and create a new manifest file |
| The file is unreadable | The file is not uploaded in the correct format. |
| Event name is mandatory | Event name is unknown or not given. |
Updated about 4 years ago
