Safari Web Push Certificate
It might appear a bit daunting at first to get Push Notifications to work in the Safari web browser. However, if you follow the simple step by step procedure outlined within this guide, you will realize that the process is quite easy to implement and not as complicated as you thought. Once you have successfully completed the process, you would have paved the way for your organization to connect and engage with a whole new audience via your organization’s website.
Nevertheless, before you begin with the procedure, you will need to fulfill a prerequisite which is to have a paid and active Apple Developer subscription, in order to create a unique Push ID for your organization’s website. For the sake of simplicity, we have deconstructed and compartmentalized the entire process into four sections namely:
Creating A Certificate Request
Creating A Website Push ID For APNs
Generating The Web Push Certificate
Uploading The Certificate To NotifyVisitors
Now, let’s get started with the process.
1. Creating A Certificate Request
In this section, the step by step process for creating a certificate signing request is delineated.
- Launch the Keychain Access app in macOS.
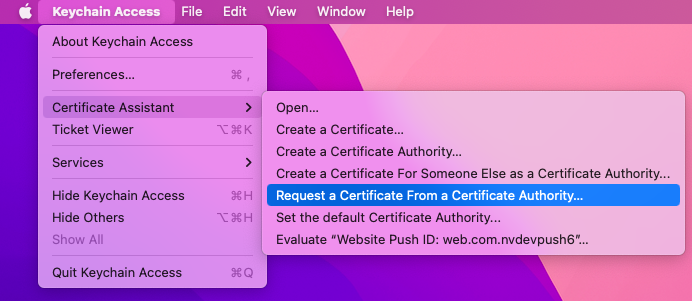
- Navigate to Keychain Access > Certificate Assistant > Request a Certificate From a Certificate Authority.
- Fill in the User Email Address and Common Name fields.
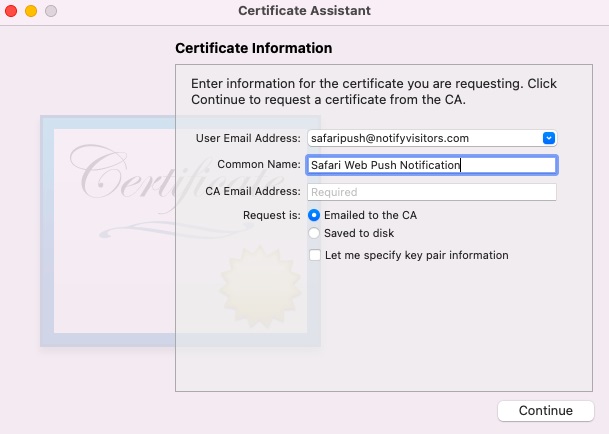
- Select the ‘Saved to disk’ option and then click on ‘Continue’.
- Within the new pop-up that appears on-screen, from the ‘Save As’ dropdown select the option titled ‘CertificateSigningRequest.certSigningRequest’.
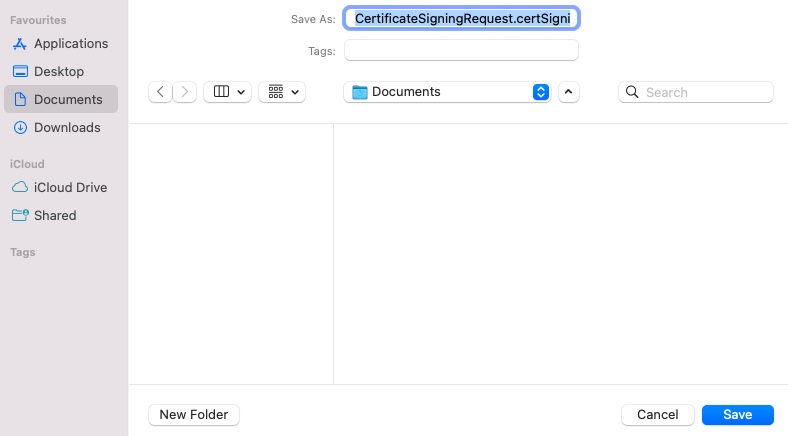
Note: Save the certificate signing request (CSR) exactly as shown in the screenshot above. This Request will be required later to create the Website Push Certificate.
2. Creating A Website Push ID For APNs
In this section, the step by step process for setting up a Website Push ID for APNs is delineated.
- Login to the Apple Developer Console in order to create a unique Website Push ID for push notifications.
- Within the Developer Console, navigate to Identifiers > Register an App ID > Register a New Identifier.
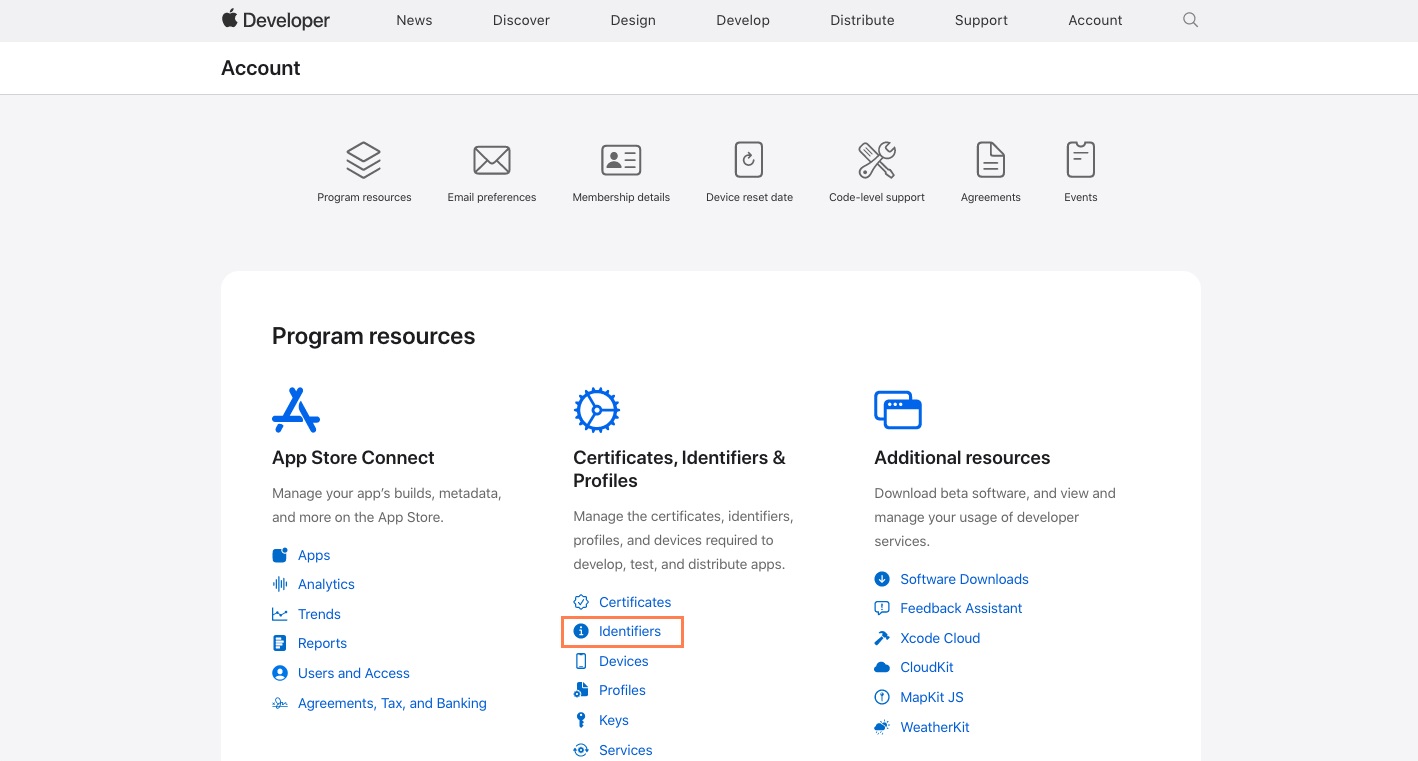
- From the ‘Register a New Identifier’ list, select the ‘Web Push IDs’ option and then click on ‘Continue’.
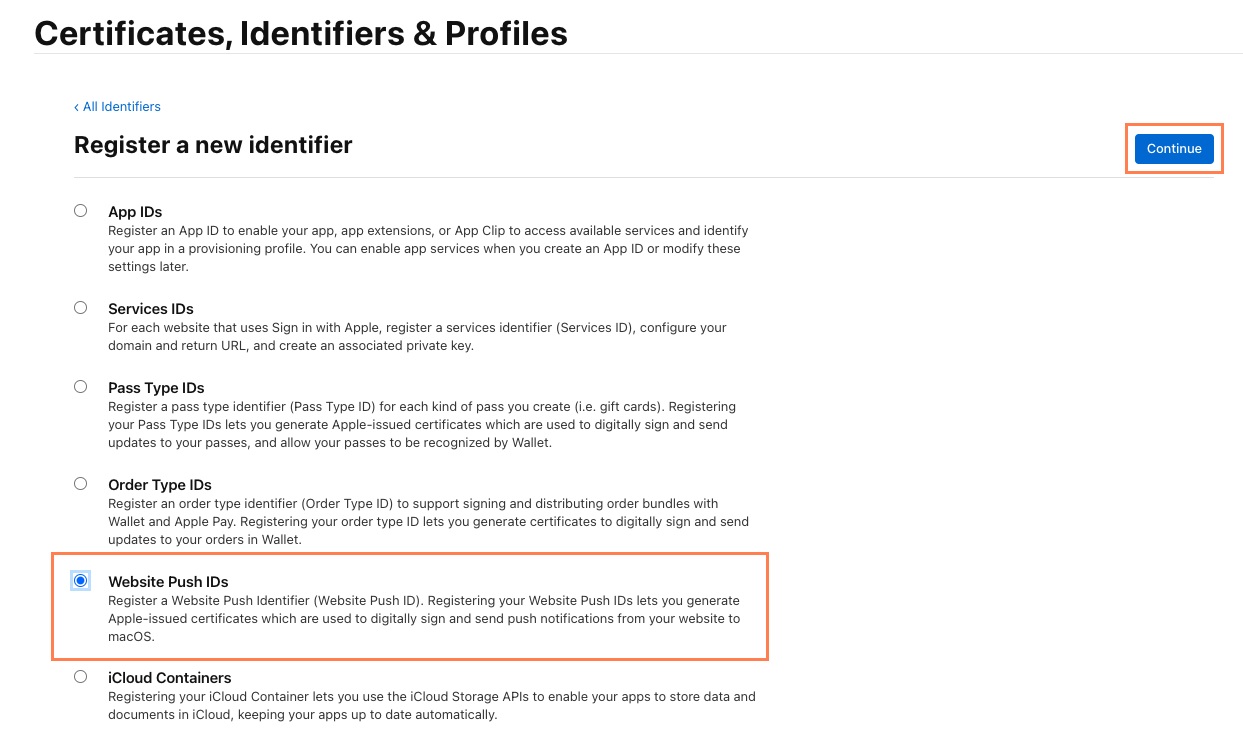
- Upon clicking on the ‘Continue’ button, you will be asked to ‘Register a Web Push ID’.
- Enter a relevant description within the ‘Description’ box. In the ‘Identifier’ box, enter an identifier using the reverse domain name notation. For example: ‘web.com.yourwebsite’.

Note: The word "web" is added automatically to the identifier.
6. Click on ‘Continue’ and then click on ‘Register’.
3. Generating The Web Push Certificate
In this section, the step by step process for generating, downloading and then exporting the Web Push Certificate is delineated.
- In the Developer Console, click on the ‘Certificates’ section, then click on the ‘+’ button in order to view all the available options.

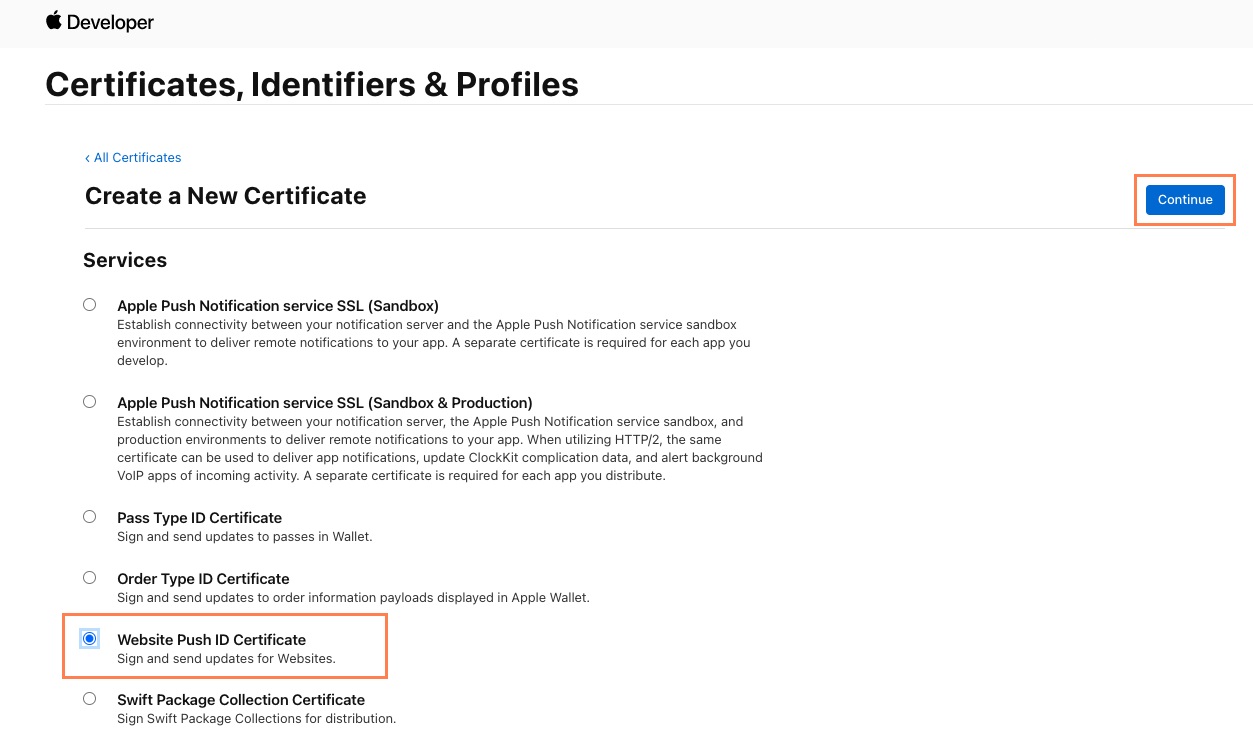
- From the ‘Create a New Certificate’ list, select the ‘Website Push ID Certificate’ option and then click on ‘Continue’.
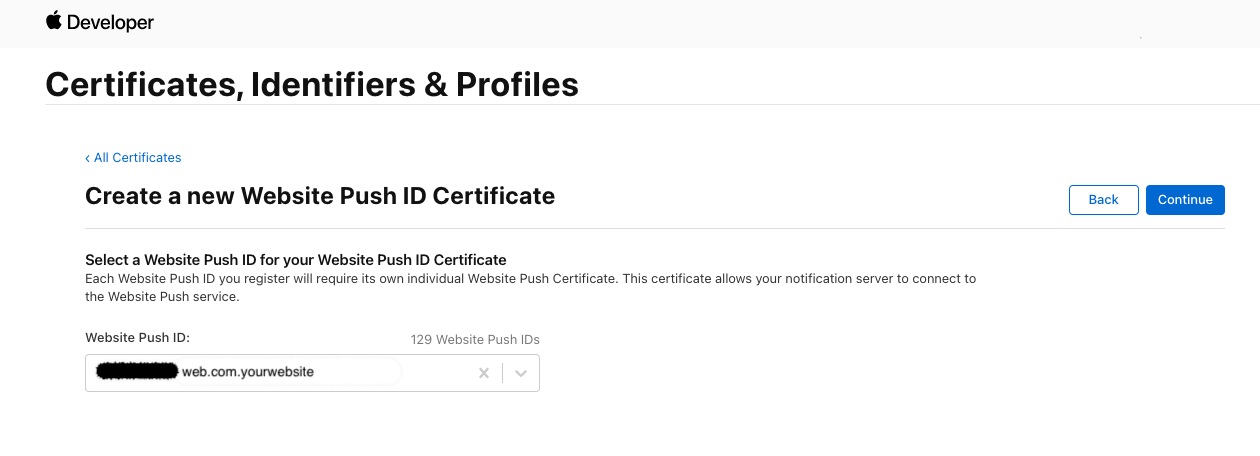
- On the next page that appears on-screen, from the ‘Website Push ID’ dropdown, select the Website Push ID you created earlier in Step 2 and then click on ‘Continue’.
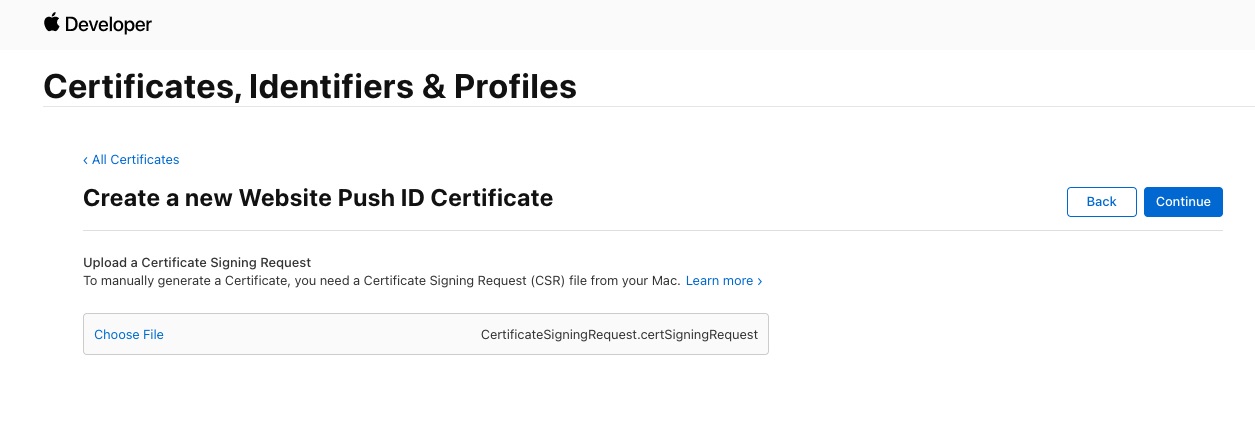
- The Certificate Request file or the CSR file which you created in Step 1 will now be required. Click on ‘Choose File’ and browse for the CSR file saved in your computer system. Then, click on the ‘Continue’ button to upload the file.

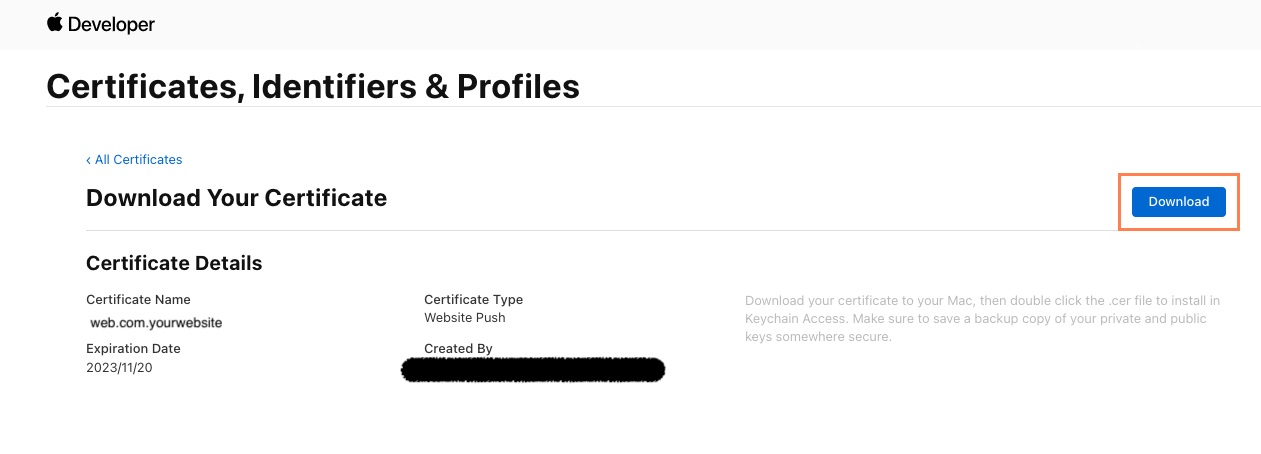
- On the next page that appears on-screen, you will notice a ‘Download’ button right next to the heading titled ‘Download Your Certificate’. Click on that ‘Download’ button to download the SSL certificate. This particular certificate will be used to send notifications to the subscribers.
-
At this point, you need to install and export the Certificate. Simply double click on the downloaded Certificate and this would install it in the Keychain Access app.
-
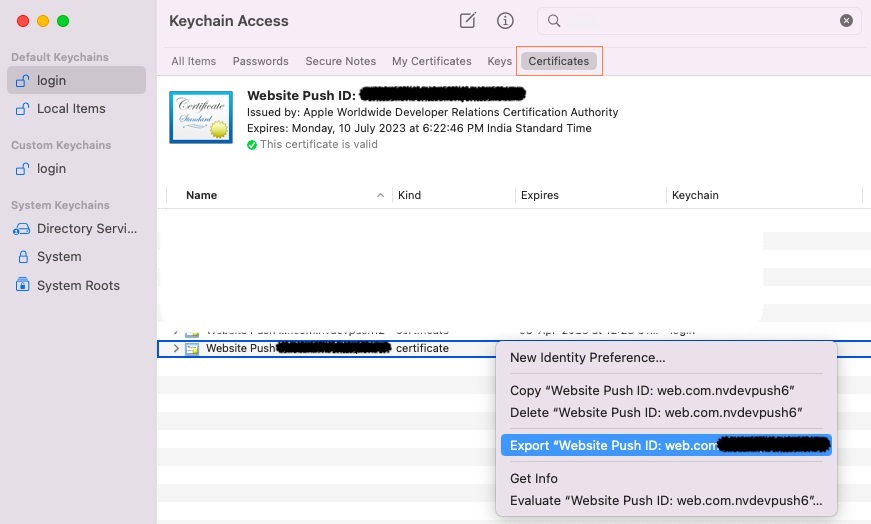
In order to export the Certificate, first open the Keychain Access app then click on ‘Certificates’ in the ‘Category’ section.
-
Now, right click on the Website Push ID for which you had created the Certificate, and in the menu that appears, click on the Export option.
-
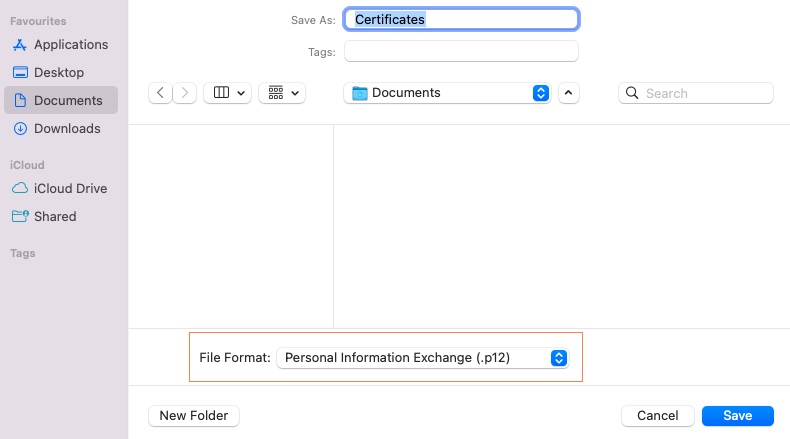
A new pop-up window will appear on-screen, prompting you to save the Certificate. While saving the Certificate use the Personal Information Exchange (.p12) file format.
-
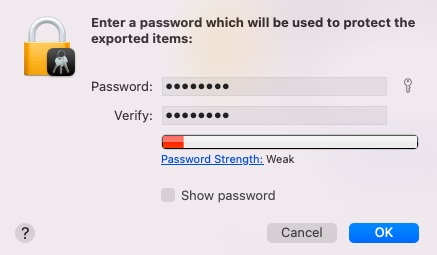
Then, you will be prompted to enter a password, kindly enter a password of your choice and click on "OK".
This password is the Import Password and it will be required later to convert the .p12 file to .pem file. -
Check out the ‘How To Create A PEM File ?’ section of the APNS Certificate Guide (link provided below), in order to learn how to create the .pem file. This .pem file along with the SSL certificate will be ultimately required in the final step.
APNS Certificate (notifyvisitors.com)
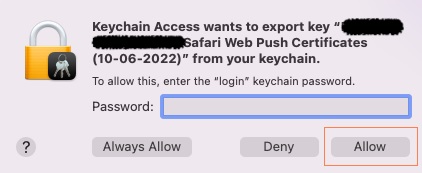
- In the next pop-up that appears on-screen, click on ‘Allow’ and then enter your Mac password in order to export the certificate to your Mac.
4. Uploading The Certificate To NotifyVisitors
In this section, the step by step process for uploading the Web Push Certificate to NotifyVisitors is delineated.
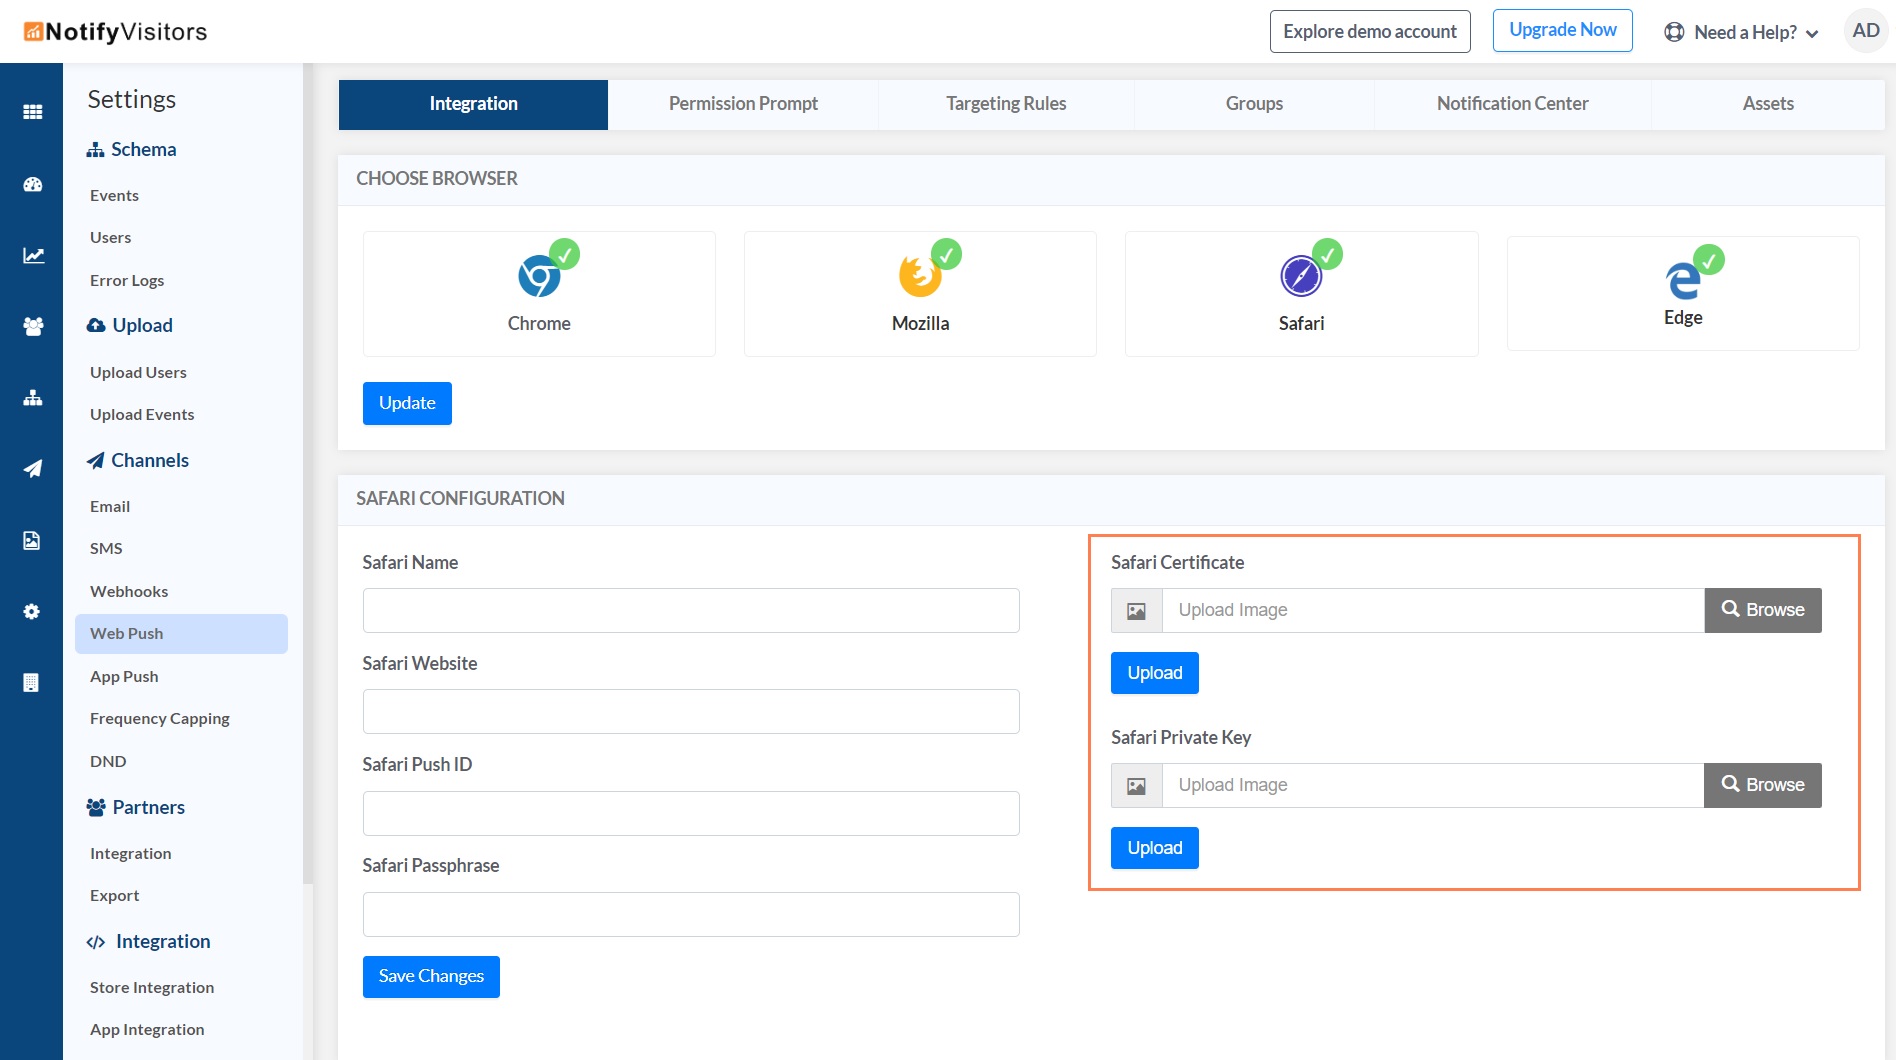
- Navigate to NotifyVisitors Dashboard> Settings> Web Push.
-
Under the ‘Integration’ tab, look for the section titled ‘SAFARI CONFIGURATION’.
Within this section, you will notice two empty fields under the headings titled ‘Safari Certificate’ and ‘Safari Private Key’. -
Simply upload the Safari Certificate and Private Key to their dedicated fields.
-
Once you have uploaded the Certificate and the Private Key, start configuring your Web Push Notification settings.
Although, in comparison to other web browsers, it takes an additional amount of effort to set up Safari to receive Push Notifications, but, once you complete the process delineated above, you would pave the way for your organization to engage with an entirely new audience through its website.
Updated about 3 years ago
