Configure Notification Center
Set functionalities to show push notification.
Notification Center UI
If you want to integrate our designed notification center into your app, then you can use the code below according to your use case. If you have broadcast Push in the panel, NV-SDK offers two different types of notification center based on UI differences as described below in this documentation.
Standard /Simple Notification Center
This will simply show you all your push notifications from the panel which you have recently sent to your users based on an expiry time. You can set the expiry time of the notifications from the panel and by default expiry set if you push notification if you have not give any while creating push notification in your panel.
notifyvisitors.notificationCenter()
[notifyvisitors notificationCenter];
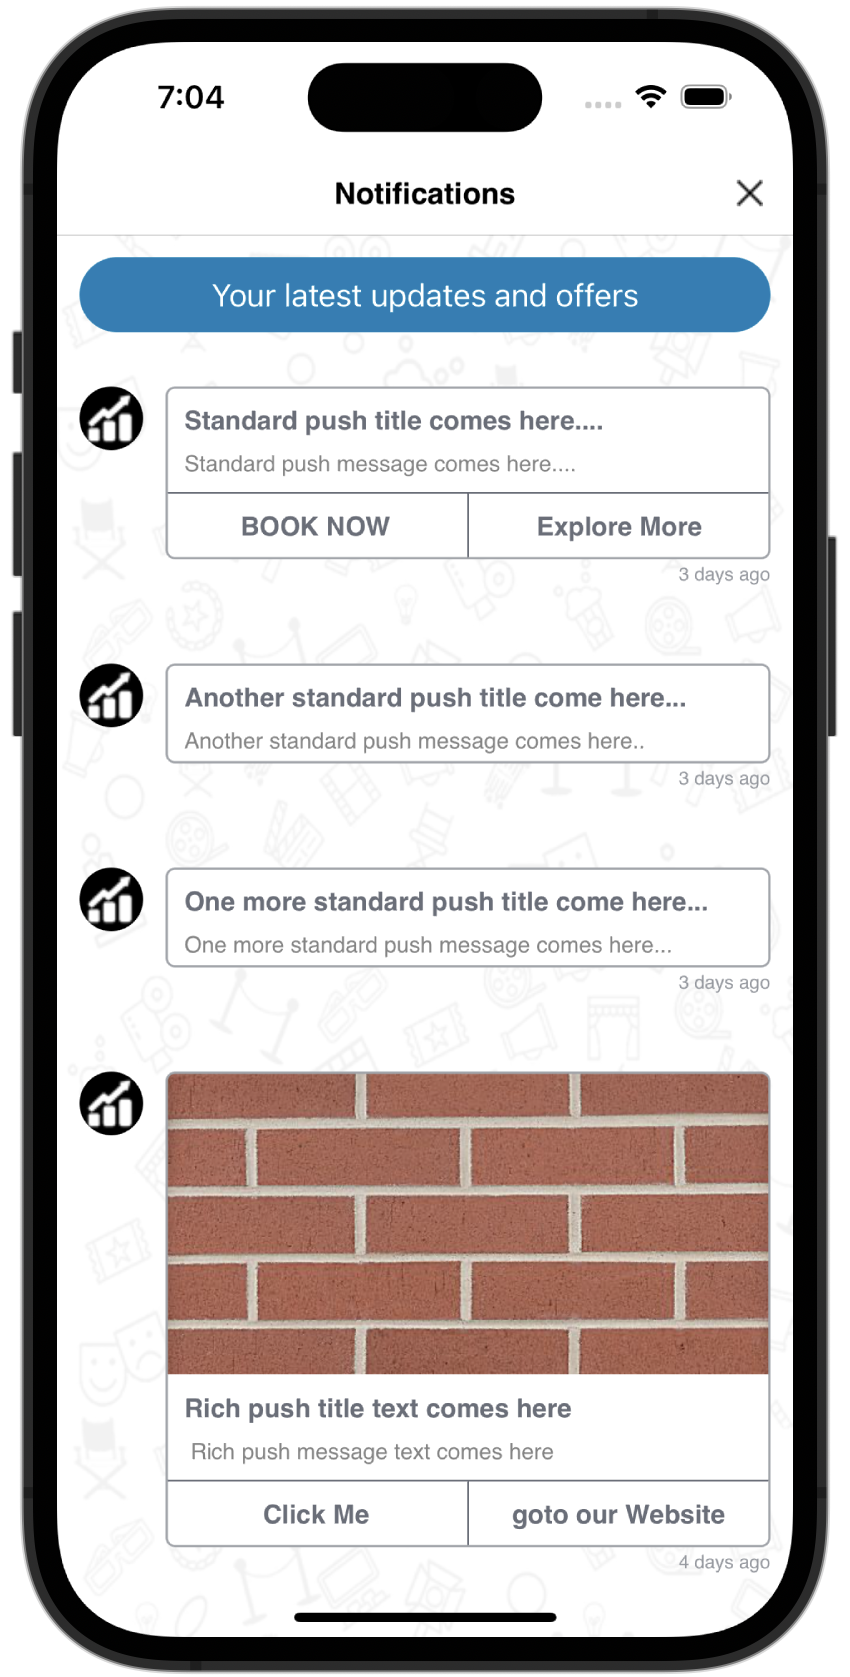
If you call the function as described above, you will get the output of the UI as shown in the following screenshot.
Advance Notification Center (UI with Tabs)
If you are using our latest SDK version 6.1.0 or above then you can use our advanced Notification Center UI. This type of Notification center allows you to show notifications in separate tabs which will be categorized based on the label you have defined in your app as well as configured in your NotifyVisitors panel. In this type of UI our SDK also provides you a separate unread count badge over the tab names against each tab. You can refer to below steps to use advanced UI in your app.
1. Configure in NotifyVisitors Panel
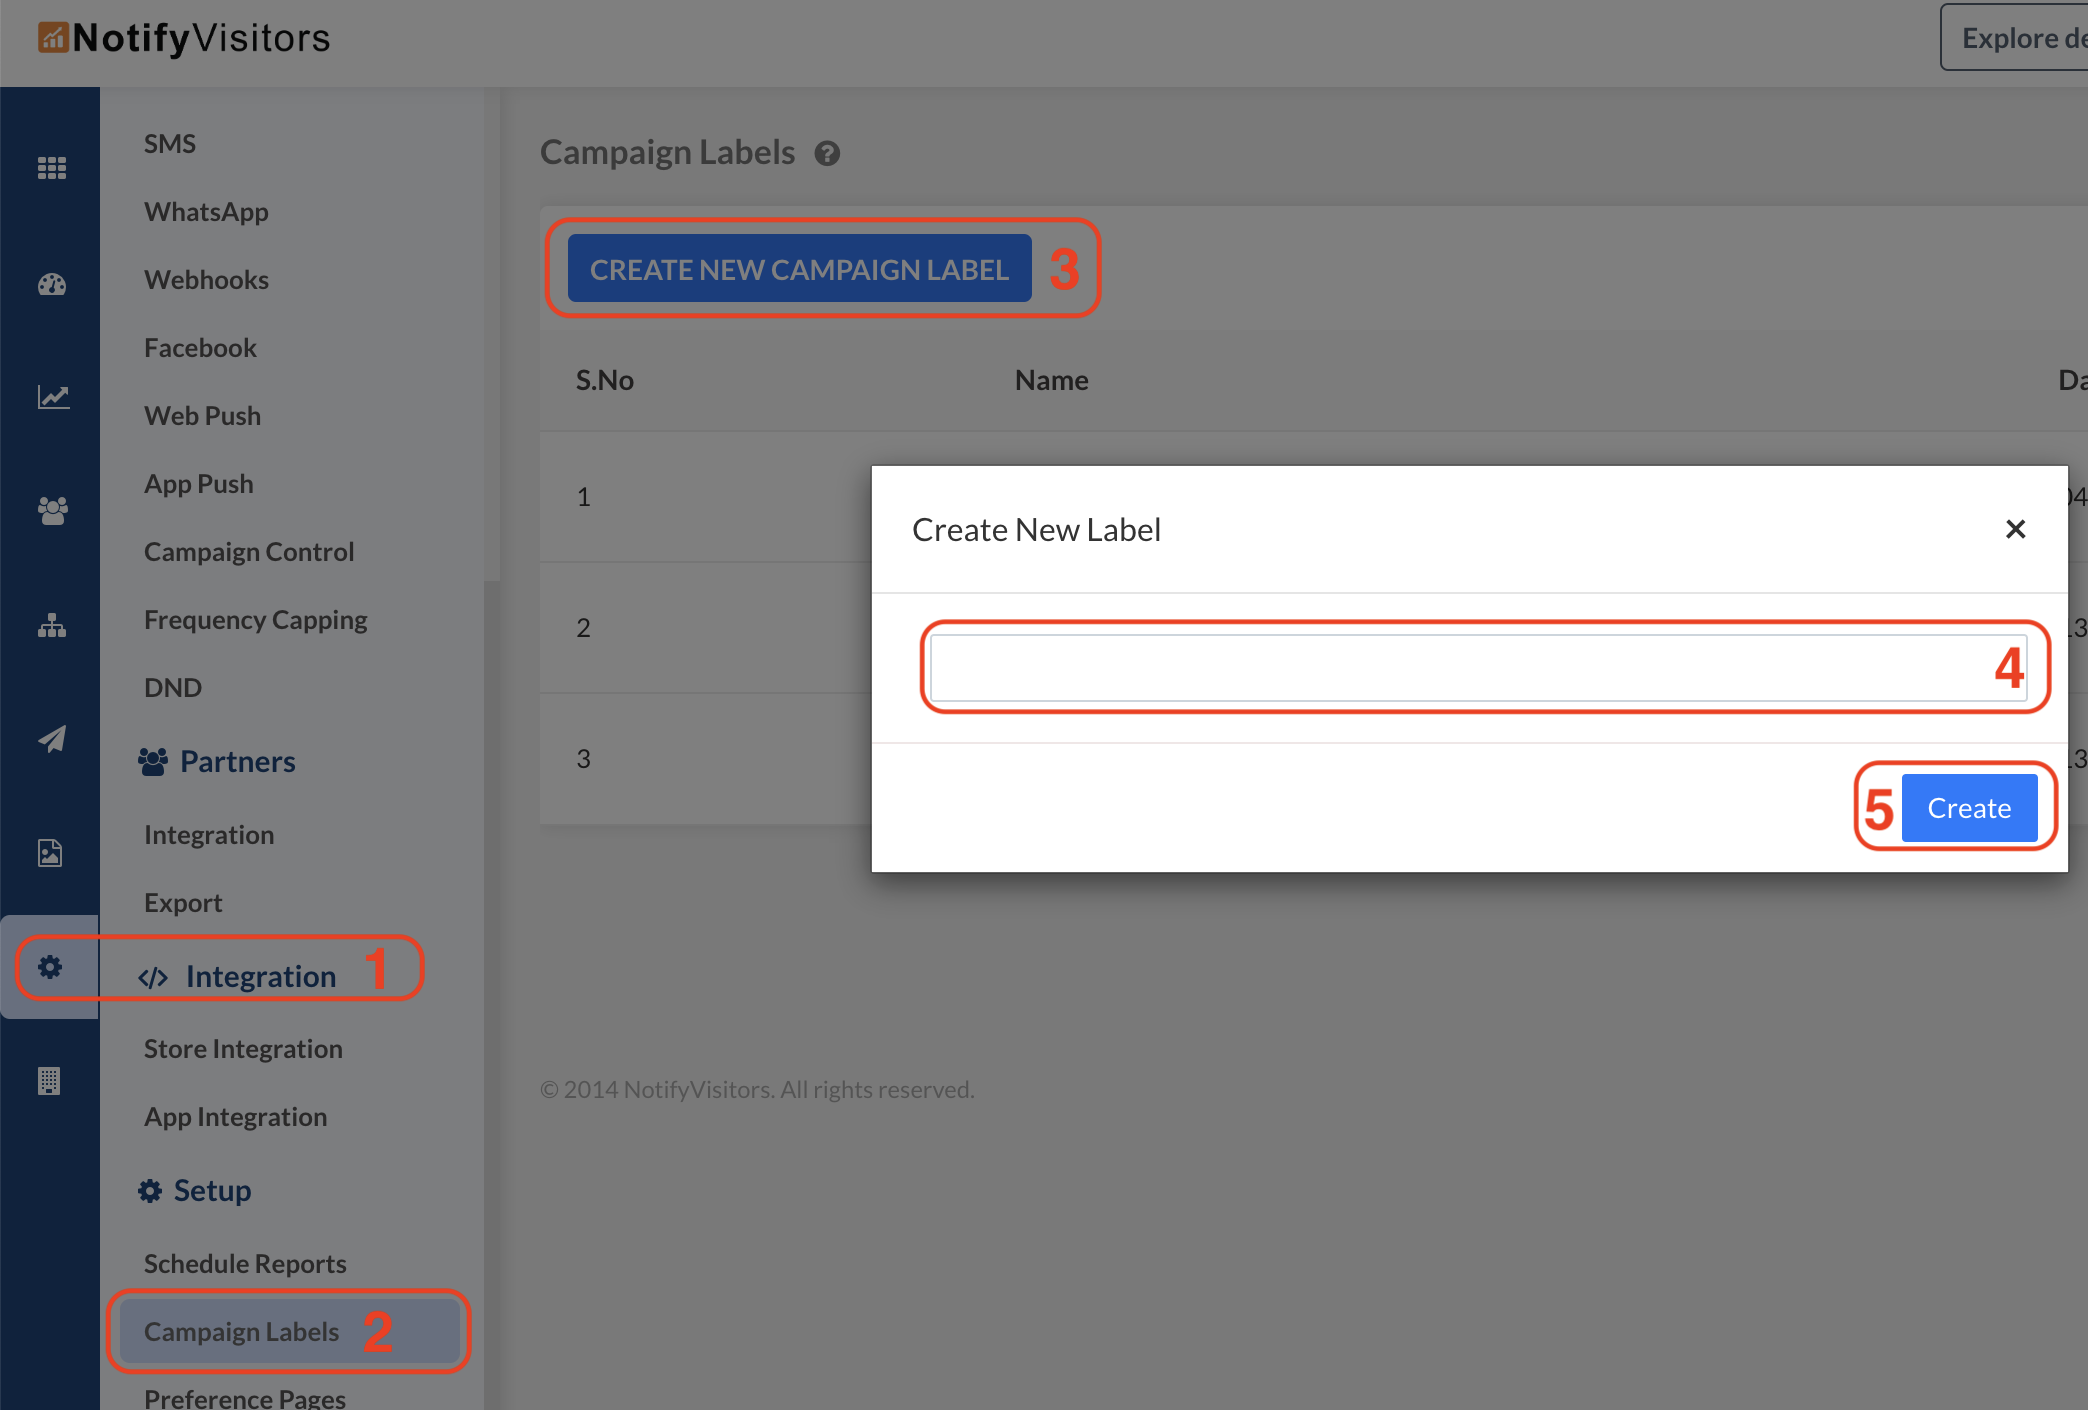
a. You need to configure labels first. In the NotifyVisitors panel, you can configure labels in the Analytics Section. Go to the Settings option from the left side menu. Another left-side menu will appear, see at the bottom of this menu, you will find Campaign Labels in the Setup section. Here you can create as many campaign labels as per your requirements.
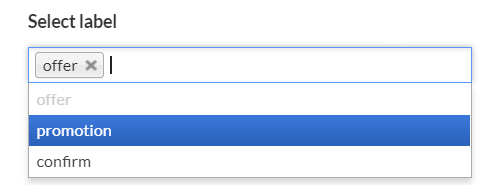
b. When creating push notifications, select the desired label in Advanced Options → Select Label. If you click here on this section, a list of all labels will appear. From this list, you can add single or multiple labels according to your requirements.
2. Configure in your App
Now when you have done with the NotifyVisitors panel setup for our advance notification center Ui you can now use the above configuration as a category filter in your app by using the following code.
/* REQUIRED 1: Initialise NVCenterStyleConfig  */
let nvConfig = NVCenterStyleConfig()


nvConfig.setFirstTabWithTabLable("your_first_label", tagDisplayName:"1st tab title will be shown in app")

nvConfig.setSecondTabWithTabLable("your_second_label", tagDisplayName:"2nd tab title will be shown in app")

nvConfig.setThirdTabWithTabLable("your_third_label", tagDisplayName:"3rd tab title will be shown in app")

/* OPTIONAL:*/
nvConfig.selectedTabIndex = 0
nvConfig.tabTextfont = UIFont(name: "Chalkduser", size: 13)
nvConfig.selectedTabTextColor = .white
nvConfig.unselectedTabTextColor = .black
nvConfig.selectedTabBgColor = .red
nvConfig.unselectedTabBgColor = .lightGray

/*REQUIRED 2: Launch the Notification Center view controller with the above configuration */
notifyvisitors.notificationCenter(withConfiguration: nvConfig)
/* REQUIRED 1: Initialise NVCenterStyleConfig  */
NVCenterStyleConfig * nvConfig = [[NVCenterStyleConfig alloc] init];

[nvConfig setFirstTabWithTabLable: @"your_first_label" TagDisplayName: @"1st tab title will be shown in app"];

[nvConfig setSecondTabWithTabLable: @"your_second_label" TagDisplayName: @"2nd tab title will be shown in app"];


[nvConfig setThirdTabWithTabLable: @"your_third_label" TagDisplayName: @"3rd tab title will be shown in app"];

/* OPTIONAL:*/
[nvConfig setSelectedTabIndex: 0];
[nvConfig setSelectedTabTextColor: [UIColor whiteColor]];
[nvConfig setUnselectedTabTextColor: [UIColor blackColor]];
[nvConfig setSelectedTabBgColor: [UIColor redColor]];
[nvConfig setUnselectedTabBgColor: [UIColor lightGrayColor]];

/*REQUIRED 2: Launch the Notification Center view controller with the above configuration */
[notifyvisitors notificationCenterWithConfiguration: nvConfig];
Important Note
- There are a maximum of 3 tabs allowed in our SDK for this type of Notification Center.
- In the above shown example both Tab Label and Display Name both parameters are required in the given method in order to show the tab in Notification Center. If any one is nil or empty string then that tab will be skipped in the UI.
- Tag labels passed at the app side must match (also case sensitive) with the tag labels set in your NotifyVisitors dashboard push notifications to apply filters in the Notification Center screen.
- If you pass only one tag label and its Display Name using any method as described in above example then Tab UI will be hidden but filter will apply in the UI of Notification Center screen.
You can refer to the following example code for your reference.
/* REQUIRED 1: Initialise NVCenterStyleConfig  */
let nvConfig = NVCenterStyleConfig()
nvConfig.setFirstTabWithTabLable("all", tagDisplayName: "All")
nvConfig.setSecondTabWithTabLable("promotion", tagDisplayName: "Promotionals")
nvConfig.setThirdTabWithTabLable("offer", tagDisplayName: "Offers")

/* OPTIONAL:*/
nvConfig.selectedTabTextColor = .white
nvConfig.unselectedTabTextColor = .black
nvConfig.selectedTabBgColor = .green
nvConfig.unselectedTabBgColor = .lightGray

/*REQUIRED 2: Launch the Notification Center view controller with the above configuration */
notifyvisitors.notificationCenter(withConfiguration: nvConfig)
/* REQUIRED 1: Initialise NVCenterStyleConfig  */
NVCenterStyleConfig * nvConfig = [[NVCenterStyleConfig alloc] init];
[nvConfig setFirstTabWithTabLable: @"all" TagDisplayName: @"All"];
[nvConfig setSecondTabWithTabLable: @"promotion" TagDisplayName: @"Promotionals"];
[nvConfig setThirdTabWithTabLable: @"offer" TagDisplayName: @"Offers"];

/* OPTIONAL:*/
[nvConfig setSelectedTabTextColor: [UIColor whiteColor]];
[nvConfig setUnselectedTabTextColor: [UIColor blackColor]];
[nvConfig setSelectedTabBgColor: [UIColor redColor]];
[nvConfig setUnselectedTabBgColor: [UIColor lightGrayColor]];

/*REQUIRED 2: Launch the Notification Center view controller with the above configuration */
[notifyvisitors notificationCenterWithConfiguration: nvConfig];
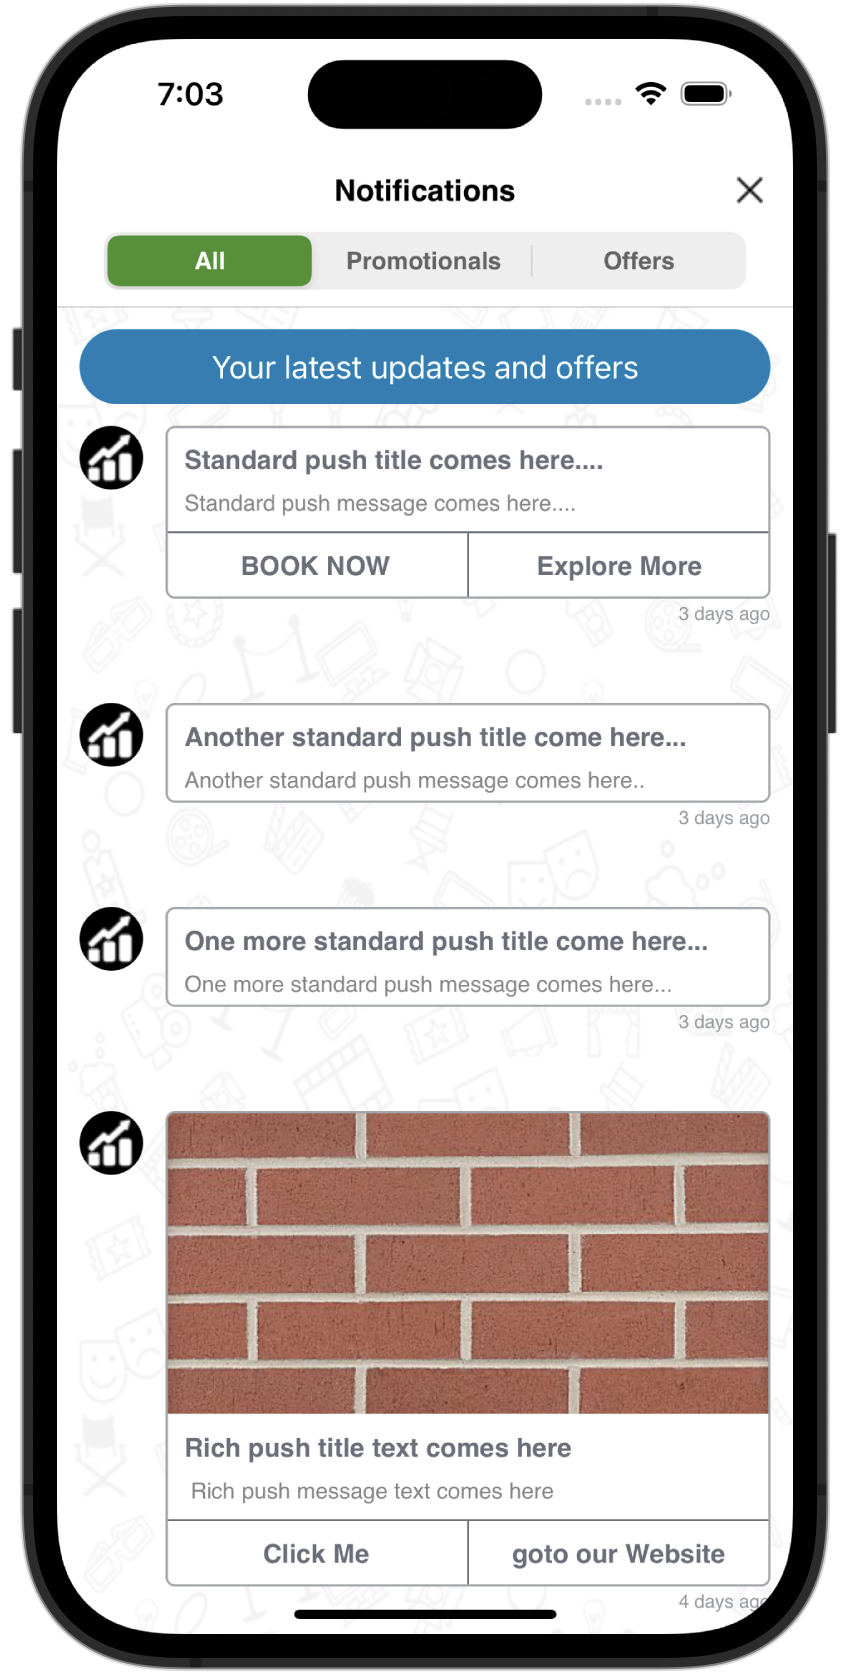
You can refer to the following UI Sample screenshot while using Advance Notification Center UI.
Default Labels ("all" and "others"):
There are two predefined labels ("all" and "others") in our SDK. Which we say as default labels which means you don’t need to configure these labels in the panel but if you want to show them in the app then you need to mention them in the function. You can check the above examples. You can refer to the following definitions of each default labels as define below.
all:
This label will show all the available broadcasted push notifications.
others:
This label will show you only those push notifications which are broadcasted and also whose tabs are not configured in the function. Which means it will show remaining notifications available which are not visible in any other tags currently visible in the Notification Center screen.
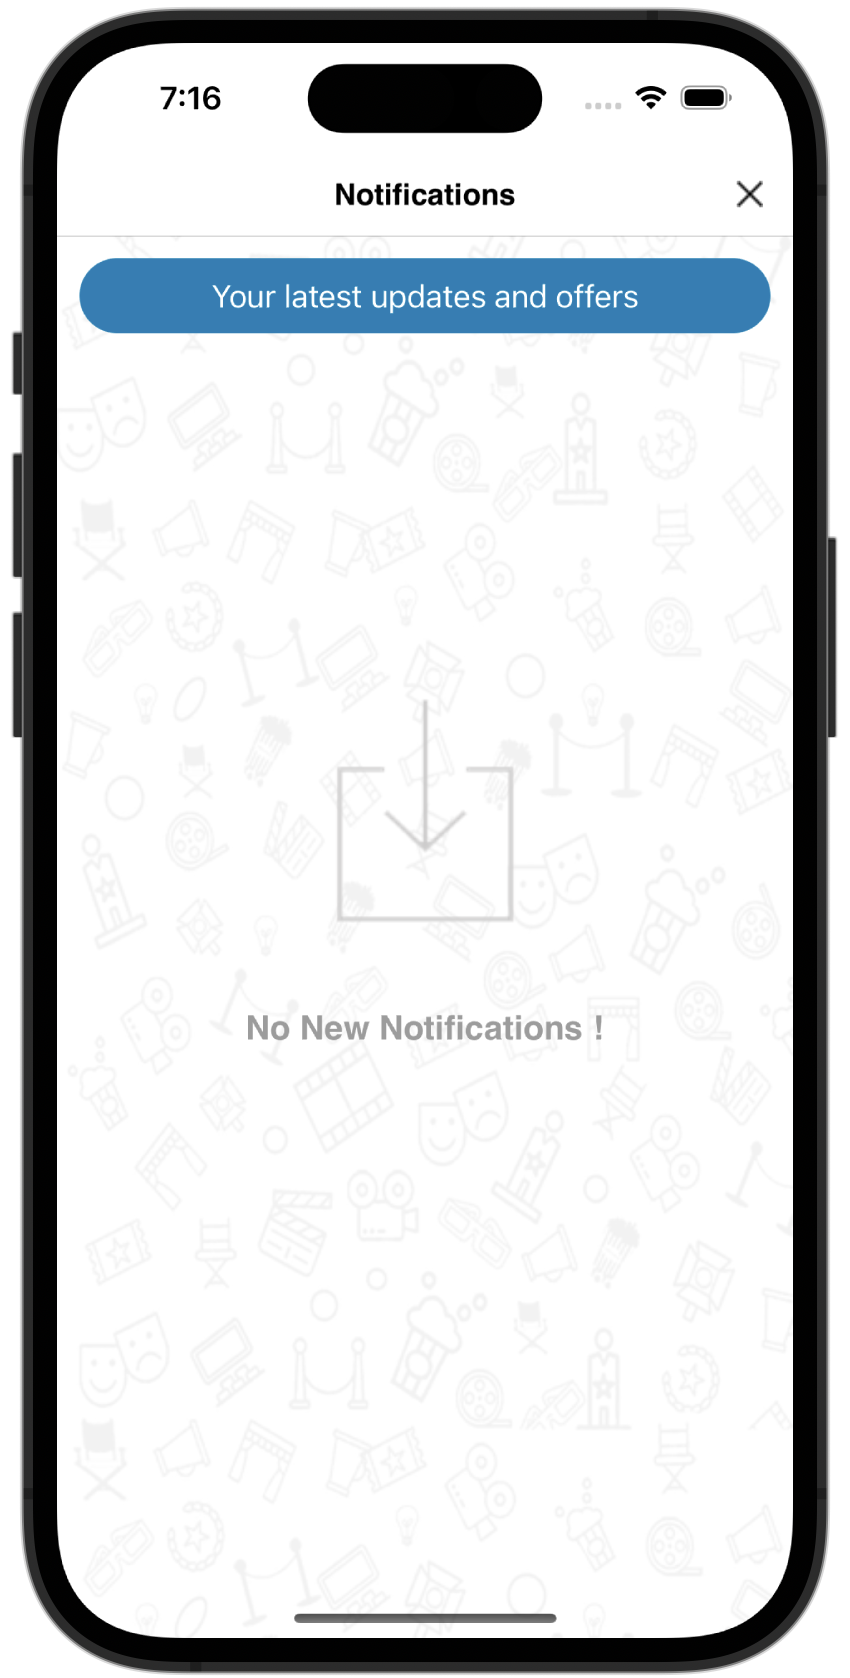
In case you don’t have any push notifications or expired to show in Notification Center, the NV-SDK will show you an empty/ no Notification screen view. Refer to the below screenshot:
Notification Center Unread Count(s)
This function provides the unread count(s) of push notifications in the Notification Center. This functionality can be used to show the number of unread push count as a badge to your user on the bell icon if you have created it in your app to launch the Notification Center Screen.
Unread Count for Standard /Simple Notification Center
If you are using standard notification center then you can get total number of unread notifications count by using the following function
notifyvisitors.getUnreadPushNotification() {totaltUnreadCount in
            //do your task here
}
[notifyvisitors GetUnreadPushNotification:^(NSInteger totaltUnreadCount) {
          //do your task here
}];
Unread Count for Advance Notification Center (UI with Tabs)
If you are using our latest SDK version 6.3.0 or above and using our Advance Notification Center UI then you can get the number of unread notifications for each tab separately along with the total number of unread count by using the following function. You need to pass the same NVCenterStyleConfig object here which you have passed to show the Advance Notification Center UI.
let nvConfig = NVCenterStyleConfig()
nvConfig.setFirstTabWithTabLable("all", tagDisplayName: "All")
nvConfig.setSecondTabWithTabLable("promotion", tagDisplayName: "Promotionals")
nvConfig.setThirdTabWithTabLable("offer", tagDisplayName: "Offers")

notifyvisitors.getNotificationCenterCount(withConfiguration: nvConfig) { (unreadCounts: [AnyHashable : Any]?) in
     //do you task here
}
NVCenterStyleConfig * nvConfig = [[NVCenterStyleConfig alloc] init];
[nvConfig setFirstTabWithTabLable: @"all" TagDisplayName: @"All"];
[nvConfig setSecondTabWithTabLable: @"promotion" TagDisplayName: @"Promotionals"];
[nvConfig setThirdTabWithTabLable: @"offer" TagDisplayName: @"Offers"];

[notifyvisitors getNotificationCenterCountWithConfiguration: nvConfig countResult:^(NSDictionary * unreadCounts) {
     //do you task here
}];
Response Sample
{
     totalCount = 7;
     tabOneCount = 0;
     tabTwoCount = 3;
     tabThreeCount = 4;
}
Notification Center Data (No UI)
This function provides notification center data as NSMutableArray in the compilation block. This functionality can be used in a case if you want to create your custom notification center UI.
Important Note (Alert Type)
- For now, this will only provide you with data for a default configuration. No details will be shared for labels.
- By using this feature SDK will not able to track any inbox view or click count in your NotifyVisitors panel.
notifyvisitors.getNotificationCentreData { (nvNotificationsList : NSMutableArray?) in
    //do your task here
}
[notifyvisitors GetNotificationCentreData: ^(NSMutableArray * nvCenterData) {
    //do your task here
}];
Response Sample
In case notification center has some data
[
  {
   "title" : "Rich push title text comes here",
   "message" : " Rich push message text comes here",
   "push_type" : "image",
   "target" : "0",
   "url" : "dashboardViewController",
   "category" : "nvpush",
   "notificationID" : "152747",
   "send_time" : "2020-07-31 17:30:00",
   "rich_media_url" : "https:\/\/pushimages.notifyvisitors.com\/images\/push_rich_icon_75820.jpg",
   "parameters" : {
         "page_id" : "dashboard",
         "category" : "fashion"
   },
   "cta_btnTitleOne" : "Click Me"
   "cta_btnTargetOne" : "0",
   "cta_btnUrlOne" : "dashboardViewController",
   "time" : "20 hours ago",
   "icon" : "https:\/\/pushimages.notifyvisitors.com\/images\/push_icon_152747.jpg",
   "cta_btnTitleTwo" : "goto our Website",
   "cta_btnTargetTwo" : "1",
   "cta_btnUrlTwo" : "https:\/\/www.notifyvisitors.com",
  }
]
In case no notification is available in the center i.e. empty notification center then you will receive an empty array.
[]
Additional Customizations
If you're using NotifyVisitors Notification Center UI (Standard or Advance Center UI) then some additional customisation can be done like font name,size color, background image /color e.t.c. To do this you can refer to our Additional Customisation Documentation for detailed information.
Updated over 2 years ago