Export Users & Events
Learn how to export Users and Events data from NotifyVisitors
Exporting users and events allows you to retrieve valuable customer data from NotifyVisitors for analysis, reporting, or integration with other systems. Whether you need to back up data, generate insights, or sync information with external tools, the export feature provides a seamless way to extract user details and event logs in a structured format.
This guide will walk you through the process of exporting user and event data via multiple available export formats.
How to create new export data
You can navigate to the "Setting" in the dashboard section and click on the "Export" tab under Partners.

Here you view all your previous exports. To create a new export, click the "Create New Export Data" button. With this, a new window will appear where you'll find four ways to export your data as detailed below:
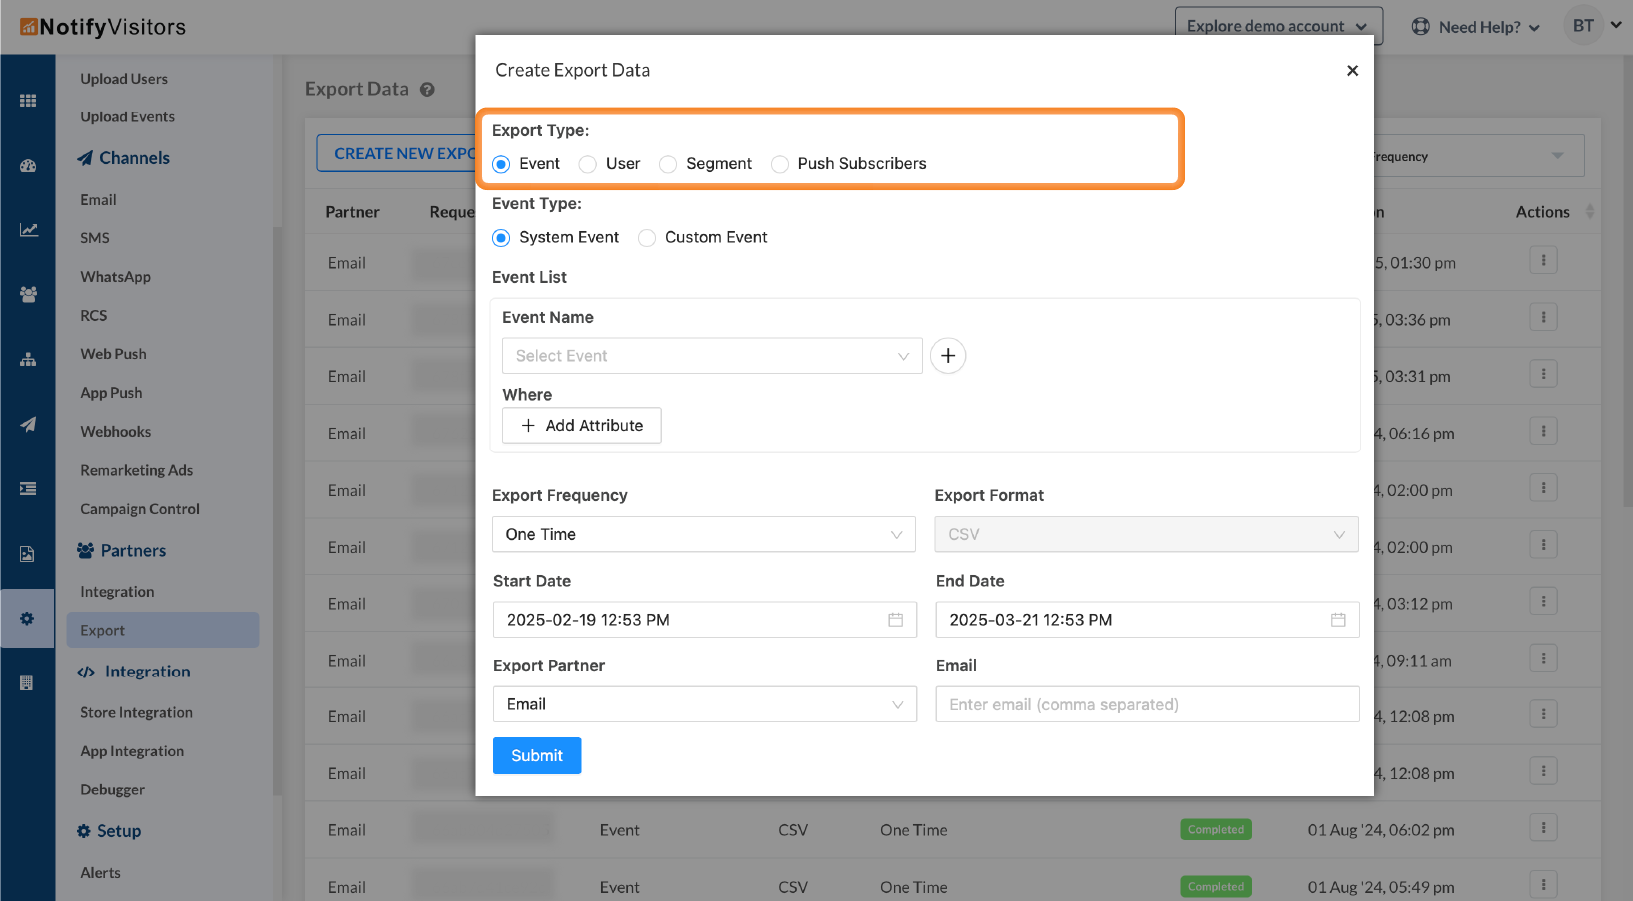
Event
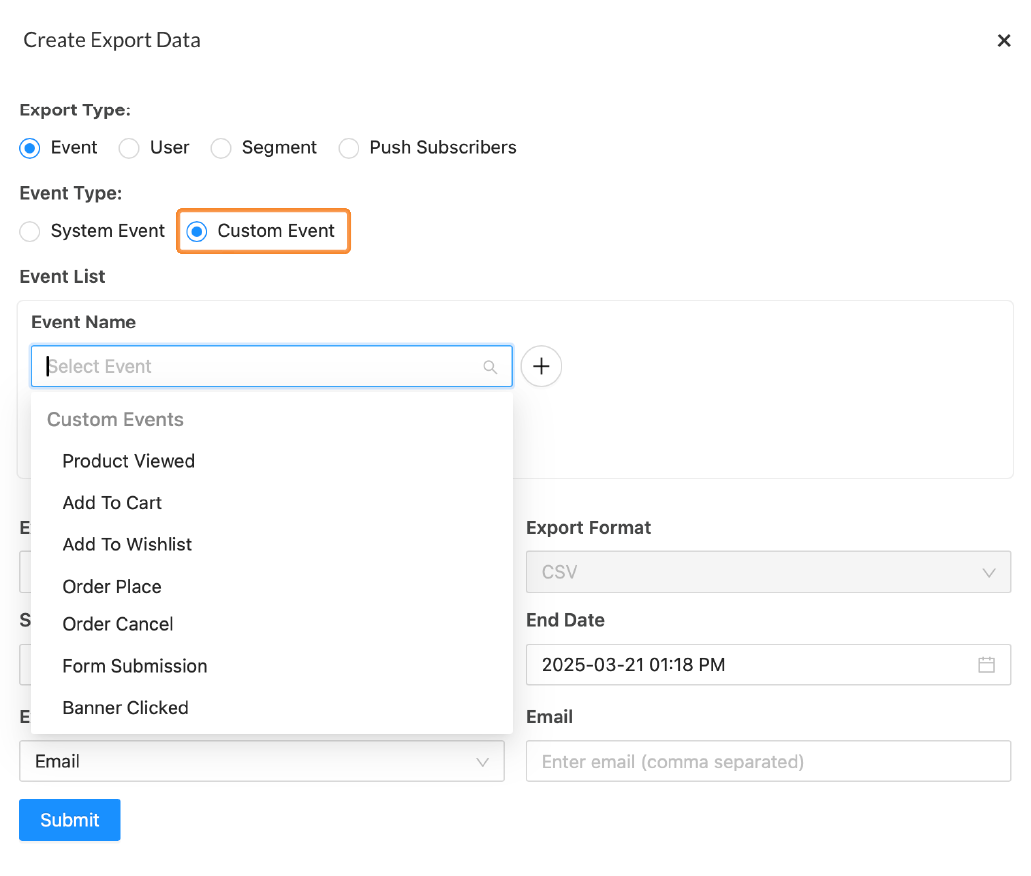
If you want to export the data for the events, select the option “event” from the export type category. There are two event types to choose from:
System event: These events are pre-defined in our system. When you select the "System" option, you'll see a list of events. From this list, you can pick an event name from a drop-down menu, such as SMS received, email unsubscribed, WhatsApp clicked, and more.
You can also filter your system events exports by attribute. For this, select attributes (like traffic source, location, device info, etc.) along with their conditions and values from the related dropdown.
You can also add multiple events by clicking the plus button.
.png")
Custom event: Custom events allow businesses to track specific interactions that are unique to their platform. These events can be defined based on your business logic and marketing goals.
User
If you want to export the data of the users, select the “User ” option in the export type category.
.png")
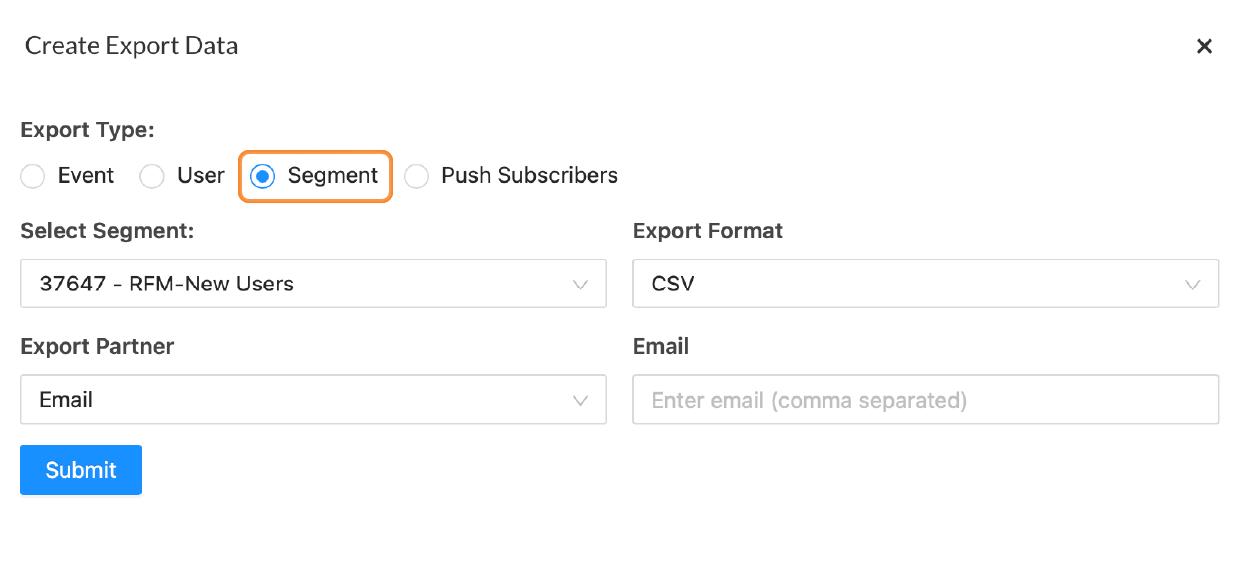
Segment
If you choose to export the data of any segment, select the “Segment” option from the export type category.
Select Segment: Click on this dropdown to specify the segment from which you want to export data.
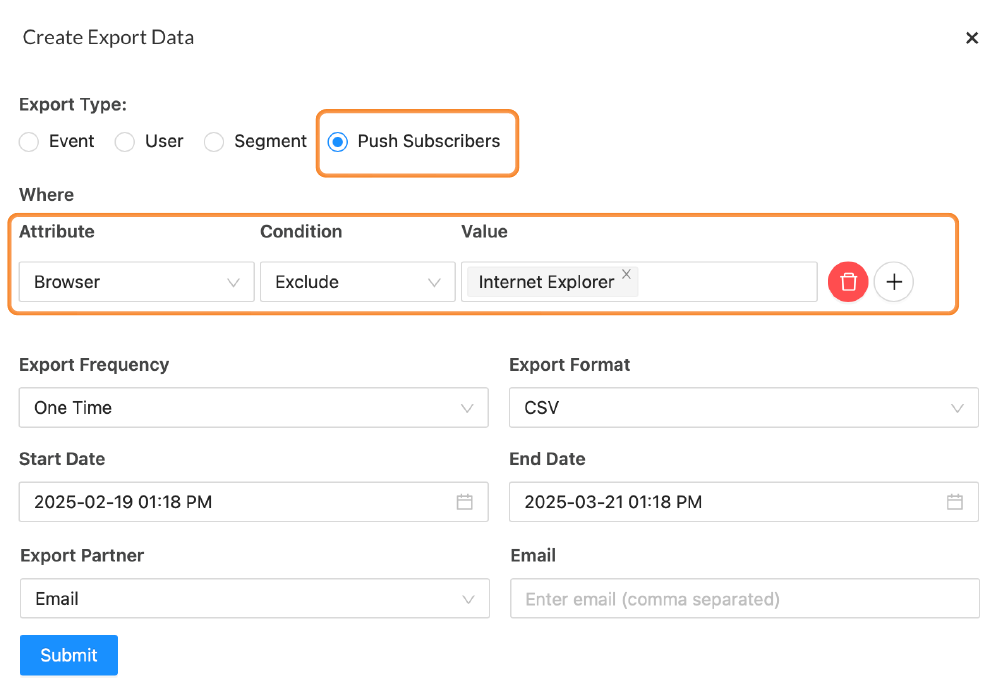
Push Subscribers
You can export the Push subscriber's data by clicking the "Push Subscribers" button in the export type category. You can also filter your push subscribers’ event exports by attributes. To do this simply choose the attributes (traffic source, location, device info, etc.) along with their condition and value from the related dropdown. You can click the Plus icon to add multiple attributes.
Export frequency and format
This option allows you to define the frequency of exporting events, users, or push subscribers’ data. For the segment option, data starts exporting instantly.
Export frequency: Here, you have two options to export data: One Time and Recurring.
For a one-time data export, select the "One Time" option. This option will enable you to choose a
specific start date and end date, along with the time for the export.
However, if you're looking to export data regularly, just click on the "Recurring" option
to schedule them hourly, daily, weekly, or monthly.
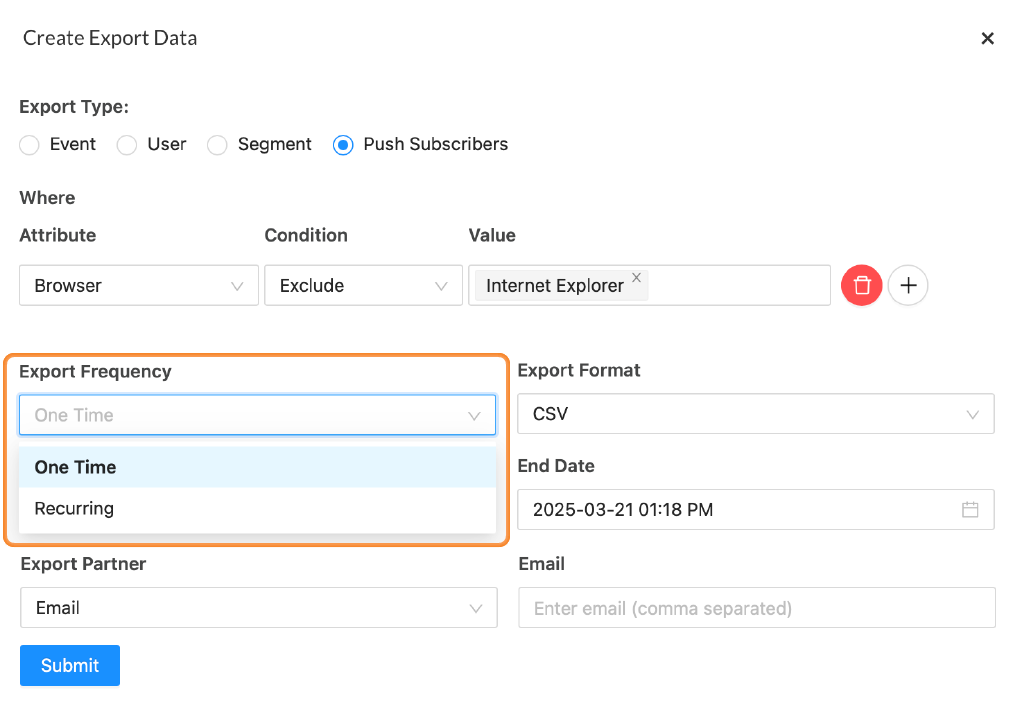
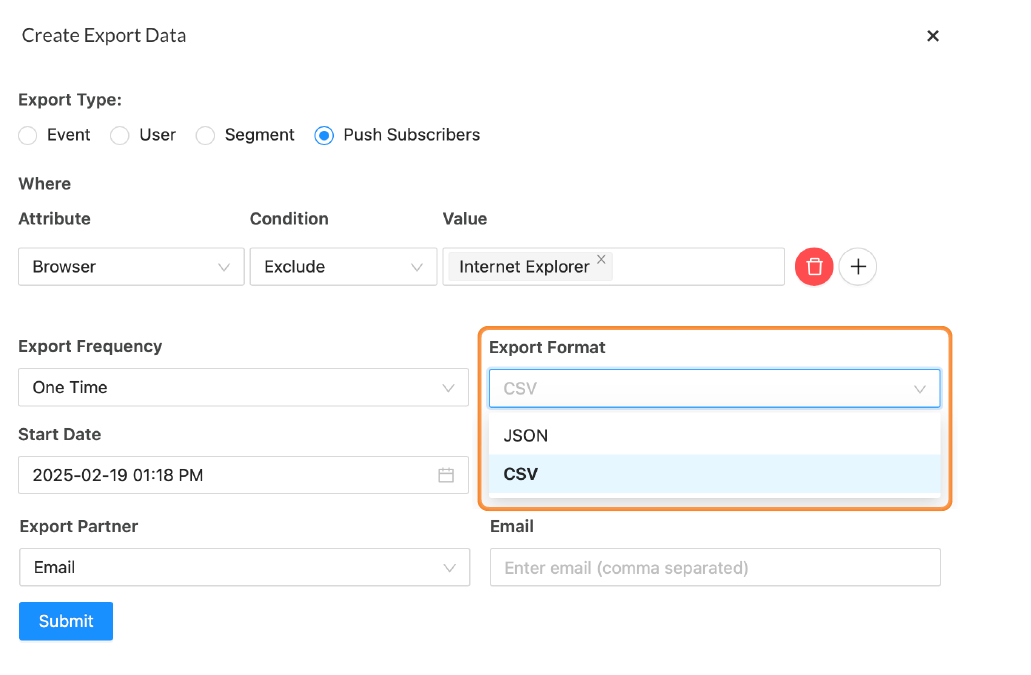
Export format: By default, the data you want to export is in CSV format. However, you can also import your data (except events) in the JSON format as well.
EXPORT PARTNER
NotifyVisitors allows you to export users’ and events’ data in three ways. Simply click the export partner dropdown and you’ll be presented with three options:
- Email: Simply select this option if you want to receive exported data via email. You can add multiple email addresses separated by commas to send exported data to multiple recipients
- AWS S3: You can select this option if you want to receive the export data to your AWS S3 bucket. But for this, you need to first configure the AWS S3 keys.
- SFTP: This option allows you to transfer files over a secure connection, protecting them from unauthorized access and cyber threats. To use this option, you first need to configure SFTP keys.
After adding the export partner, simply click the "Submit" button to start the exporting process.
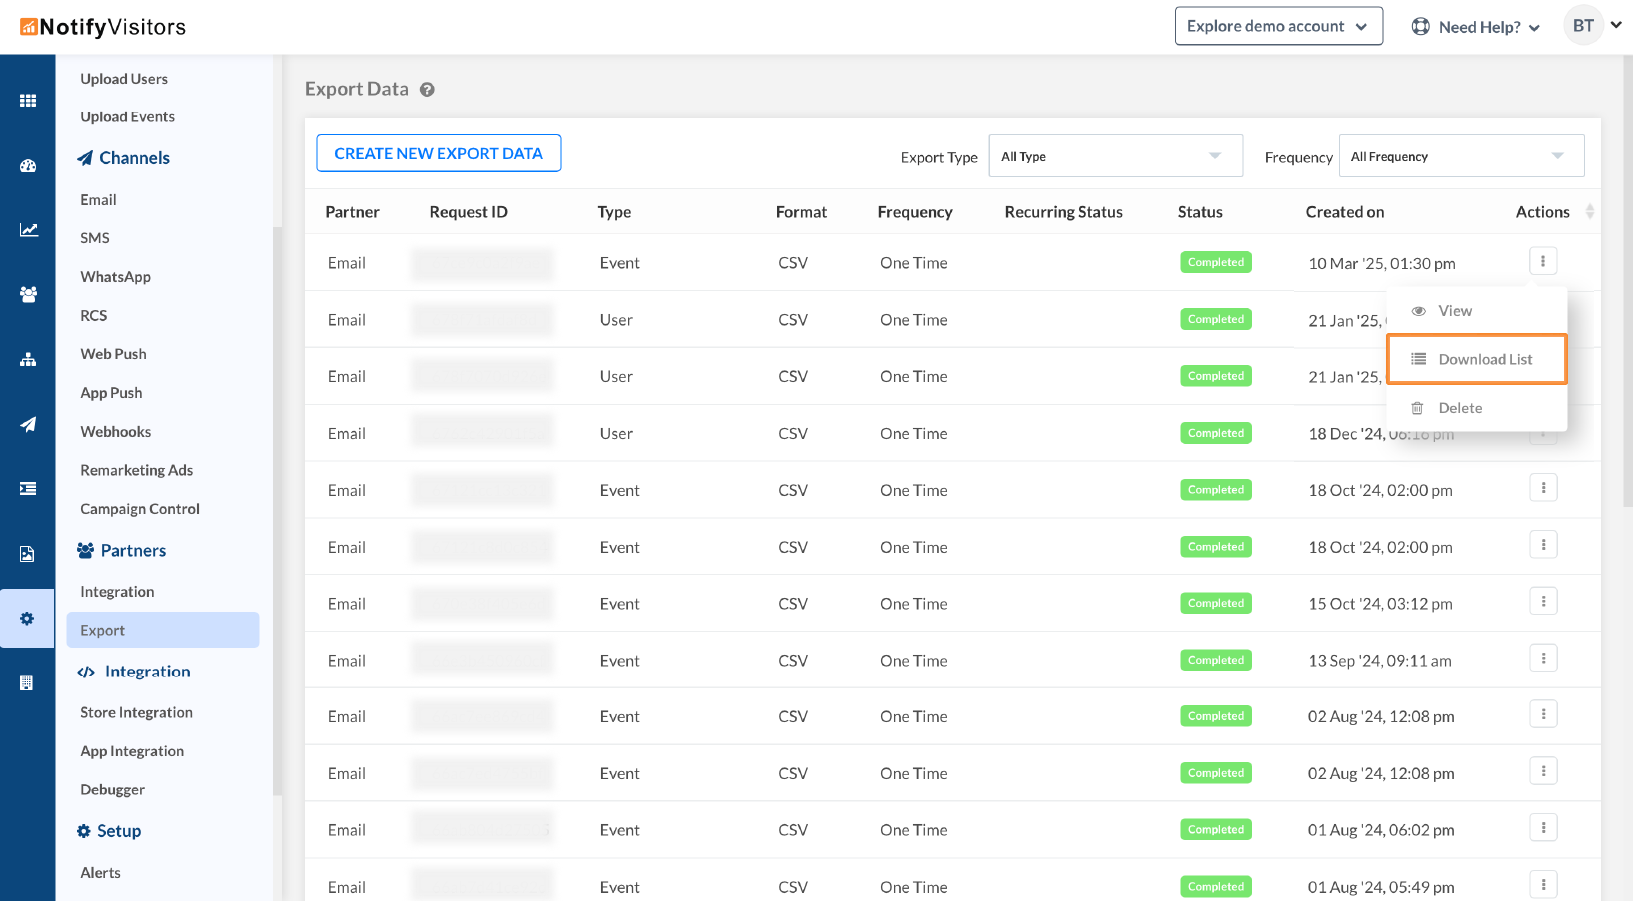
Export status
To check the status of your export data, navigate to the NotifyVisitors dashboard > Partner > Export.
Here click on the three-dotted action button and select the download list option.
With this, a popup window will appear where you can view the status of your export.
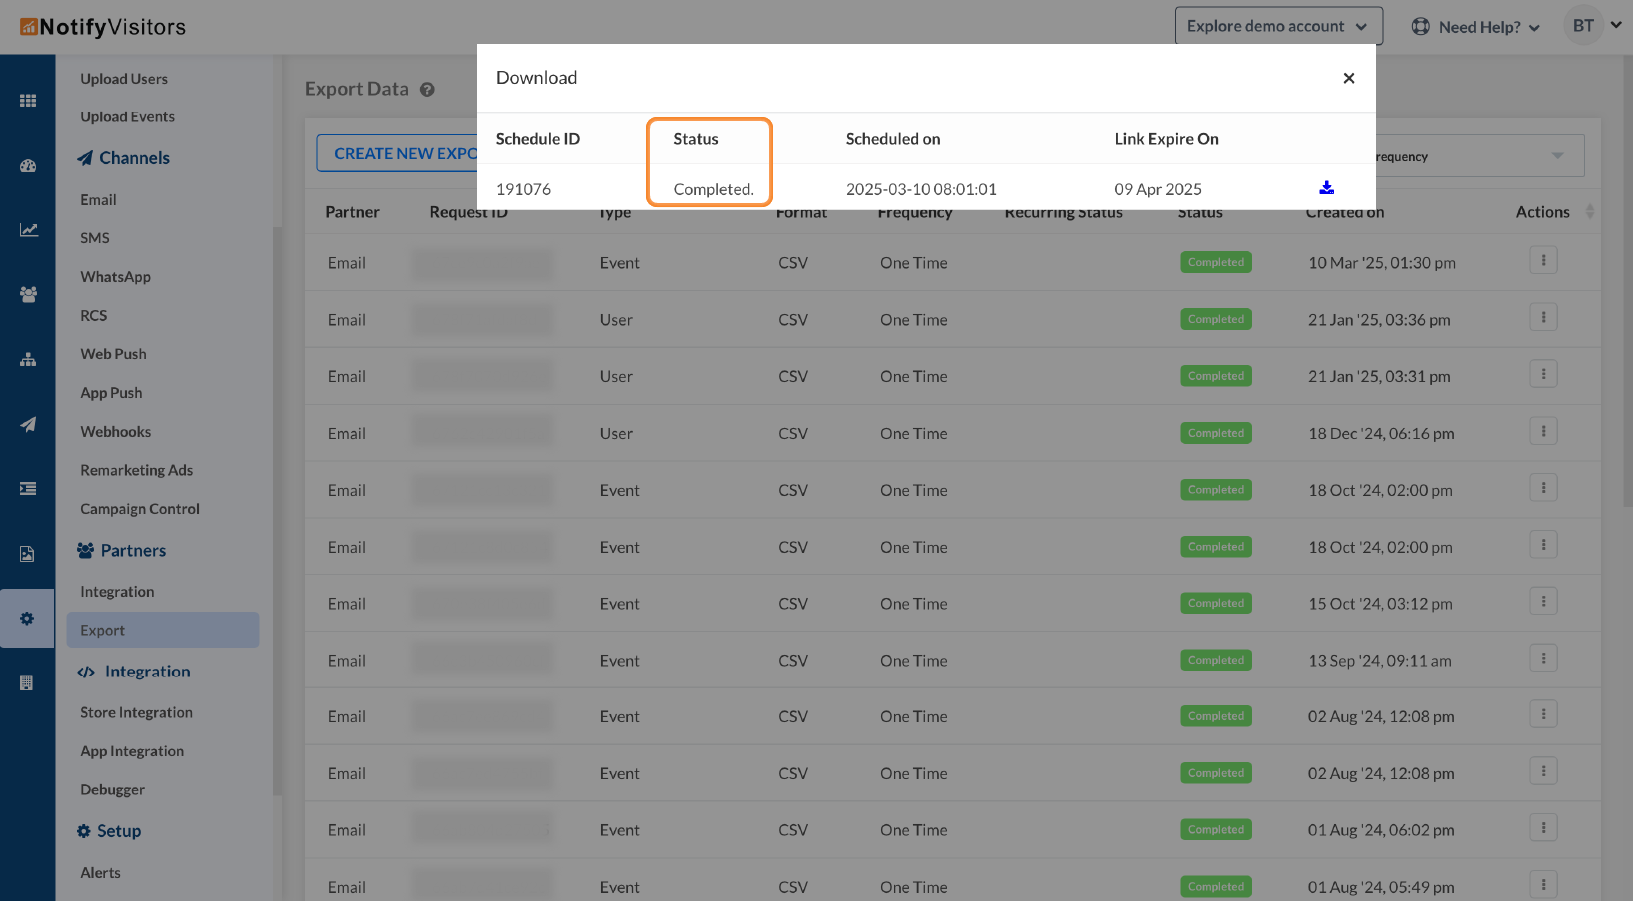
You can also choose the view option to see the details of your export, or click the delete button to remove a particular export.
Updated 11 months ago