APNS Auth Keys
App Push Notifications are great tools to engage your subscribers with the relevant content. The tools bring in magnetic growth in terms of conversions and revenues. Also, they are easily reachable to the subscribers as well as the users can receive them even if they are offline.
In this article, you will know more about how to send push notifications to your subscribers by uploading an APNS authenticated key.
In this article, you will know more about how to send push notifications to your subscribers by uploading an APNs authenticated key or a push certificate.
HOW TO SEND PUSH NOTIFICATIONS TO iOS USERS:
In order to send push notifications to the iOS users, you are required to upload either an APNs auth key or an APNs push certificate.
It would be recommendable for you to create and upload the APNS Auth Key. Below are the reasons as to why you must opt to upload the APNS Auth Key:
- Firstly, it is not necessary to renew or regenerate the push certificate.
- You can use the created auth key for all the apps, it will prevent you from creating and keeping many push certificates.
What all you require to send the push notifications using an APNS Auth Key.
- Team ID
- Auth key file
- App’s bundle ID.
HOW TO CREATE APNS AUTH KEY
Below are the steps to create APNs auth key:
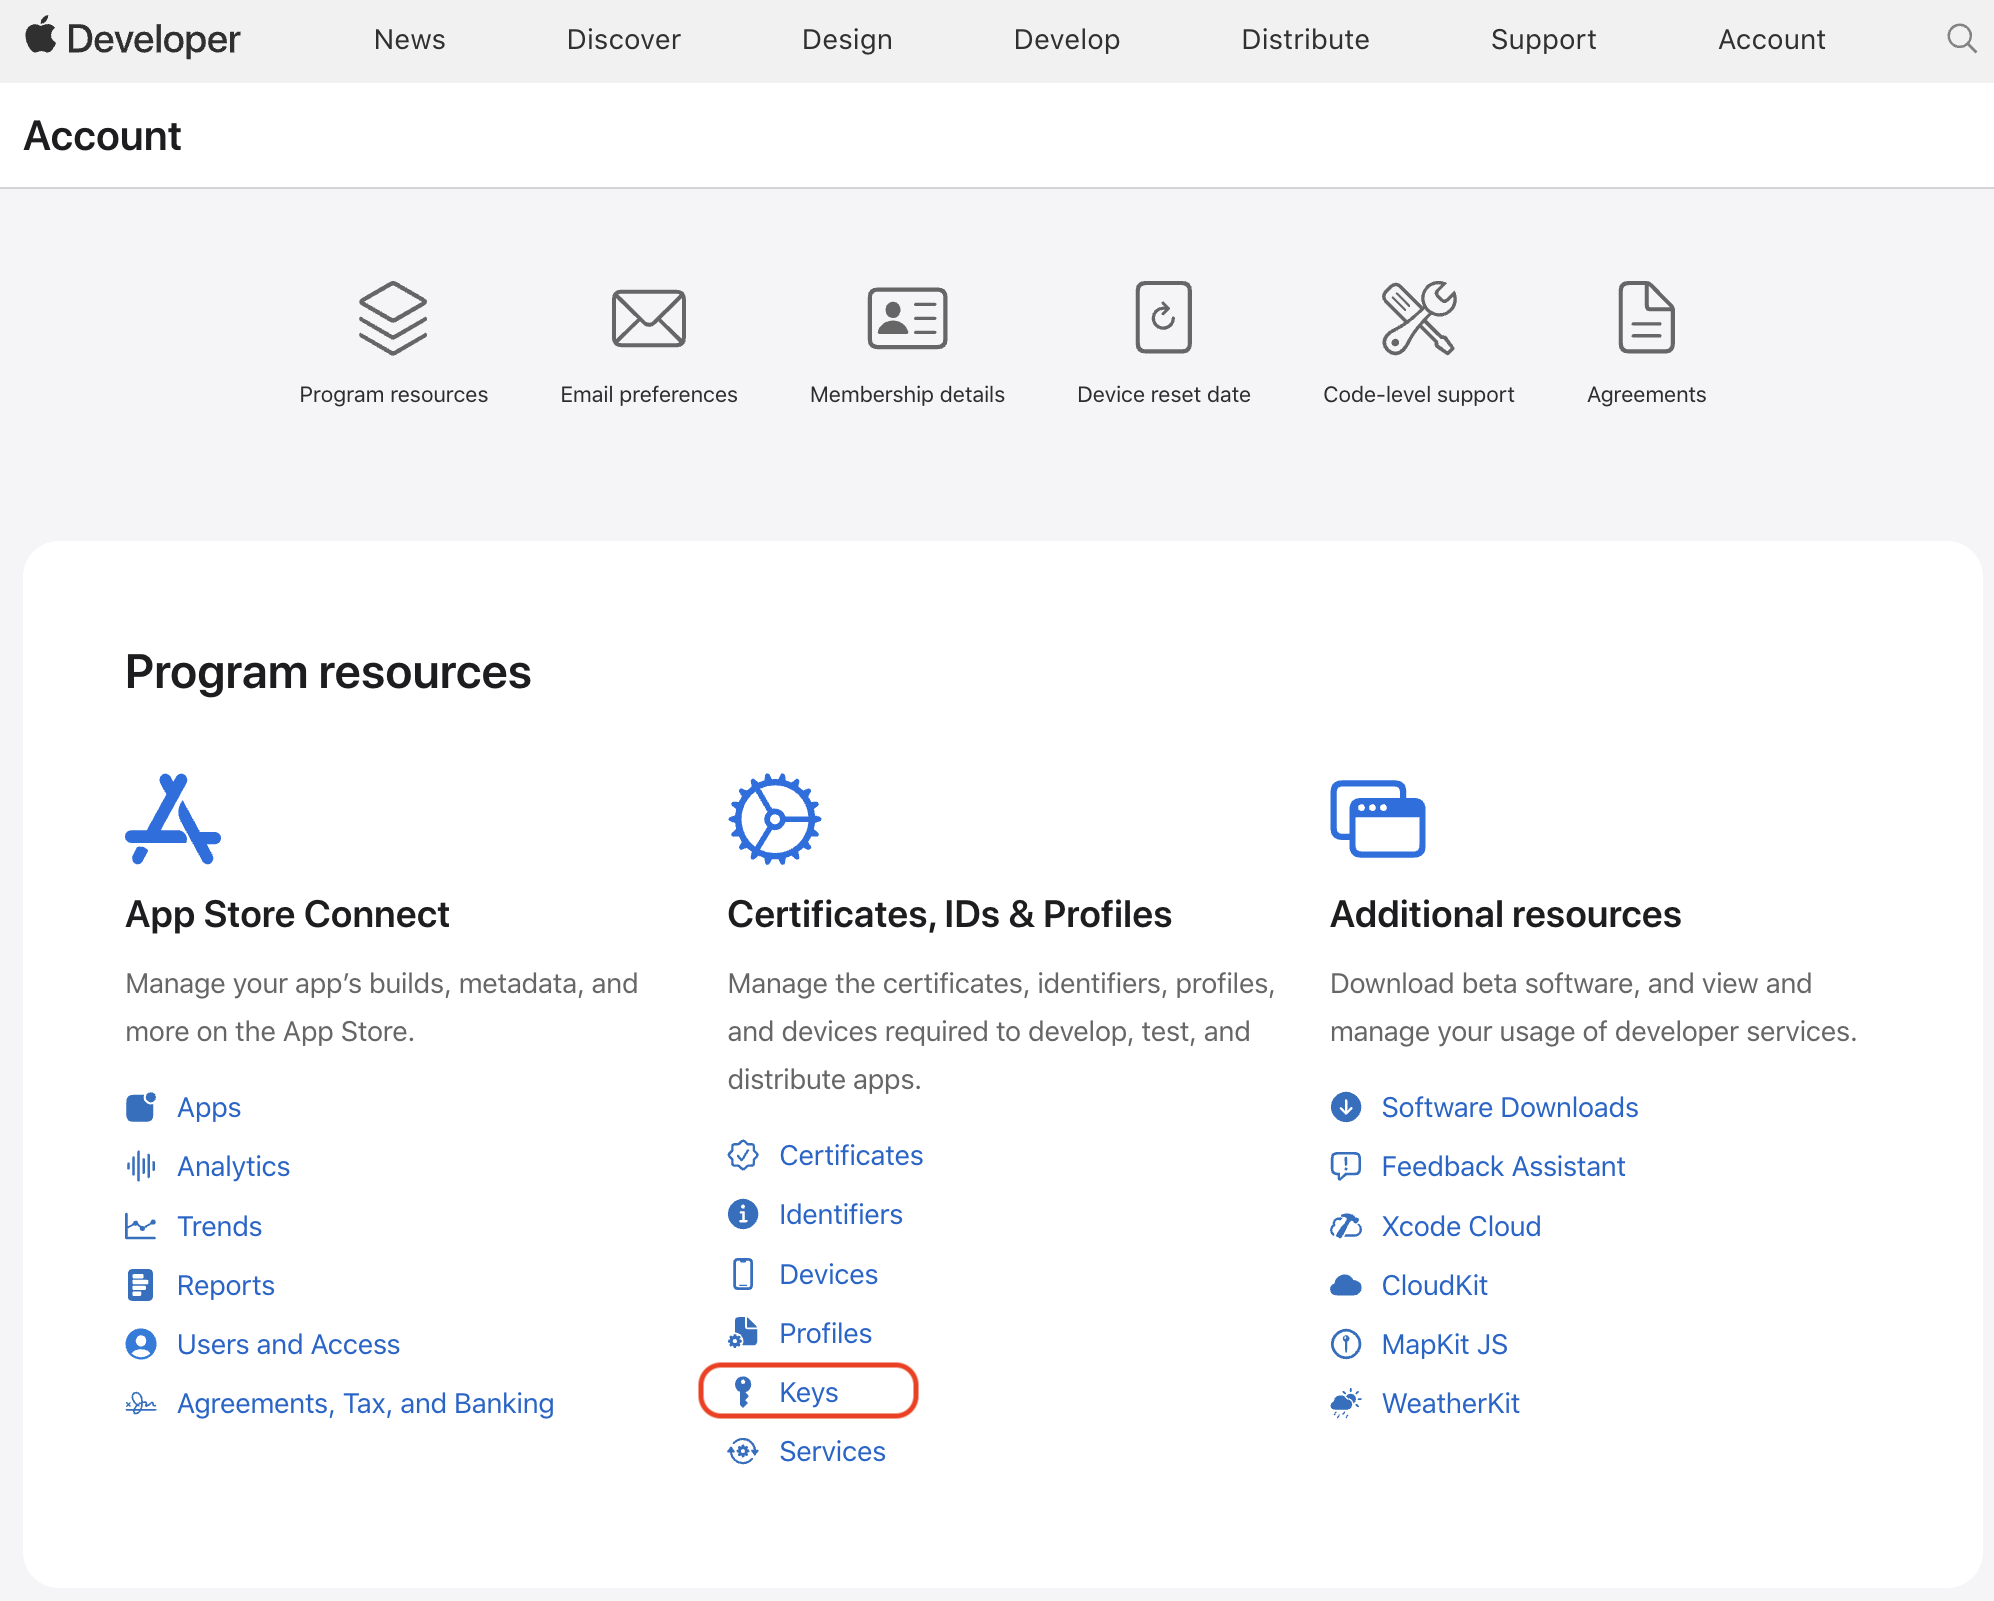
- Now, log in to the Apple Developer Console and under Certificates, Identifiers & Profiles and goto Keys.

- You have navigated to the keys section and and now click on the +(Plus) symbol button in order to create a new auth key.

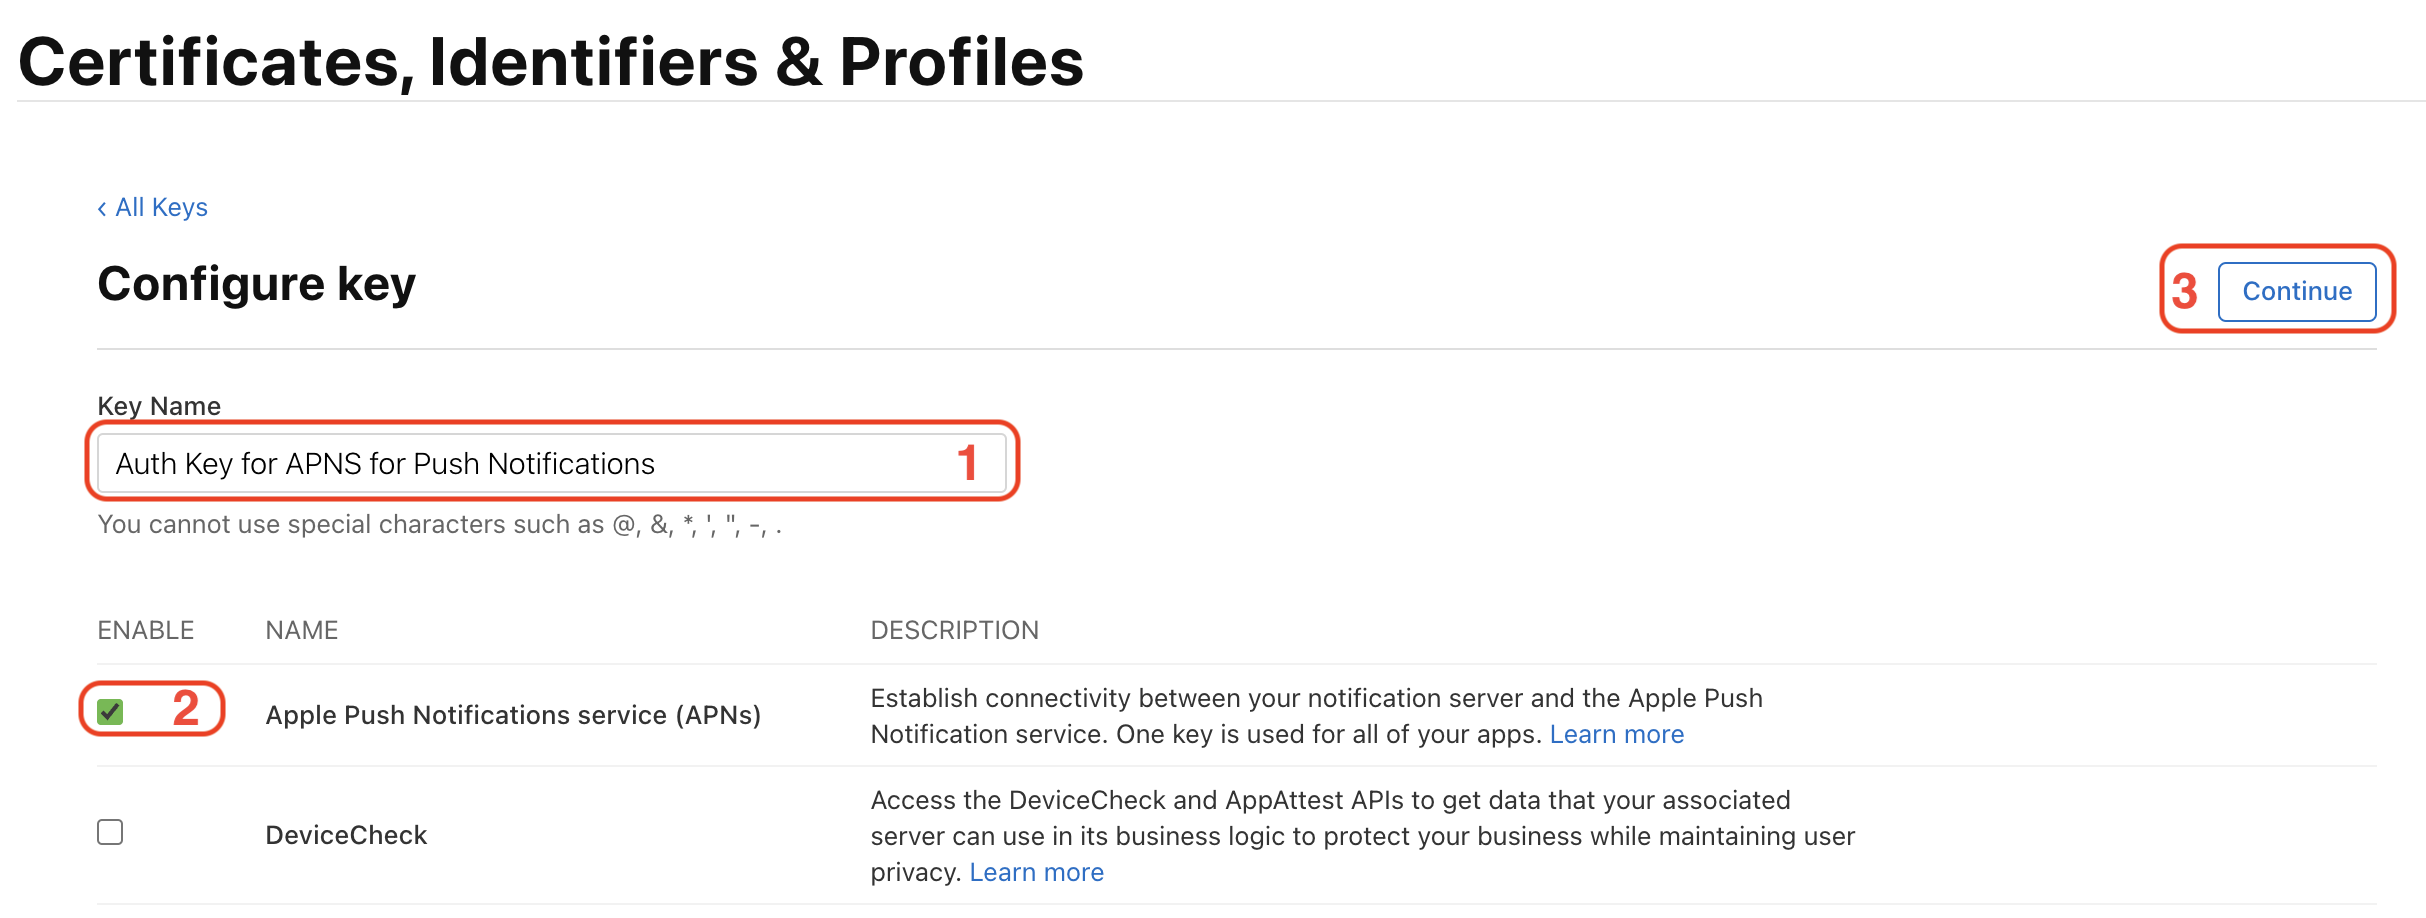
- Provide a key name for your further reference, select the Apple Push Notifications service (APNs) and then click on the Continue and on the next page, select Register button if asked to confirm the key configuration.

- Now, Download the auth key and save your downloaded .p8 file in a secure place. Note and save the key ID as well then, click on Done and you will have a new APNS Auth key ready to use.

Important Note
Make sure to save a backup of your downloaded auth key (i.e. the .p8 file) in a secured place because you can't download the auth key file more than once so don't lose it.
Also note the as of now, upto two .p8 keys you can have in your Apple Developer Account so you will need to revoke one of your existing keys if you want to generate a third .p8 key and the revoked key can no longer be used.
Configure and Upload APNS Auth Key
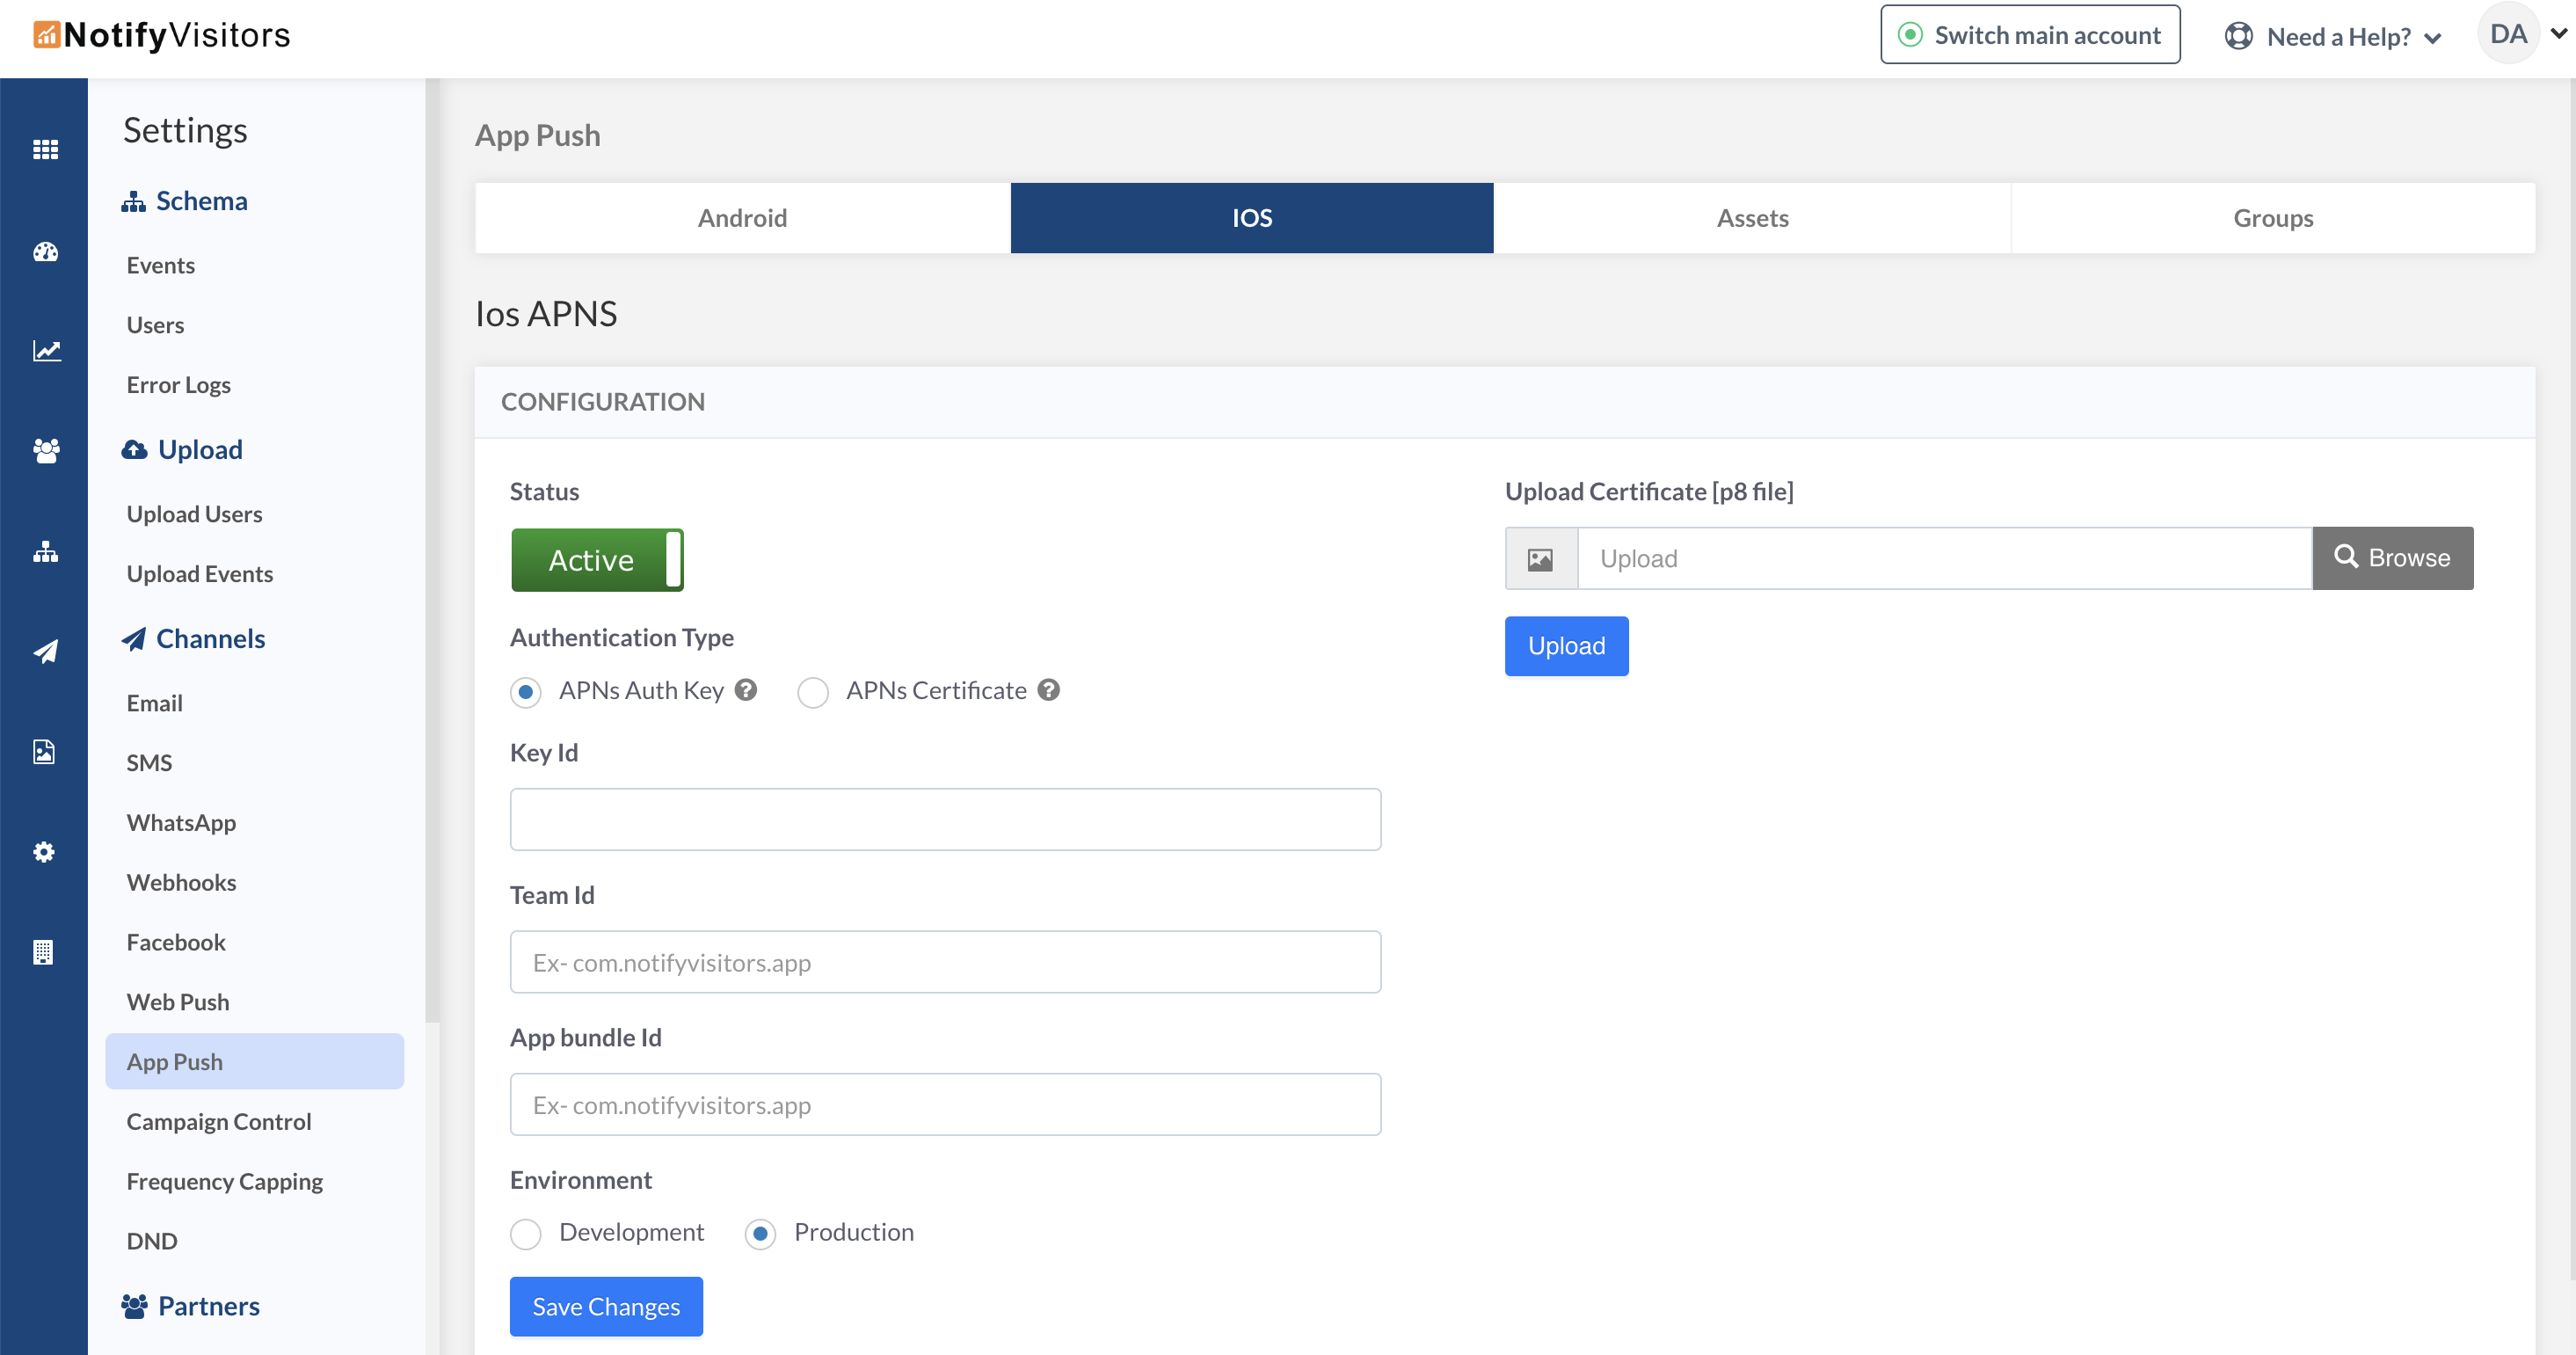
You have created the APNS Auth Key. Now, to complete the configuration, you need to upload this key (.p8) file in notifyvisitors panel along with the Key id, Team id and App bundle ID. To do this goto your notifyvisitors panel and under Any one of Analytics Product and now from the left side menu goto Settings >> App Push (under Channel section) >> iOS tab.
Now make sure status should be Active if not make it into active state then select Authentication Type to APNs Auth Key and provide the rest of the details in their respective fields and then upload your auth key (.p8) file in the given field.

Key ID
An unique Key ID was assigned to your APNS Auth Key .p8 file while creation of it for the authentication of your auth key (.p8 file). You can get it from your Apple Developer account.
Team ID
You can get your Team id from your Apple developer account under the Membership Section. A dummy screenshot attached below for your reference.

App bundle ID:
Your App’s bundle id that can be found in your Xcode. Make sure you should place your App’s Main Target Bundle Id in the NotifyVistors panel and its case sensitive also.
Environment:
Select the environment in which you want to send the push notification, if you have a Development Build of your app then select development and if you have a Production Build (AdHoc, TestFlight or to live users) then select production environment.
Note
Once you have done with all the above described settings and uploading your auth key (.p8) file You have successfully configured your dashboard to send push notifications for your app. Now you can refer to our Push Notification Documentation to complete the rest of the integration to enable your app to receive push notifications.
Updated over 2 years ago
