APNS Certificate
APNS, or Apple Push Notification Service, is an operating system notification service that delivers notifications to iOS devices. In order to securely send notifications through APNs, you’ll need an Apple Push Certificate among other requirements.
Without configuring and registering with an operating system push notification service like Apple Push Notifications Service, your app would be unable to send notifications to iOS users. The Apple Push Notifications Certificate is a necessary element in the process of sending notifications to your users through APNs.
How To Create APNs Push Certificate
Here are a few steps you need to follow to create an APNs Certificate.
Step 1: Firstly, you need to launch Keychain Access on your Mac. Now, in the Certificate Assistant section, click on Request a Certificate from a Certificate Authority… Now, download and install the WWDR Intermediate Certificate first. Also, make sure no private key is selected in the main Keychain Access window.

Step 2: Enter your apple developer account login email address here. Now, check Saved to disk and click Continue. Save the file as “MyAppPushCSR.certSigningRequest”.

Step 3: Now, log in to the Apple Developer Console and under Certificates, Identifiers & Profiles and goto Identifiers.

Step 4: Select App IDs and choose your app.

Note
APNS Certificate should only be generated for your App's Main Target not for the notification service extension target otherwise it may not work to send push on your device so be careful while selecting in this step.
Step 5: Now, under Capabilities Tab scroll down till Push Notification.

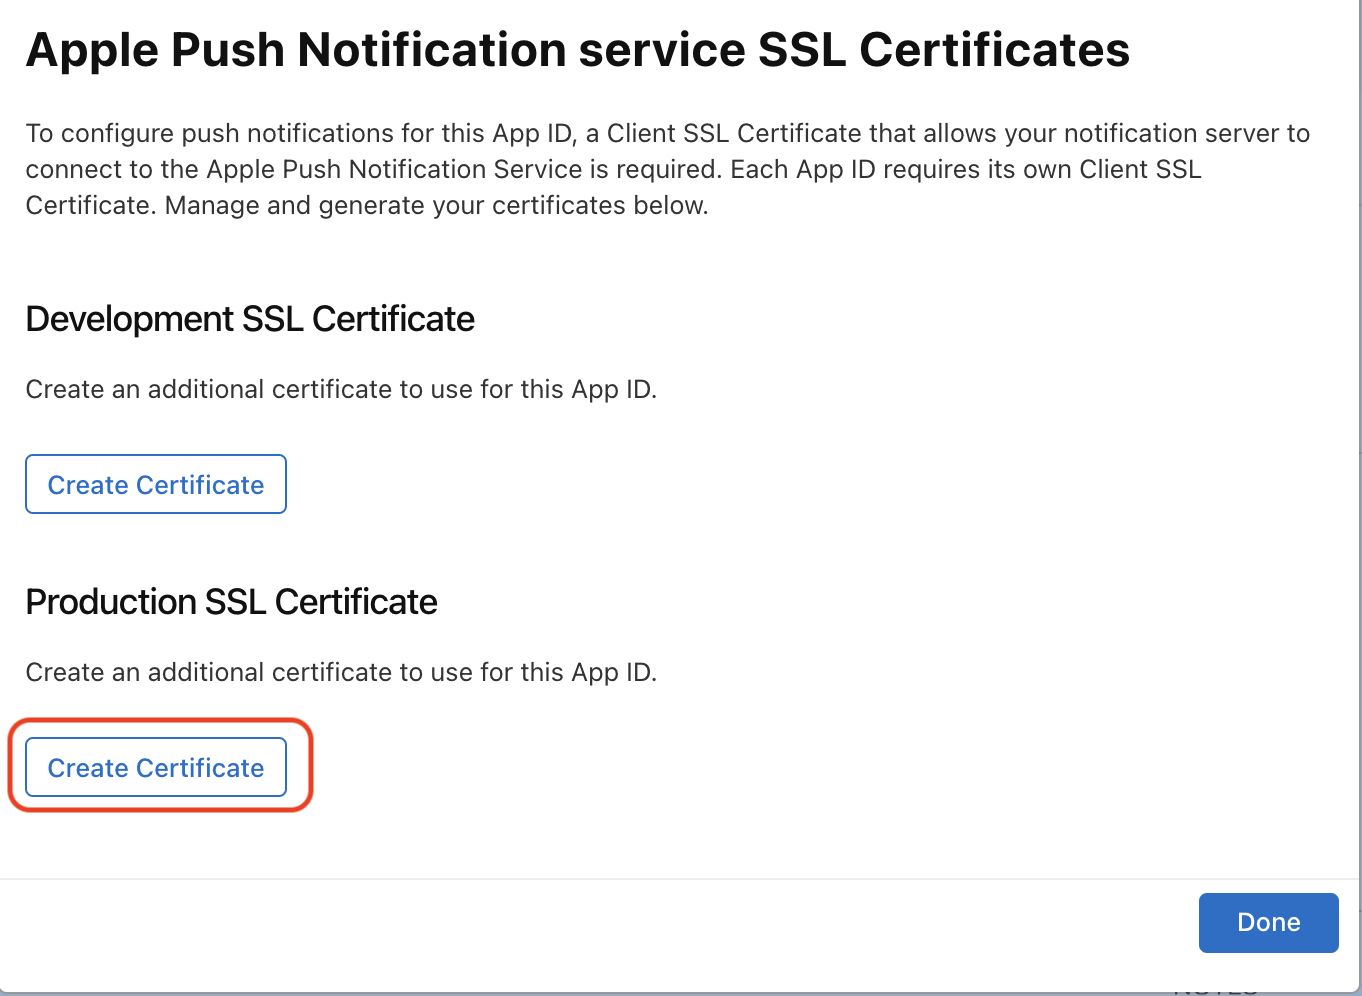
Step 6: If you have not enabled push notifications yet then check on the Push Notifications service checkbox to enable it and click on Configure button.

Step 7: In case, you already created a certificate, you can use it, download it and move on to the further step. If not, then tap on Create Certificate… of the environment (development / production) for which you want to create.
Step 8: Now, you need to follow the instructions on the next web page to make a certificate request on your Mac, and click Continue.
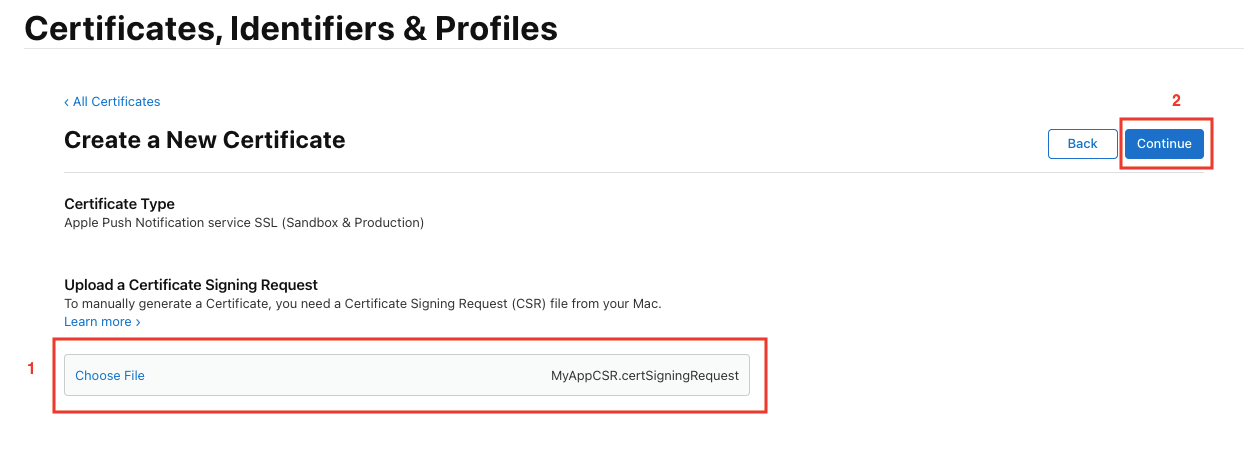
Step 9: On the Create a New Certificate page, select Choose File and select the certificate request file you just created (with a .certSigningRequest extension) and then click on Continue.
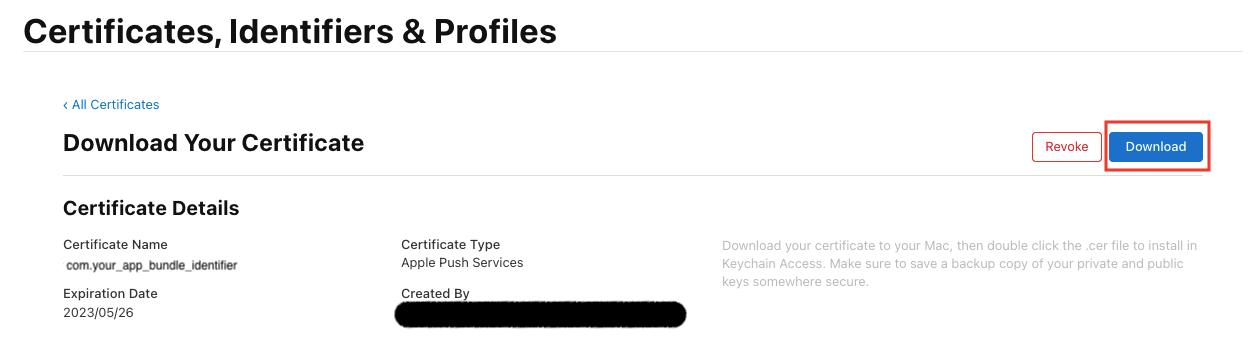
Step 10: Download the certificate to your Mac and then open the .cer file to install it in your Mac’s Keychain Access.
Step 11: Go to the Keys section of your Mac’s Keychain Access, you will see that a new private key has appeared in your keychain. Right-click it and choose Export.
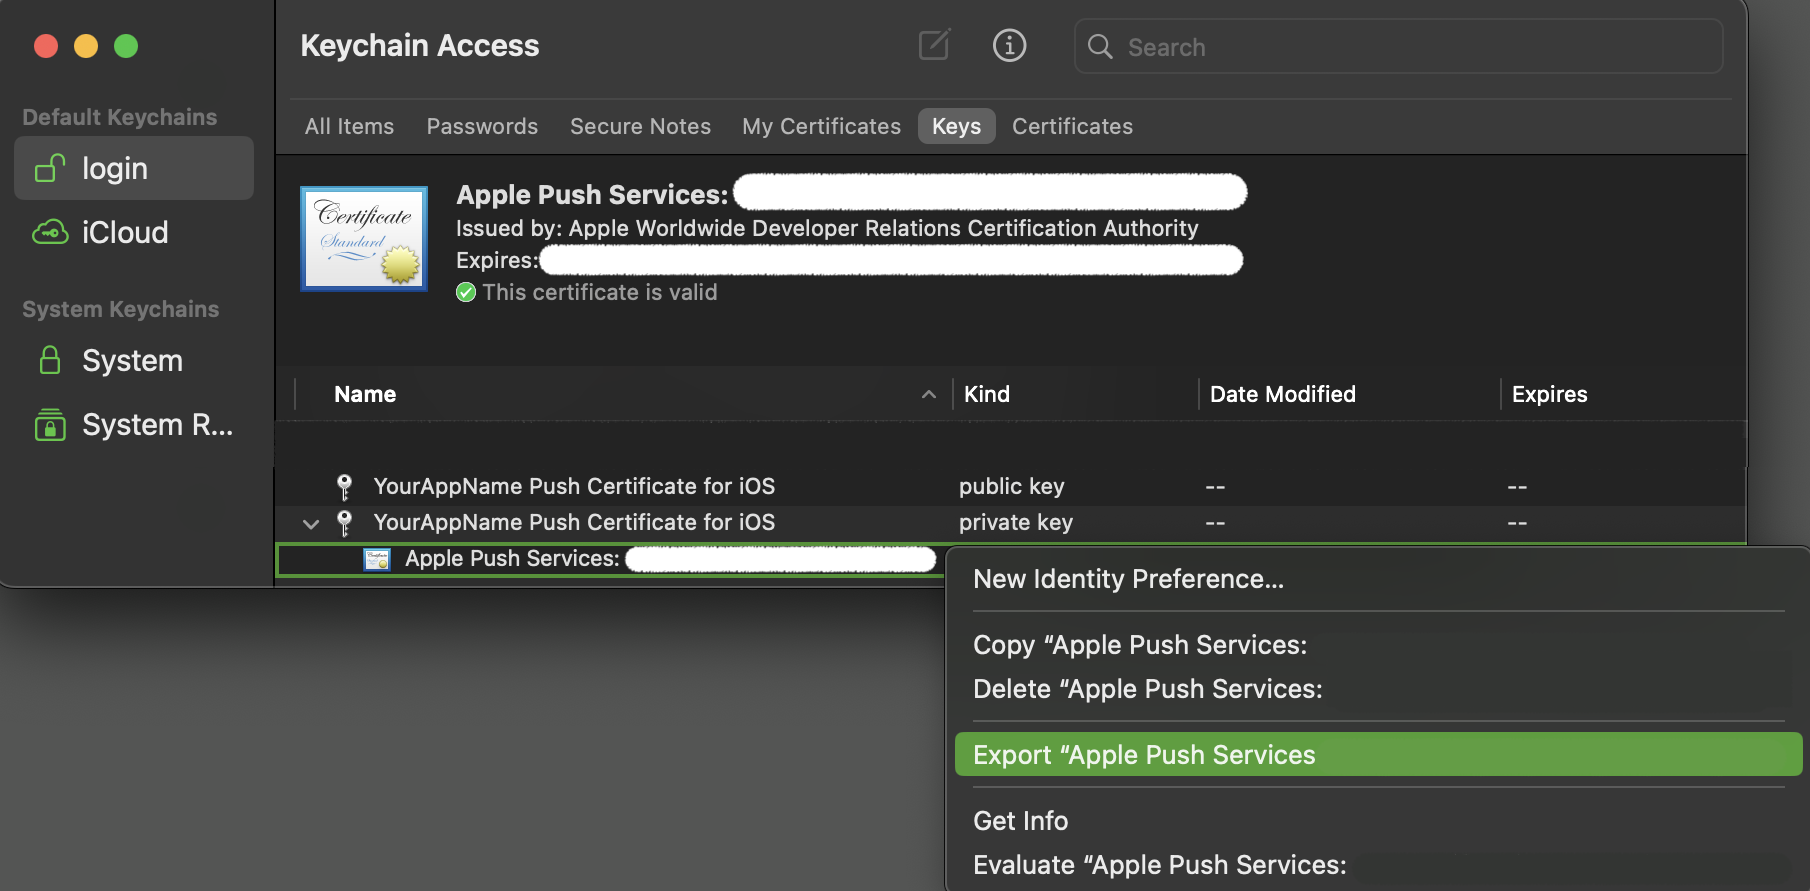
Step 11 :Save the private key as “yourAppPushKey.p12” and enter an import password. Make sure to note down or remember this password so that we can use same value for the passphrase in further steps and you also need to provide the passphrase value in your notifyvisitors account while uploading the push certificate file.
How To Create a PEM File
By now, you will be having three files:
- The CSR
- The private key as a p12 file (PushChatKey.p12)
- The SSL certificate (aps.cer OR aps_development.cer)
Make sure you keep all three files in a safe place. You can make use of the same CSR to create a new one when your certificate expires. For instance, for generating a new CSR, you also need a new private key. By re-using the CSR you can keep using your existing private key and you only need to change the .cer file.
Now, all you have to do is to convert the certificate and private key into a more usable format and combine the certificate along with the private key into a single file that uses the PEM format.
You need to use the command-line OpenSSL tools for this. Open the Terminal App and execute the following steps.
Step 1 : Go to the folder in which you have saved the downloaded certificate (aps.cer) and exported .p12 file. Let's suppose these files have been saved in Desktop then in the terminal goto Desktop using the below command.
$ cd ~/Desktop/
Step 2 : Convert the .cer file into a .pem file:
$ openssl x509 -in aps.cer -inform der -out yourAppPushCert.pem
Step 3 : Convert the private key’s .p12 file into a .pem file:
$ openssl pkcs12 -nocerts -out yourAppPushKey.pem -in yourAppPushKey.p12
        Enter Import Password:
        MAC verified OK
        Enter PEM pass phrase:
        Verifying - Enter PEM pass phrase:
You first have to enter your import password for the .p12 file as given before, so that OpenSSL can read it. Now, you need to enter a new passphrase (recommended to use the same as import password) that will be used to encrypt the PEM file.
Ultimately, combine the certificate and key into a single .pem file:
$ cat yourAppPushCert.pem yourAppPushKey.pem > ck.pem
At this point it’s a good idea to test whether the certificate works. Execute the following command:
Development Environment:
$ telnet gateway.sandbox.push.apple.com 2195
            Trying 17.172.232.226...
            Connected to gateway.sandbox.push-apple.com.akadns.net.
            Escape character is '^]'.
Production Environment:
$ telnet gateway.push.apple.com 2196
             Trying 17.188.160.138...
             Connected to gateway.push-apple.com.akadns.net.
             Escape character is '^]'.
This tries to make a regular, unencrypted, connection to the APNS server. If you see the above response, then your Mac can reach APNS. Press Ctrl+C to close the connection. If you get an error message, then make sure your firewall allows outgoing connections on port 2195.
Let’s try connecting again, this time using our SSL certificate and private key to set up a secure connection:
Development Environment:
$ openssl s_client -connect gateway.sandbox.push.apple.com:2195 -cert yourAppPushCert.pem -key yourAppPushKey.pem

         Enter passphrase for yourAppPushKey.pem:
Production Environment:
$ openssl s_client -connect gateway.push.apple.com:2196 -cert yourAppPushCert.pem -key yourAppPushKey.pem

         Enter pass phrase for yourAppPushKey.pem:
You should see a whole bunch of output, which is OpenSSL letting you know what is going on under the hood.
If the connection is successful, you should be able to type a few characters. When you press enter, the server should disconnect. If there was a problem establishing the connection, OpenSSL will give you an error message but you may have to scroll up through the output to find it.
Configuring the APNS Certificate
Now, to complete the configuration, you need to update the status to Active and select the Authentication type. Further, add iOS PassPhrase (must be the same case sensitive as you have created in previous steps) and App bundle ID then select the environment, and save the changes.

Now, upload the finally created (ck.pem) certificate file to complete the process.
Updated over 1 year ago