Import Event Data
OVERVIEW
Import the data of the events performed by the users on your site. You can manually create the events’ data in an MS excel sheet. Further, you can upload the data of the events in the panel with the help of the CSV upload feature. NotifyVisitors allows you to create and track events so that you can further create segments and engage users based on their behavior.
Understanding Event Data
Events in NotifyVisitors are of the following types :
- Custom events: Custom events are the events that you send to NotifyVisitors based on the users’ interactions on your site or app. Examples- Purchased, searched, or added to cart.
The custom events signify the event details such as who performed the event, at what time the event was performed, etc. The said events can also be categorized into custom and system attributes. System attributes signify the events such as the time and location of the event whereas custom attributes are considered to be the attributes of a custom event as item price of Purchase event.
- System events: These are the events that are captured by the NotifyVisitors as soon as the SDK integration is done such as app install.
You can only upload custom events and attributes in your CSV file.
Prerequisites of CSV file
-
The event_time attribute (yyyy-mm-dd H:i:s or the epoch time format) is mandatory for the CSV file.
-
File must contain columns with these name event_name , event_time , & (userID OR nv_uid) .
-
The size of the file must be upto 50 MB.
-
Once you have configured an event attribute, you cannot change it.
-
Values of the attribute can only be of the following data types: Boolean, string, integer and array.
Uploading Events Data In NotifyVisitors
How To Access
Navigate to the Settings > Upload > Upload Events.
Uploading the CSV file
Click on the “Upload events data” to upload the CSV file.
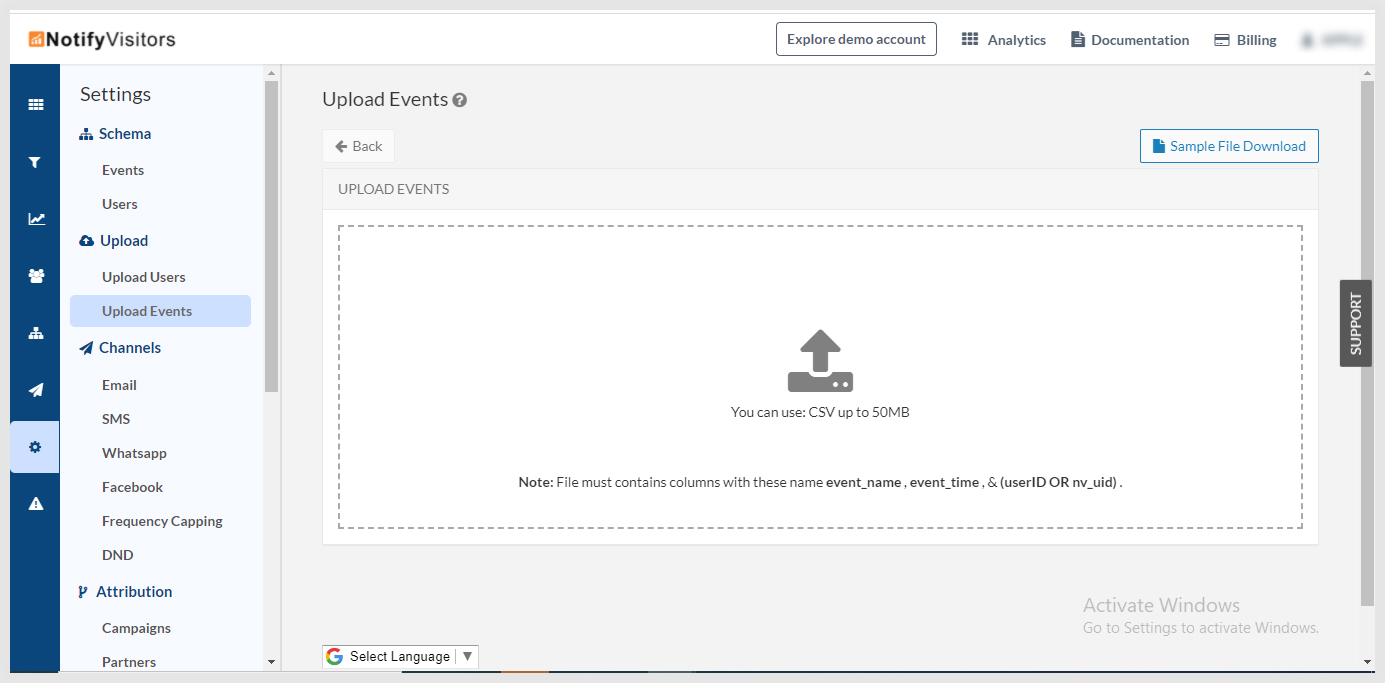
Next, upload the file which you have created manually.
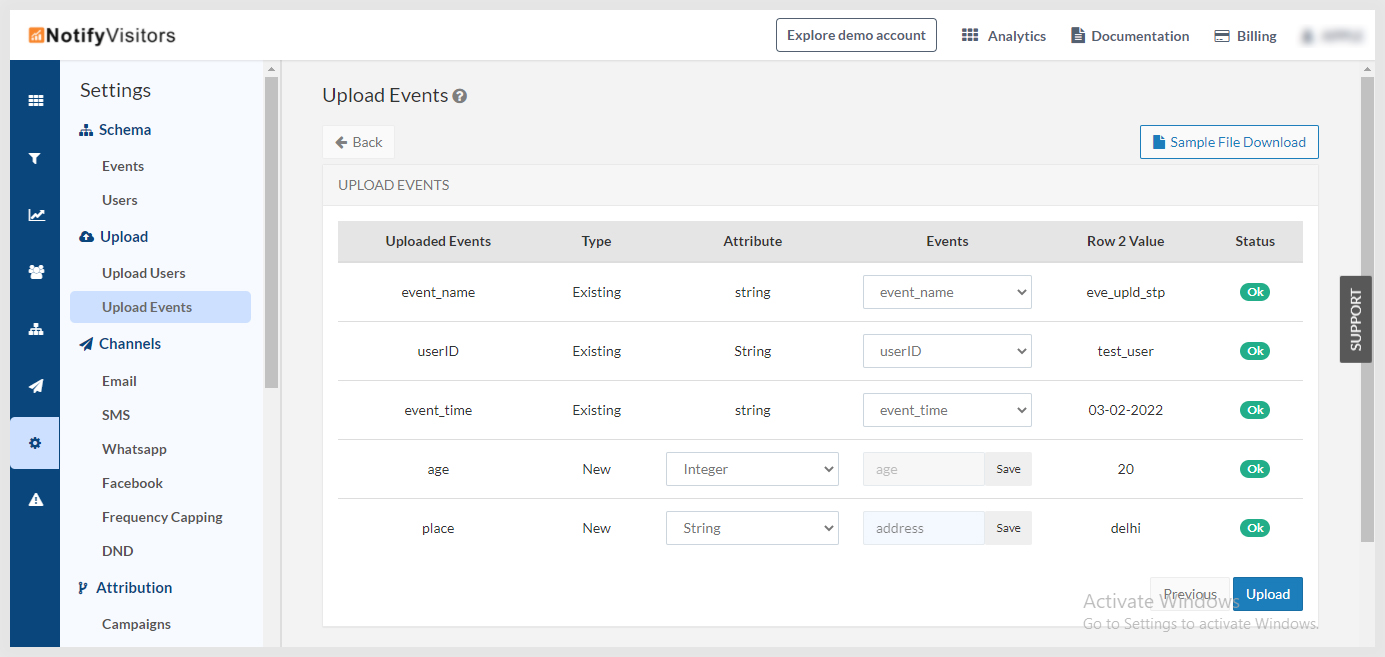
Once you have uploaded the file, define the variables:
-
CSV column : These are the events that you created in excel and uploaded as a CSV file.
-
Data type : Define the data type for the uploaded events whether they belong to the category of string boolean or integer values.
-
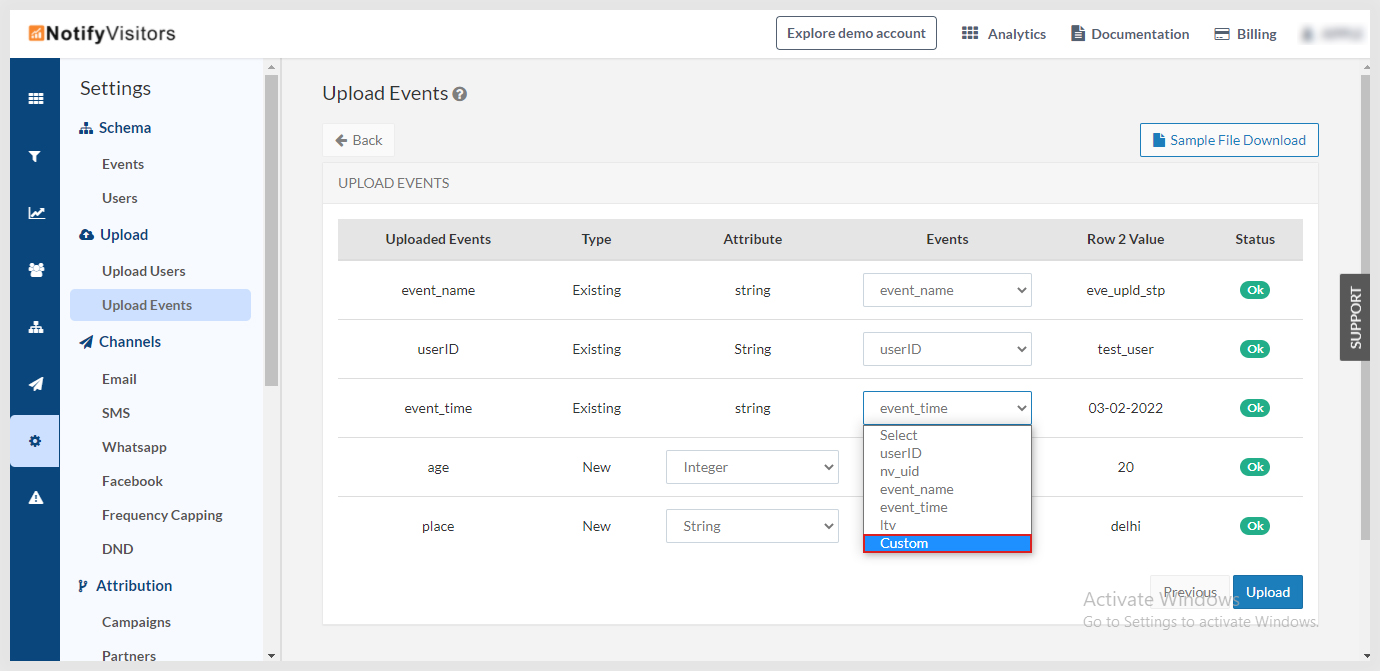
Event Attribute : Map the CSV columns with the event attributes that are already configured in the system. You can create a custom event if it is not present in the list as shown in the below image.
- Status : View the status of the event attributes. It will be shown as OK if all the fields are correctly filled whereas a warning status could be seen in case of any discrepancies.
After defining all the variables, click on the UPLOAD button.
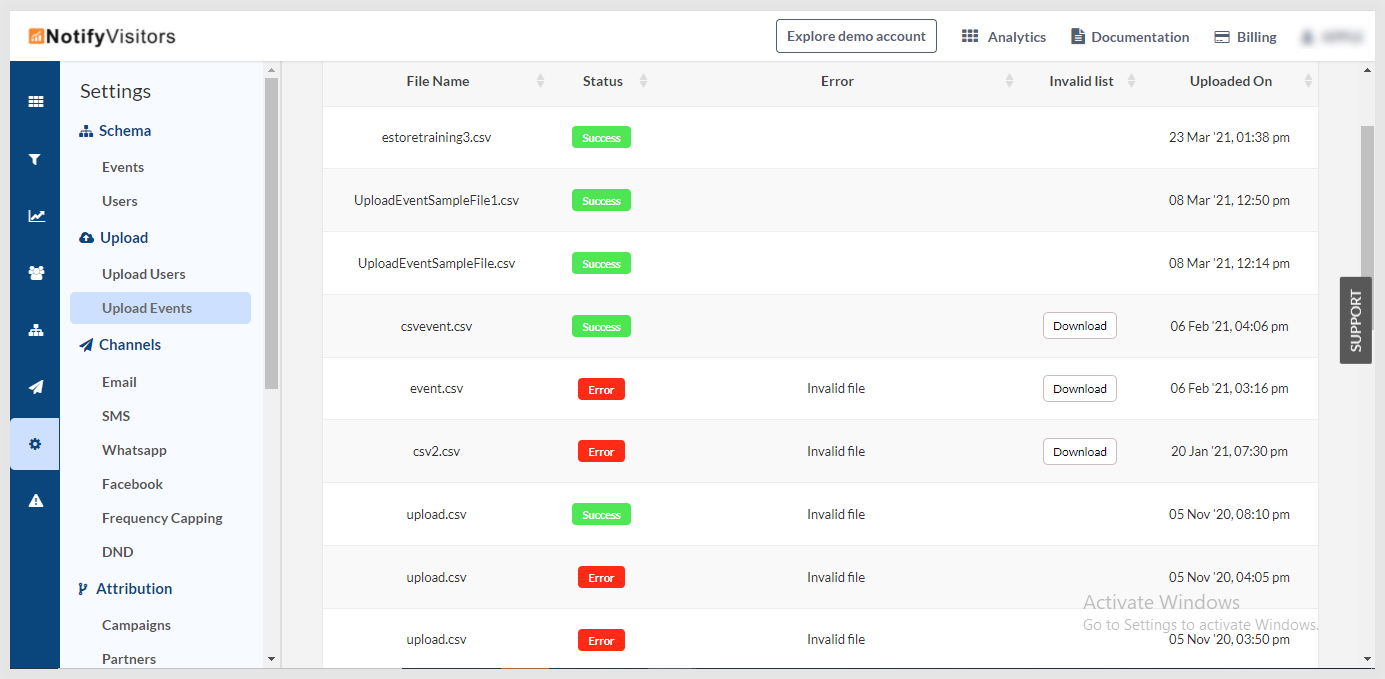
Status of the CSV file
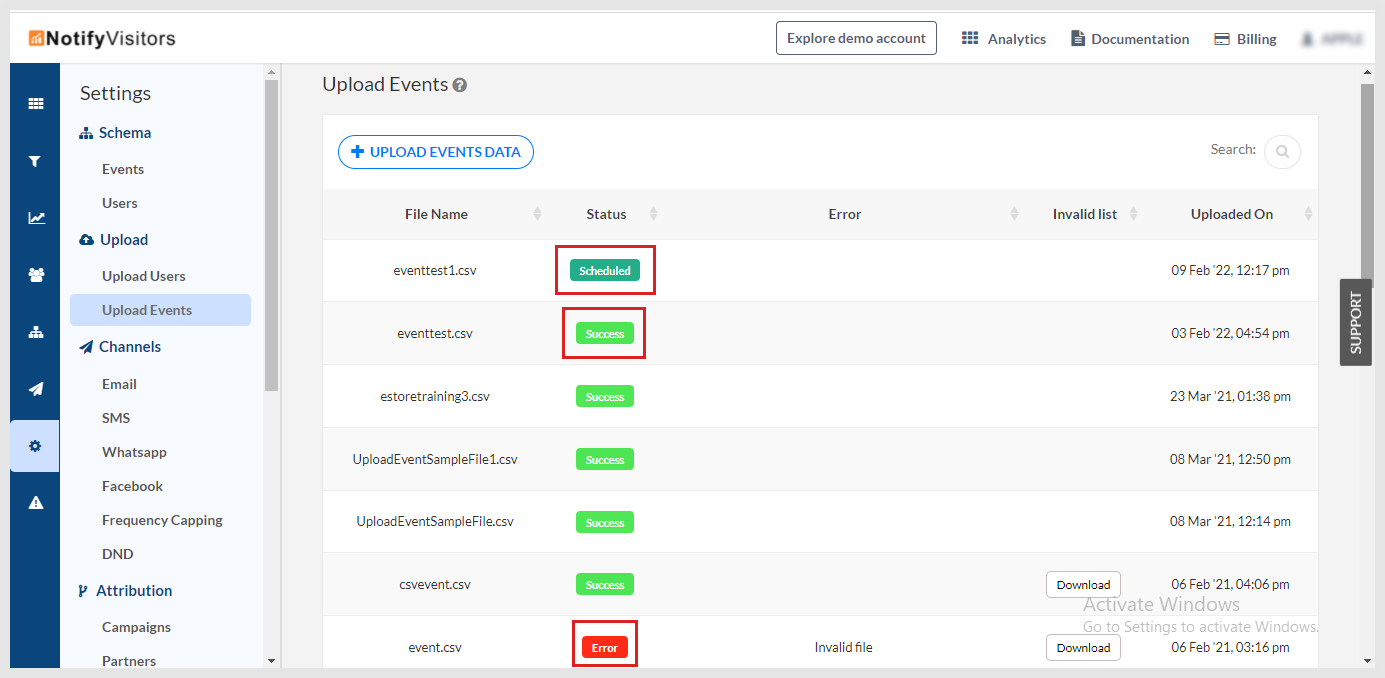
You can check the status of the uploaded file in terms of success, error, or schedule.
Validate Uploaded Events
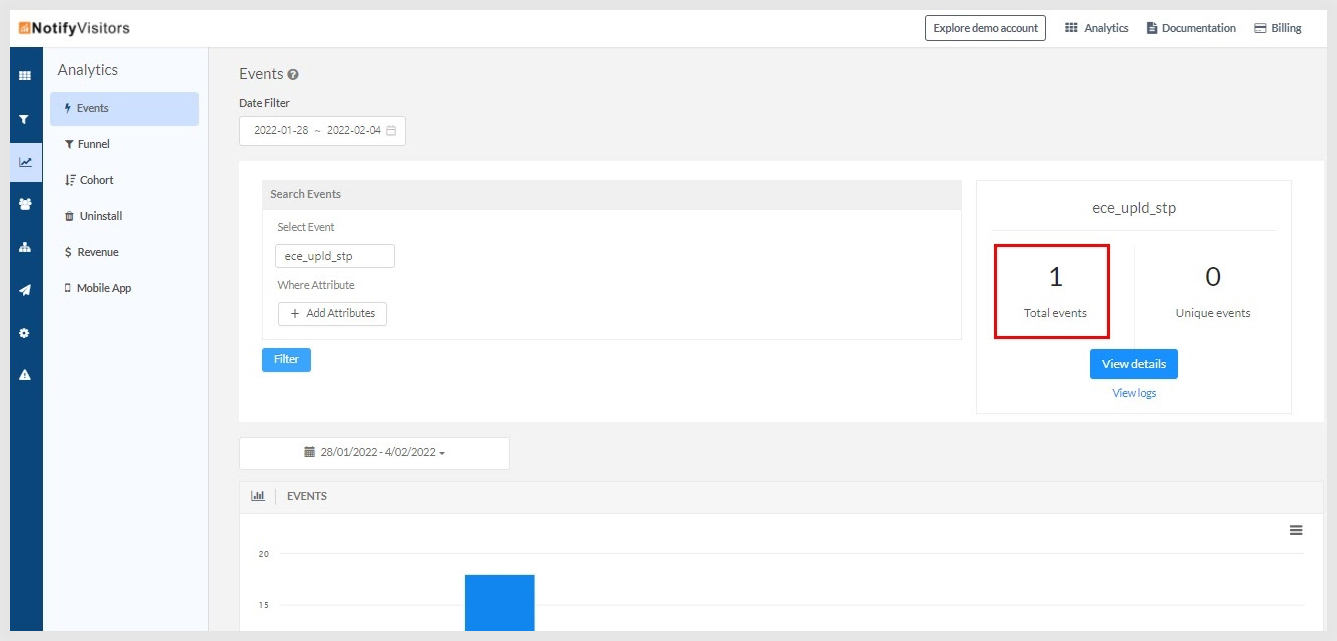
You can view the uploaded events by navigating to the Settings > Events section in the panel.
Note : You can view here the total and unique events
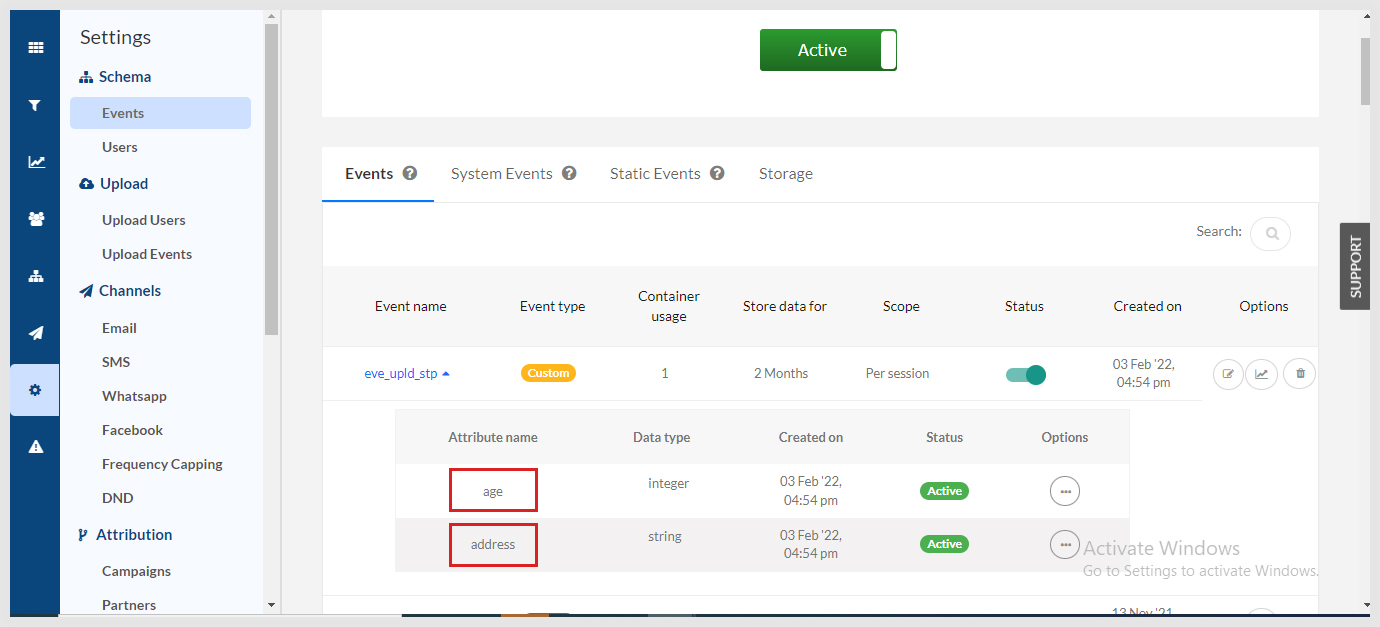
You can also view the attributes by clicking on the event name.
Updated about 4 years ago
