Register FCM Keys
This document tells you how to create a Sender ID and API Key for Firebase Cloud Messaging.
In order to generate the sender ID and API key for FCM, follow the below steps :
CREATE FIREBASE PROJECT
a. Firstly, open the Firebase console.

b. Navigate to the view console.
c. Click on the ADD PROJECT, if you have not yet created a project.

d.Assign a name to the PROJECT and click on the continue button.

e. Activate the toggle button to enable the Google analytics and further click on the Continue button.

You can enable or disable the Google Analytics for your Firebase project as per your requirements.

f. You can find your Project by clicking on the PROJECT NAME.

g. Simply move to the top-left side section of the Firebase console and click on the PROJECT OVERVIEW.

REGISTER YOUR APP
Click on the Add app if your app is not yet registered.
a. Select an android platform.

b. Enter the details to register your app :
-
Android package name.
-
App nickname
Click on the REGISTER app button once you enter all the details.

c. Next, Download the google-services.json file and add it to your Project’s app module folder. Further click on the Next button.

d. Configure the below dependencies and plugins in your app module and project module to connect with firebase.


Click on the Next button once you configure all the dependencies and plugins.
e. Click on the Continue to Console button to conclude the process of app registration.

f. Select your app under your project in Firebase Console. And click on the Settings icon to be redirected to the Project Settings page.


CONFIGURE SENDER ID AND PRIVATE KEY
Select the 'Cloud Messaging' tab to find out the 'SENDER ID' for FCM.

Select the 'Service Accounts' tab to generate 'PRIVATE KEY' for FCM.
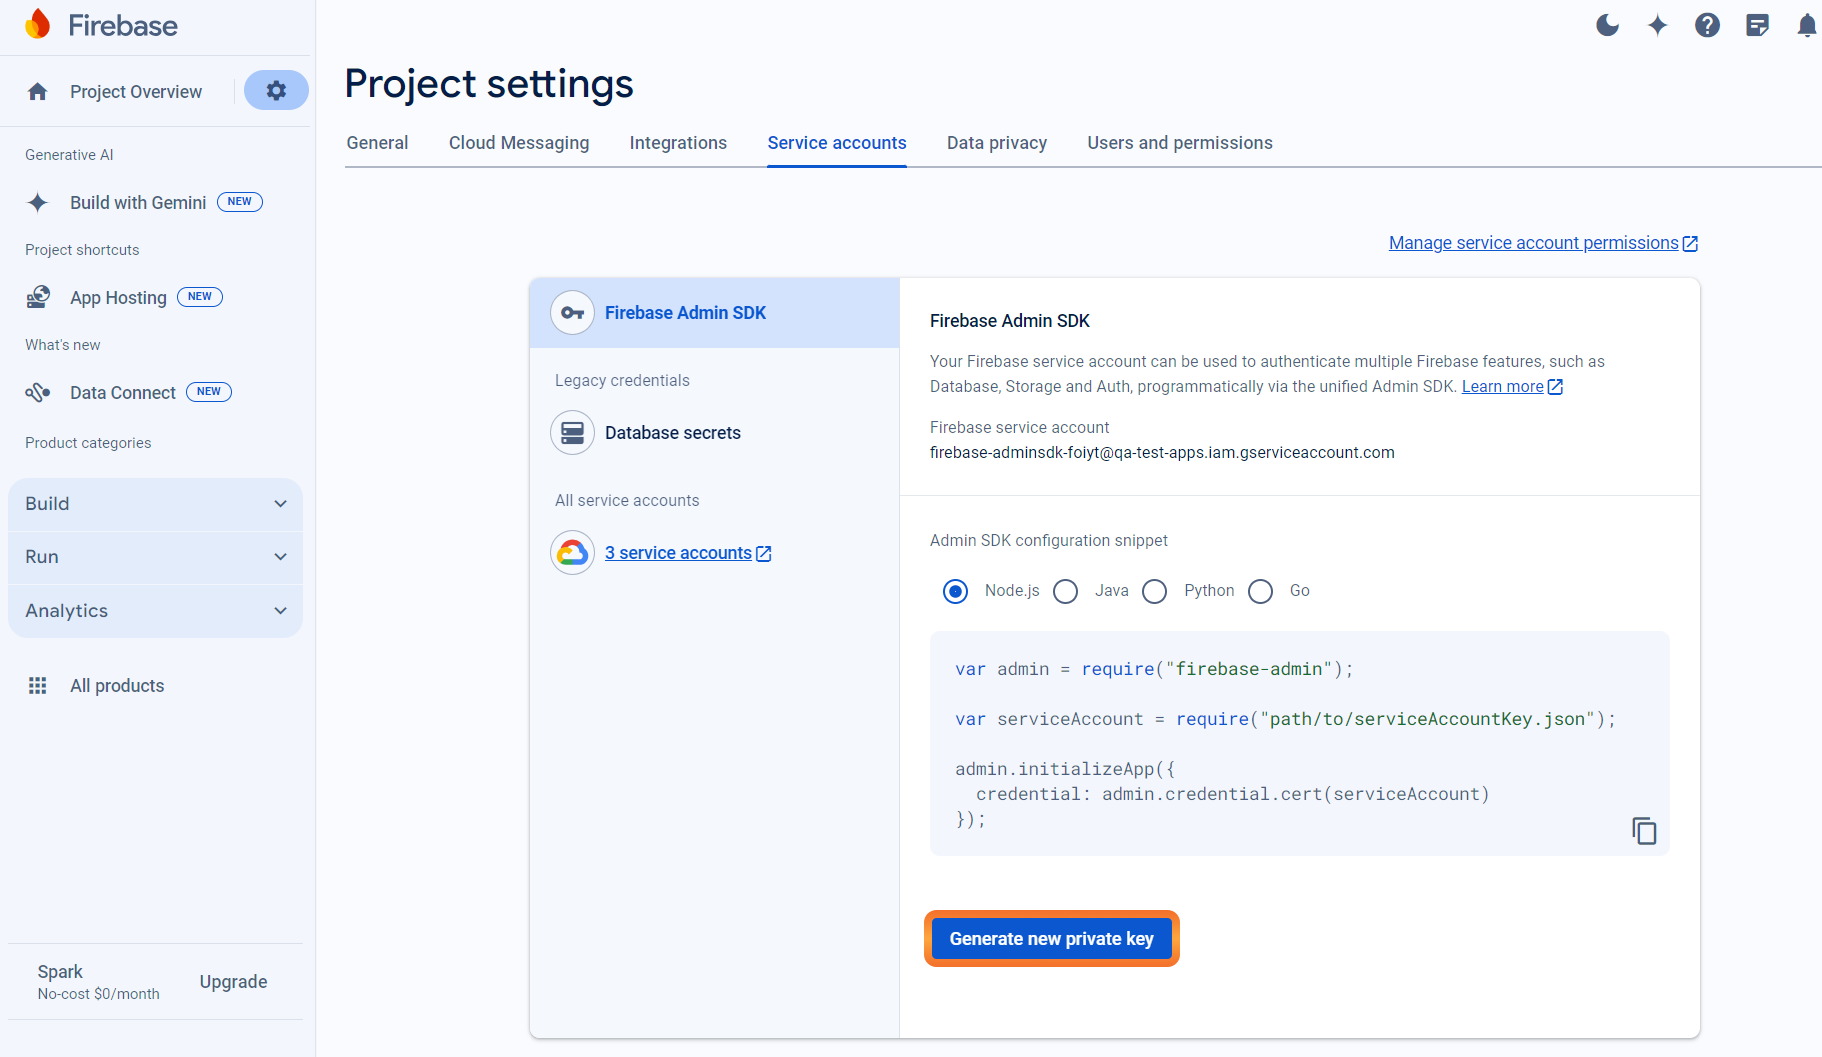
Click on the 'Generate new private key' button. This will download a JSON file. Refer below for sample JSON file format.
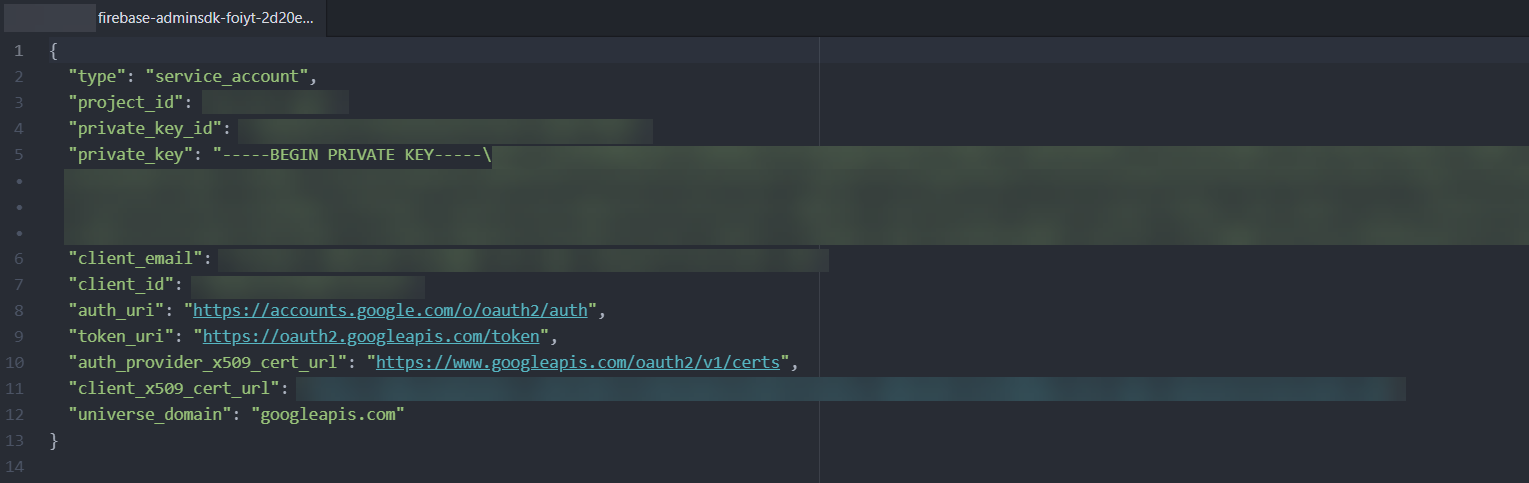
Store this JSON file on your system.
Login to your NotifyVisitors Account.
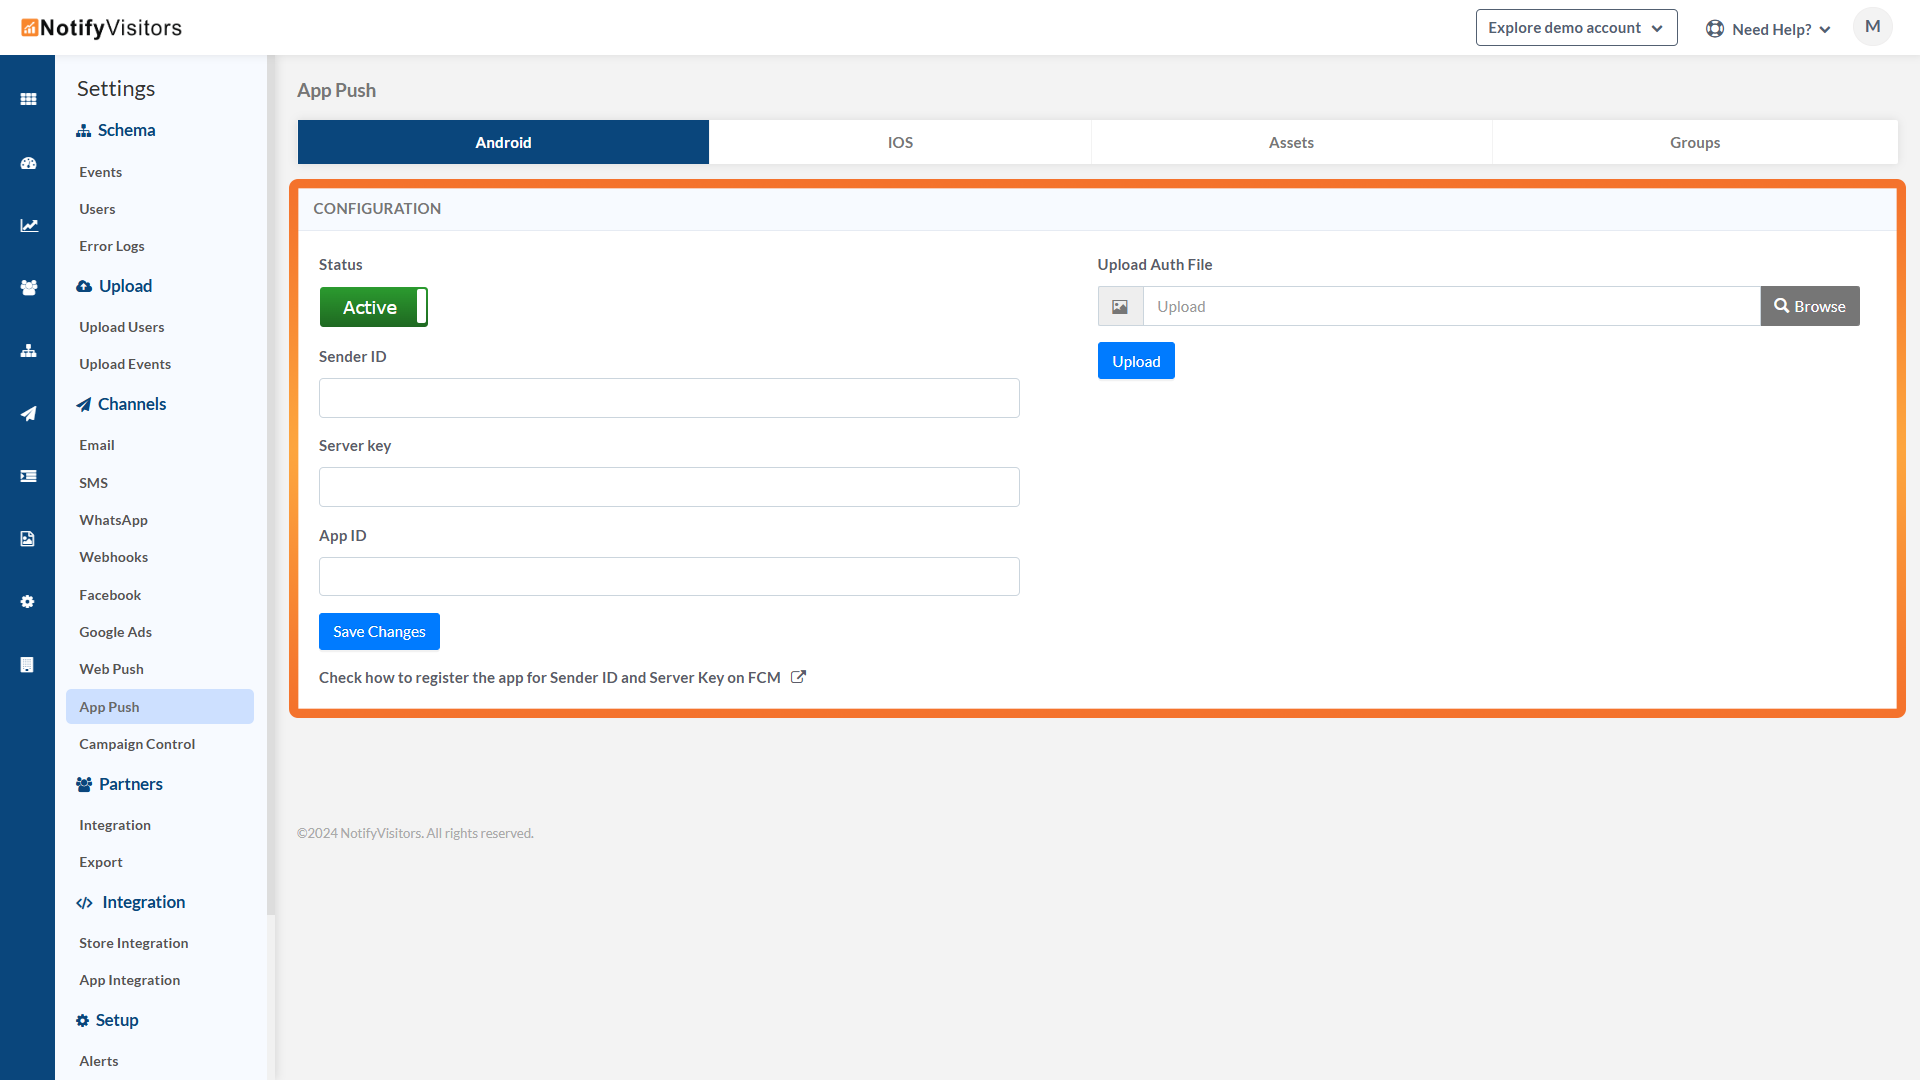
Navigate to Settings > App Push > Android tab.
Upload your downloaded private key JSON file in the 'Upload Auth File' section.
Add 'Sender ID' from your 'Cloud Messaging' section.
Add 'App ID (project ID)' from your downloaded private key JSON file.
Save the changes i.e., click on the button titled 'Save Changes'.
Updated 11 months ago