Shopify
Unlock the Full Potential of Your Shopify Store with NotifyVisitors Integration
Shopify is a leading e-commerce platform that enables you to establish your brand, cultivate a sense of community, and attract customers to your website. In today's world, it is crucial to interact with them through multiple channels to deliver a positive experience.
By integrating your Shopify store with NotifyVisitors, you can monitor your customers' behaviors and ultimately enhance your return on investment, boosting your e-commerce business revenue.
If you aim to run NotifyVisitors campaigns on Shopify, it is essential to understand the process of integrating NotifyVisitors with Shopify.
How to integrate NotifyVisitors with Shopify?
There are two ways to integrate NotifyVisitors with Shopify:
Method 1: Installing NotifyVisitors from the Shopify App Store.
Connecting your shopify store with NotifyVisitors is effortless. All you need to do is
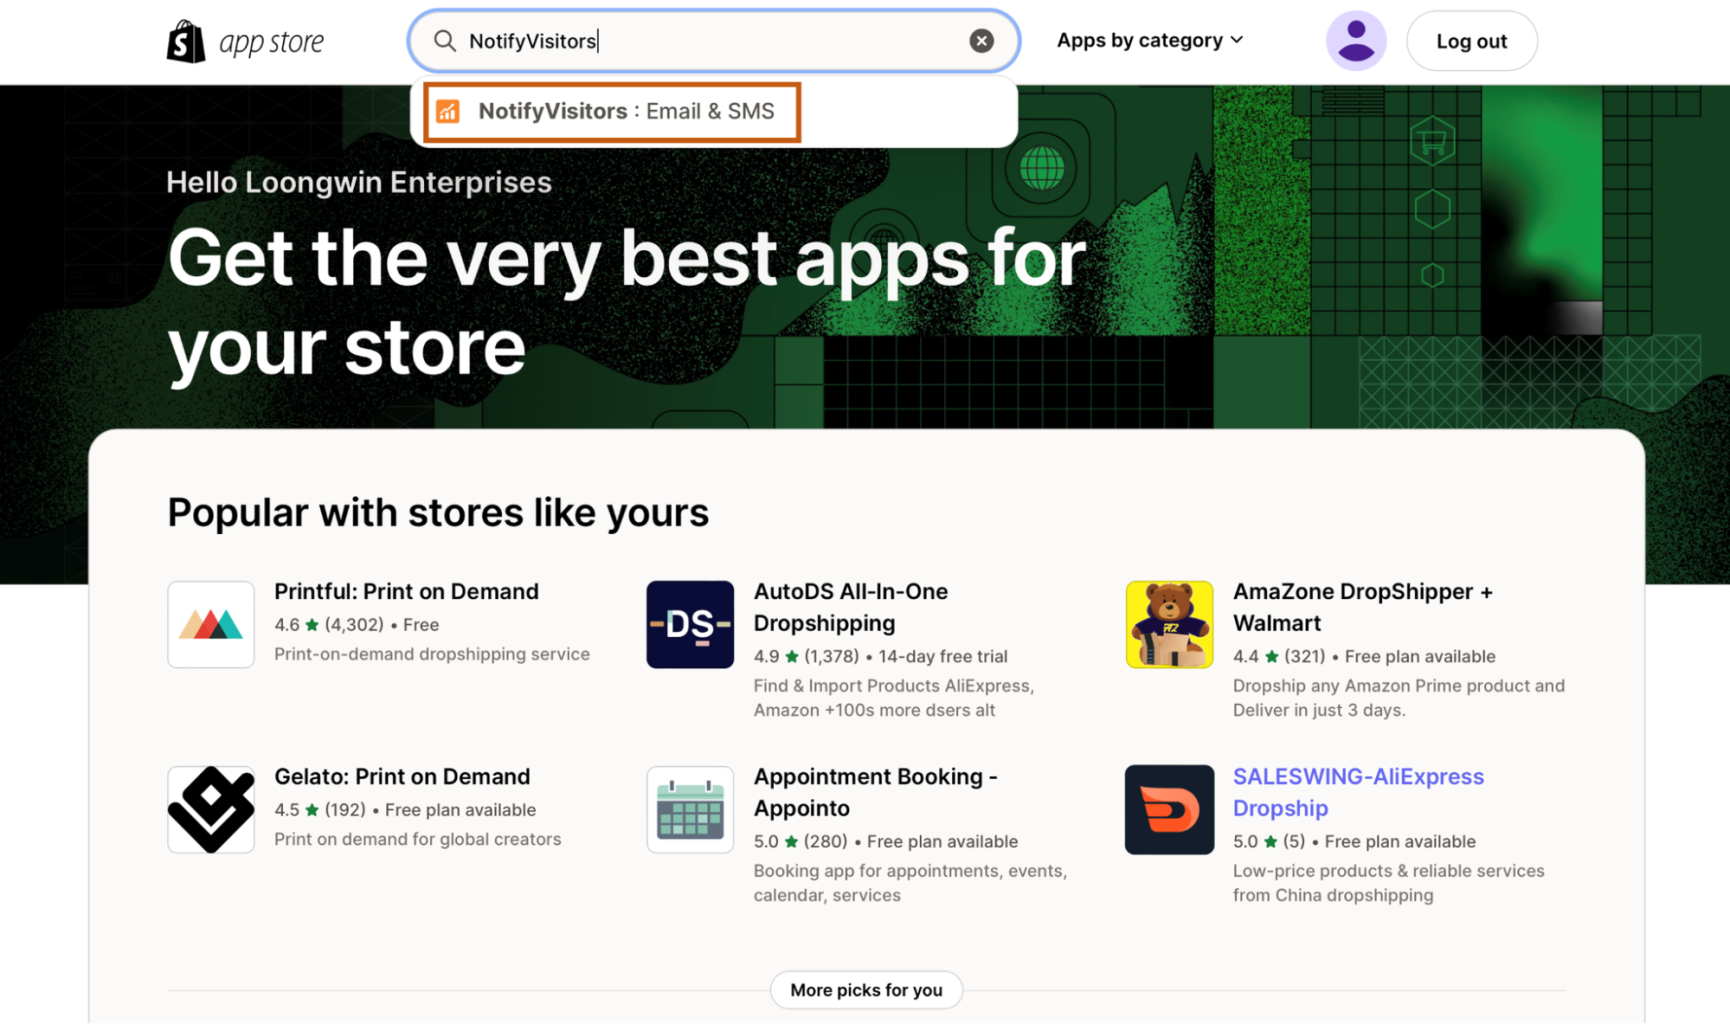
Step 1: Go to the Shopify App Store, search for 'NotifyVisitors,' select the first result, and you'll be taken to the detailed page of the app or simply click here.
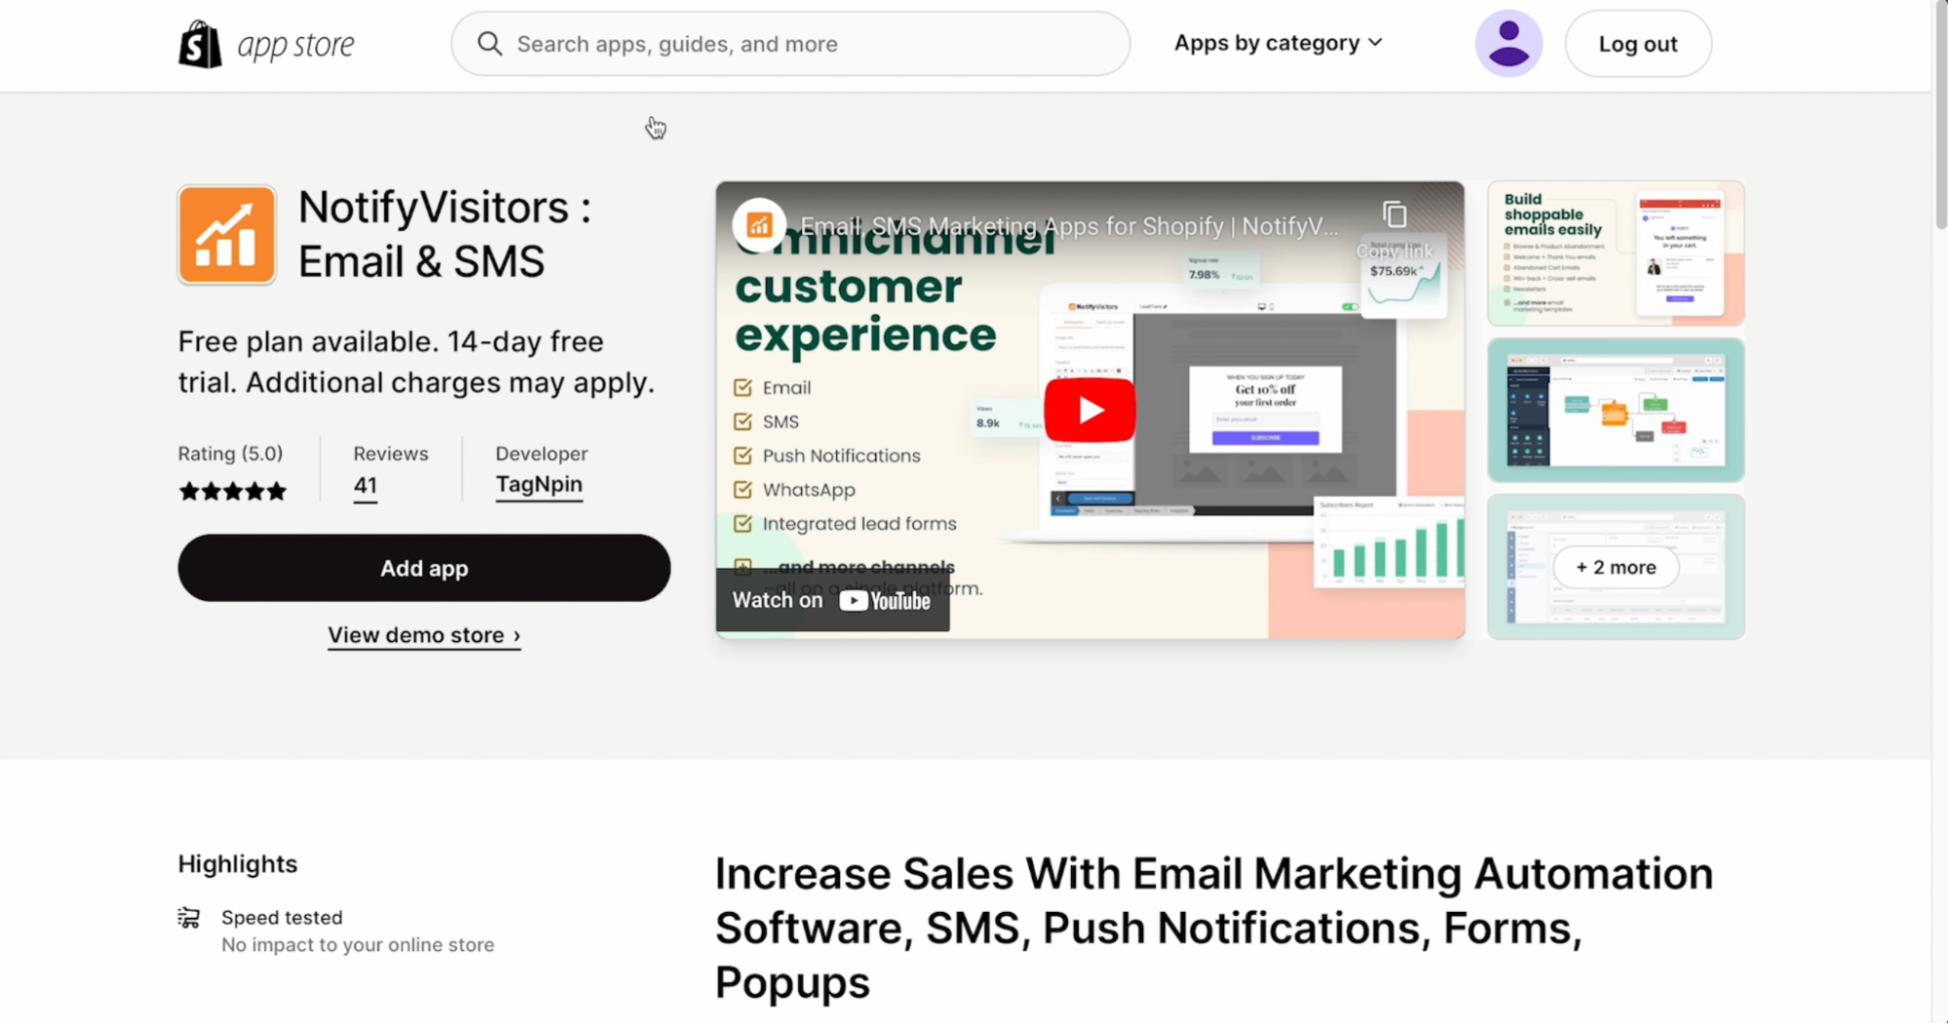
Step 2: On this page click on the “Add app” button to proceed.
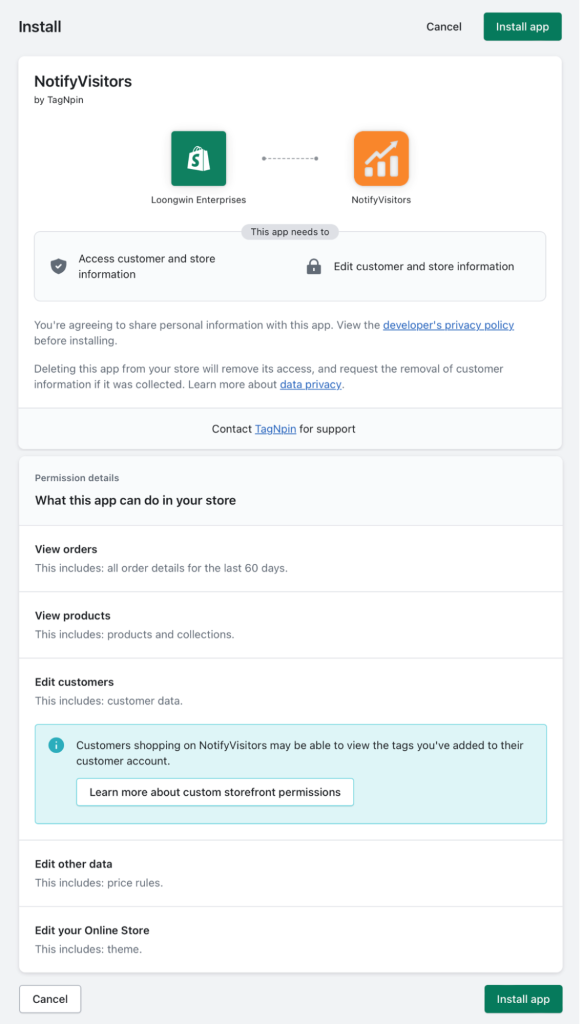
Step 3: After clicking the “Add app” button you will be presented with options to view privacy policy, all your information being shared, and permission details. Once you've thoroughly reviewed the information, simply click 'Install App' to finish the setup process.
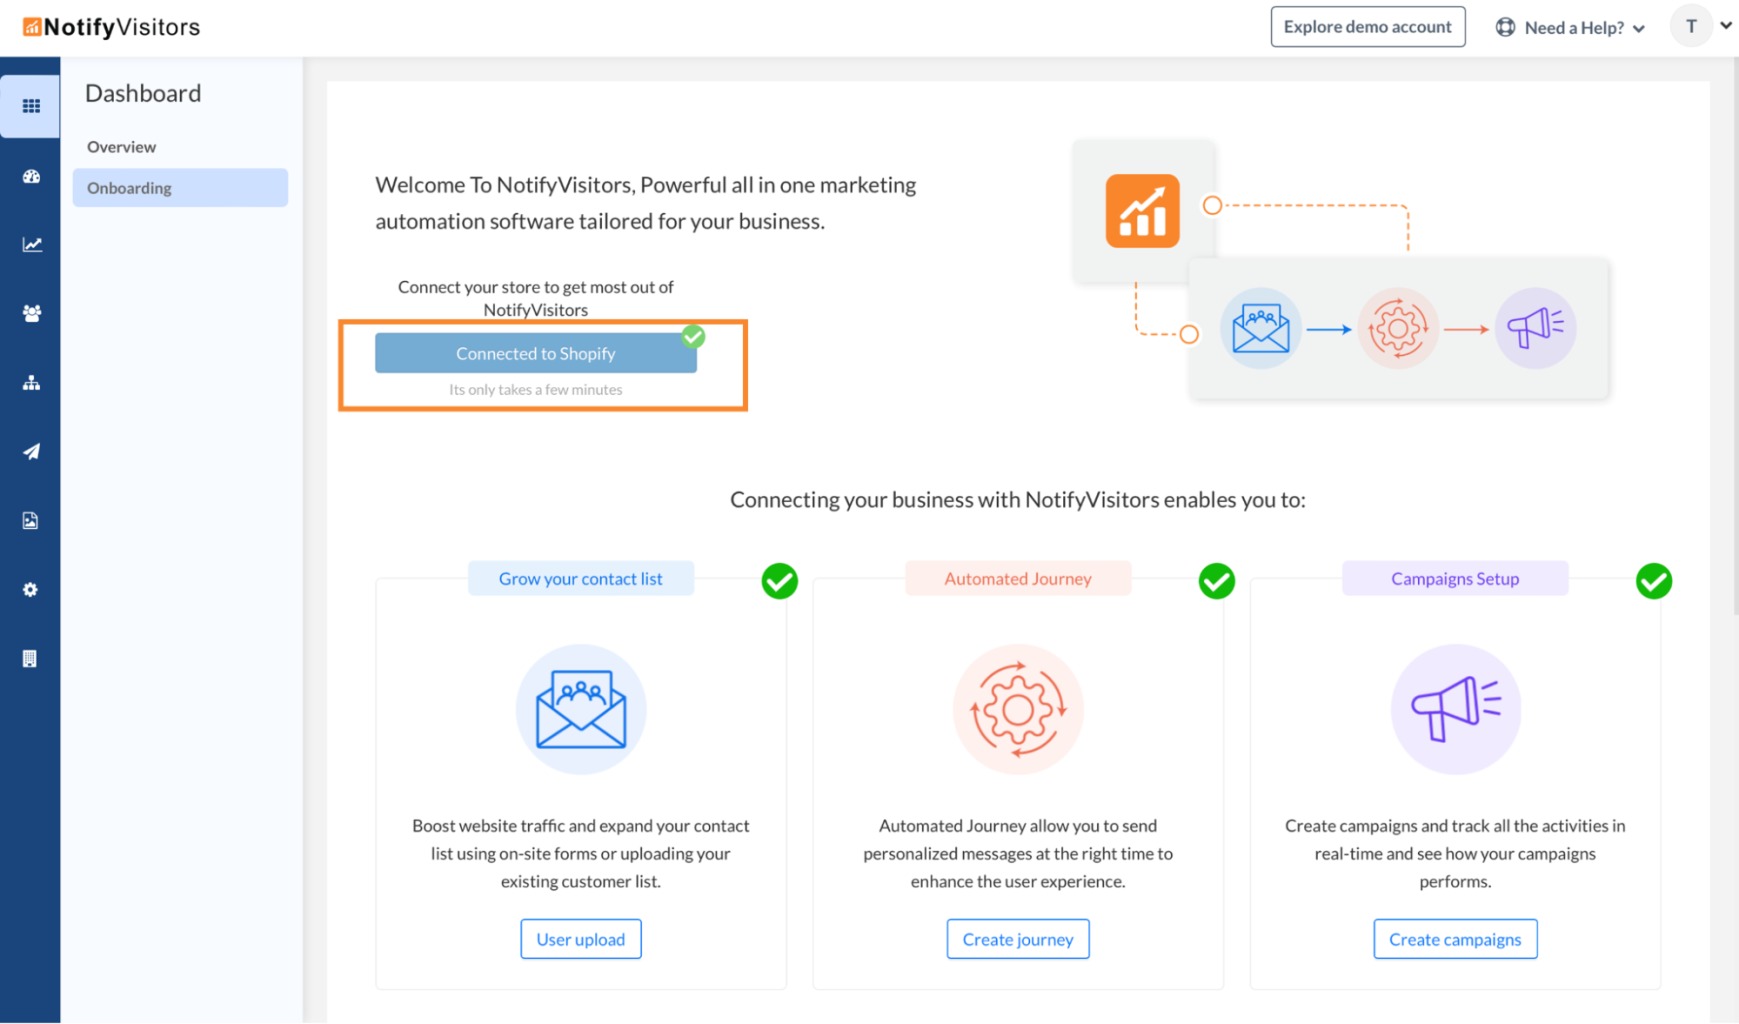
Step 4: Upon successful installation, you will be redirected to the NotifyVisitors dashboard.
If you don't have a NotifyVisitors account, you'll be redirected to the sign-up page where you can quickly create one. After you've completed the sign-up process, you'll be redirected back to the NotifyVisitors dashboard.
Step 5: But for this integration to work, you will need to enable an extension from the popup that appears on your screen. Click on the "enable shopify app embed" button, and it will redirect you to your Shopify store.
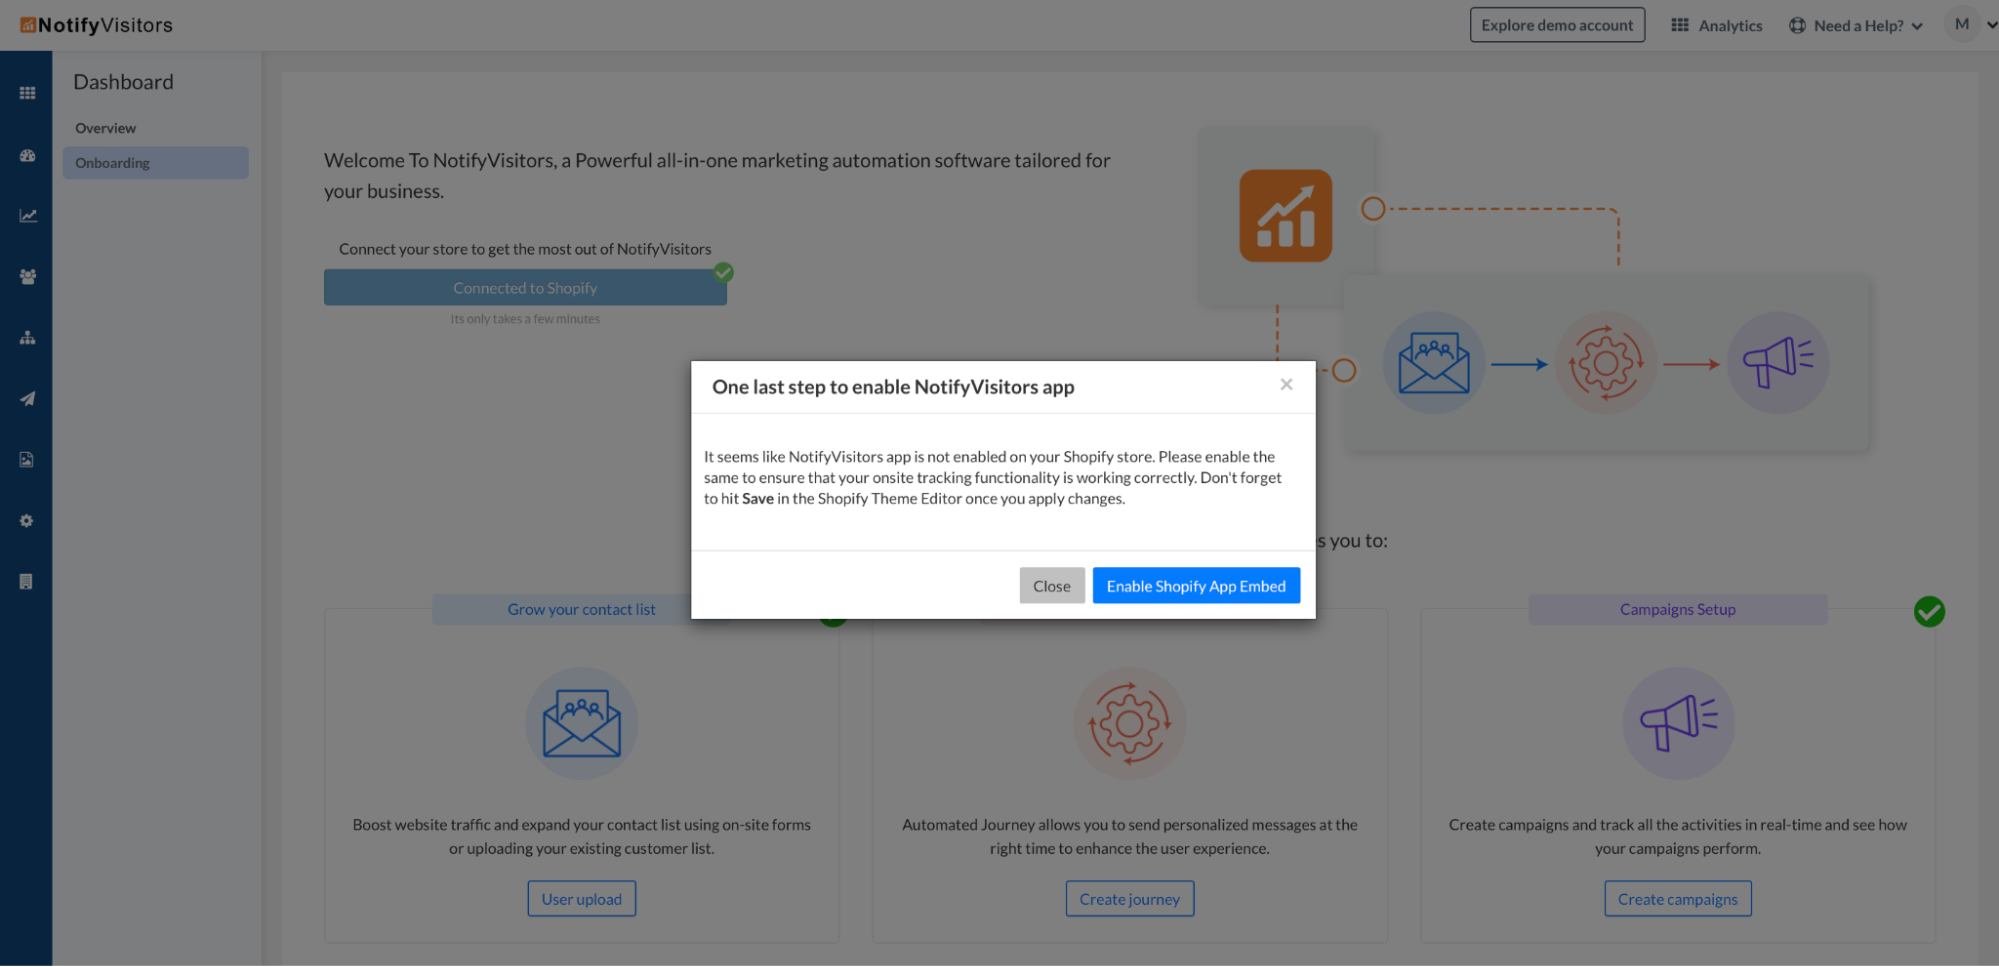
In the left menu, you will be able to see that the extension is now enabled. Now click on the “save” button on the top right corner to save changes and your integration process is now complete.

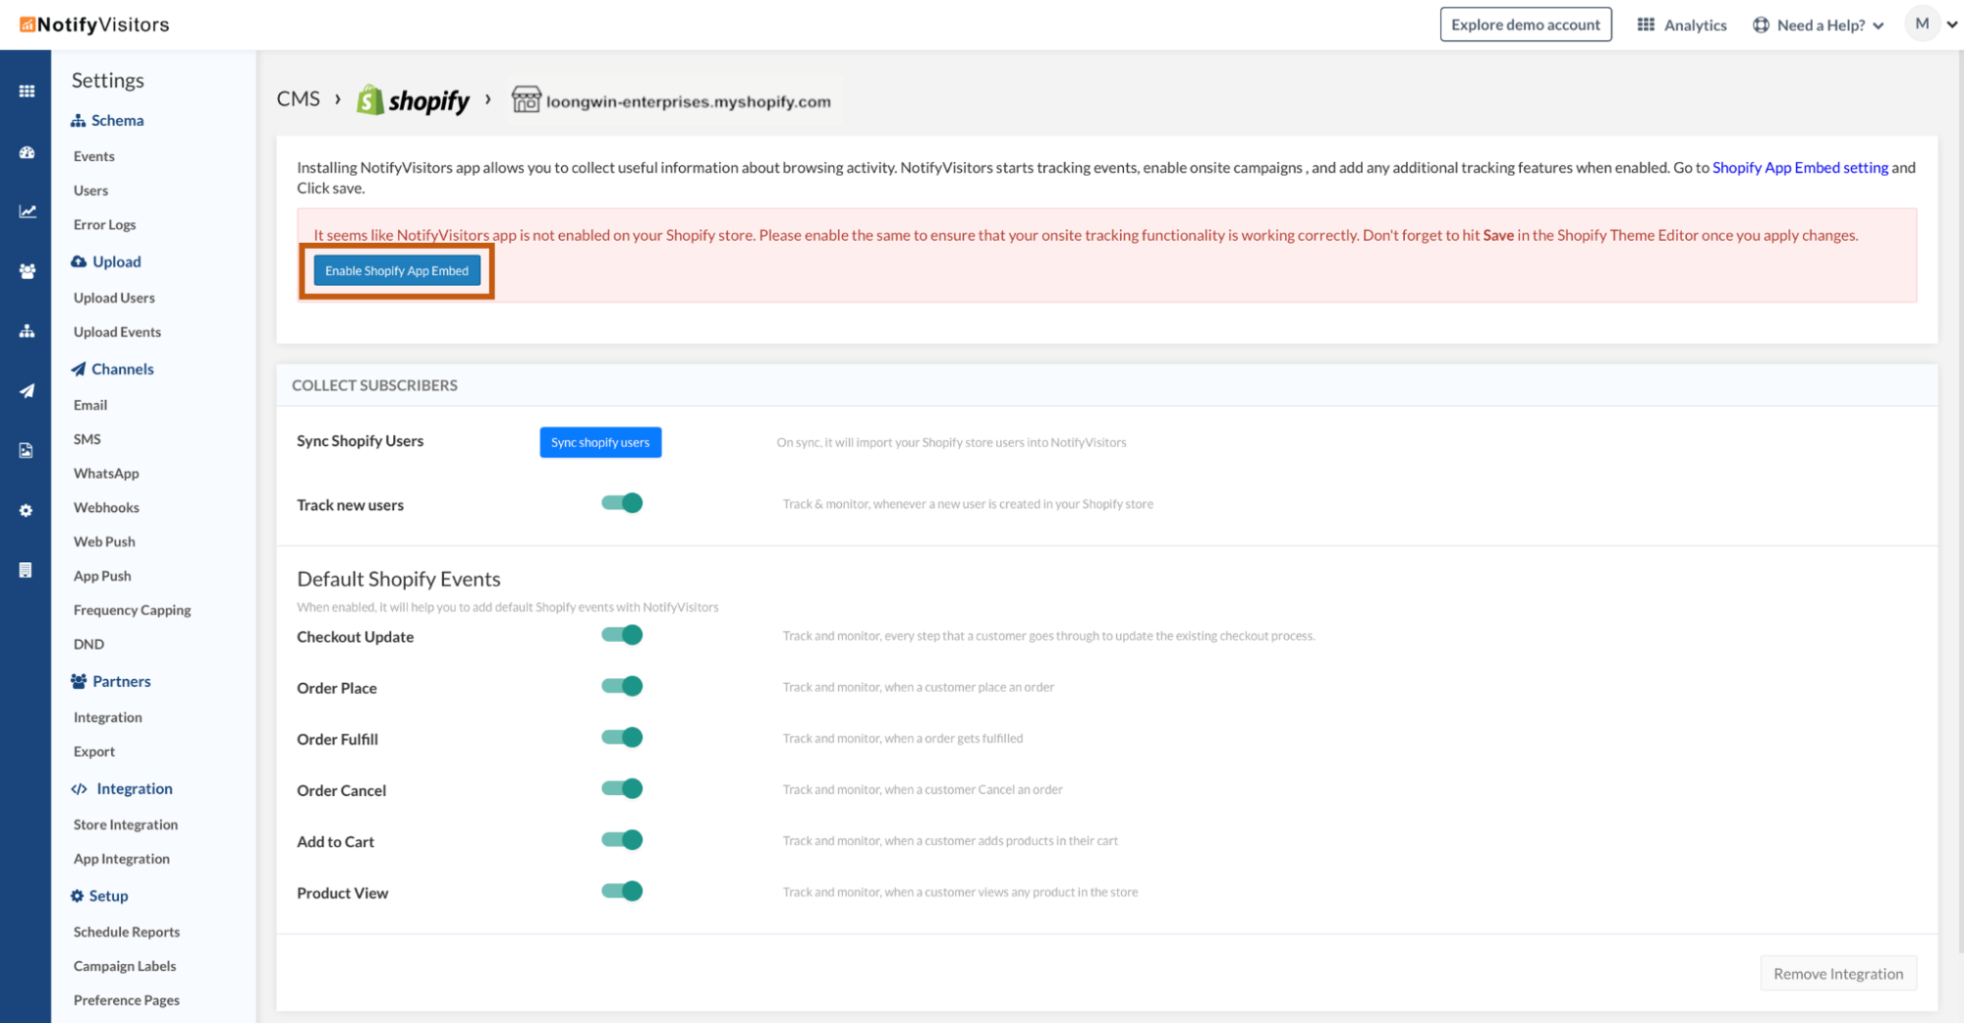
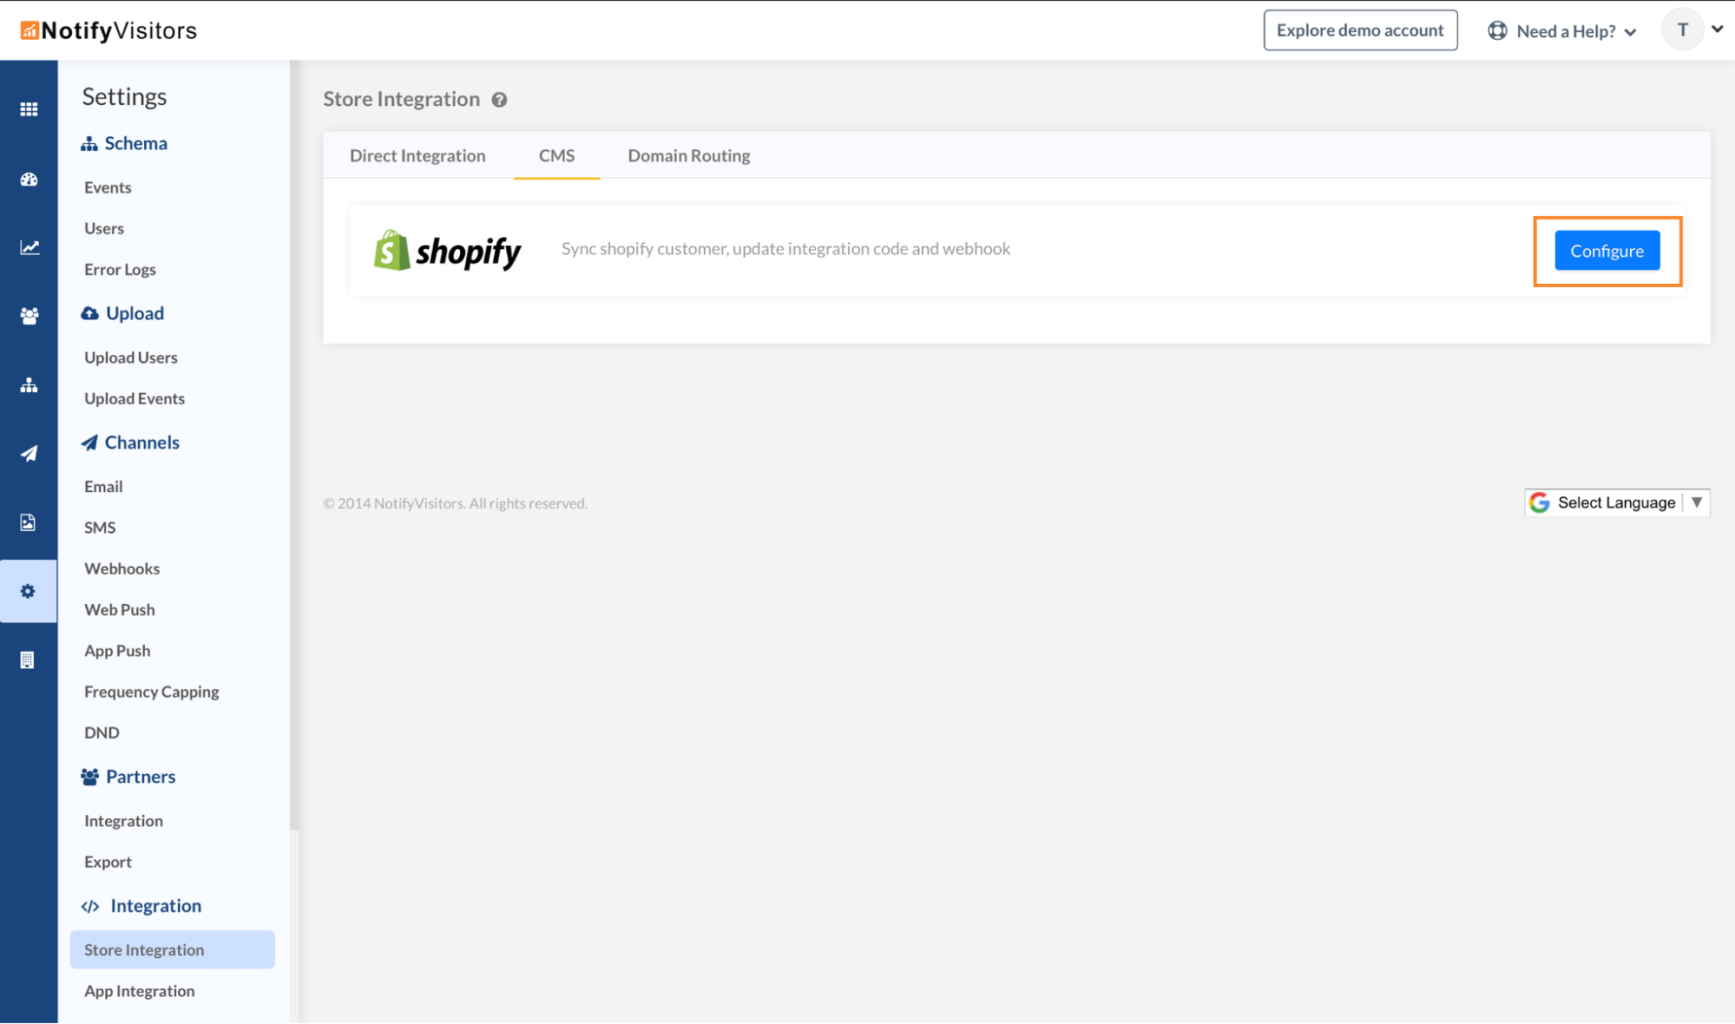
Alternatively, if you have closed the popup or wish to enable the extension later, you can access it from the settings menu. Go to "store integration" and select "CMS." Click on the "configure" button and here, you will see that the extension is not enabled. To enable it, click on the "enable shopify app embed" button, and you will be redirected to your Shopify store. On this page, you will see that the extension is now enabled. At last, click on the “save” button.
And that's it. Your Shopify store is now successfully integrated.
Method 2: Connecting the store directly from NotifyVisitors.
This alternative method allows you to connect your Shopify store directly from NotifyVisitors website.
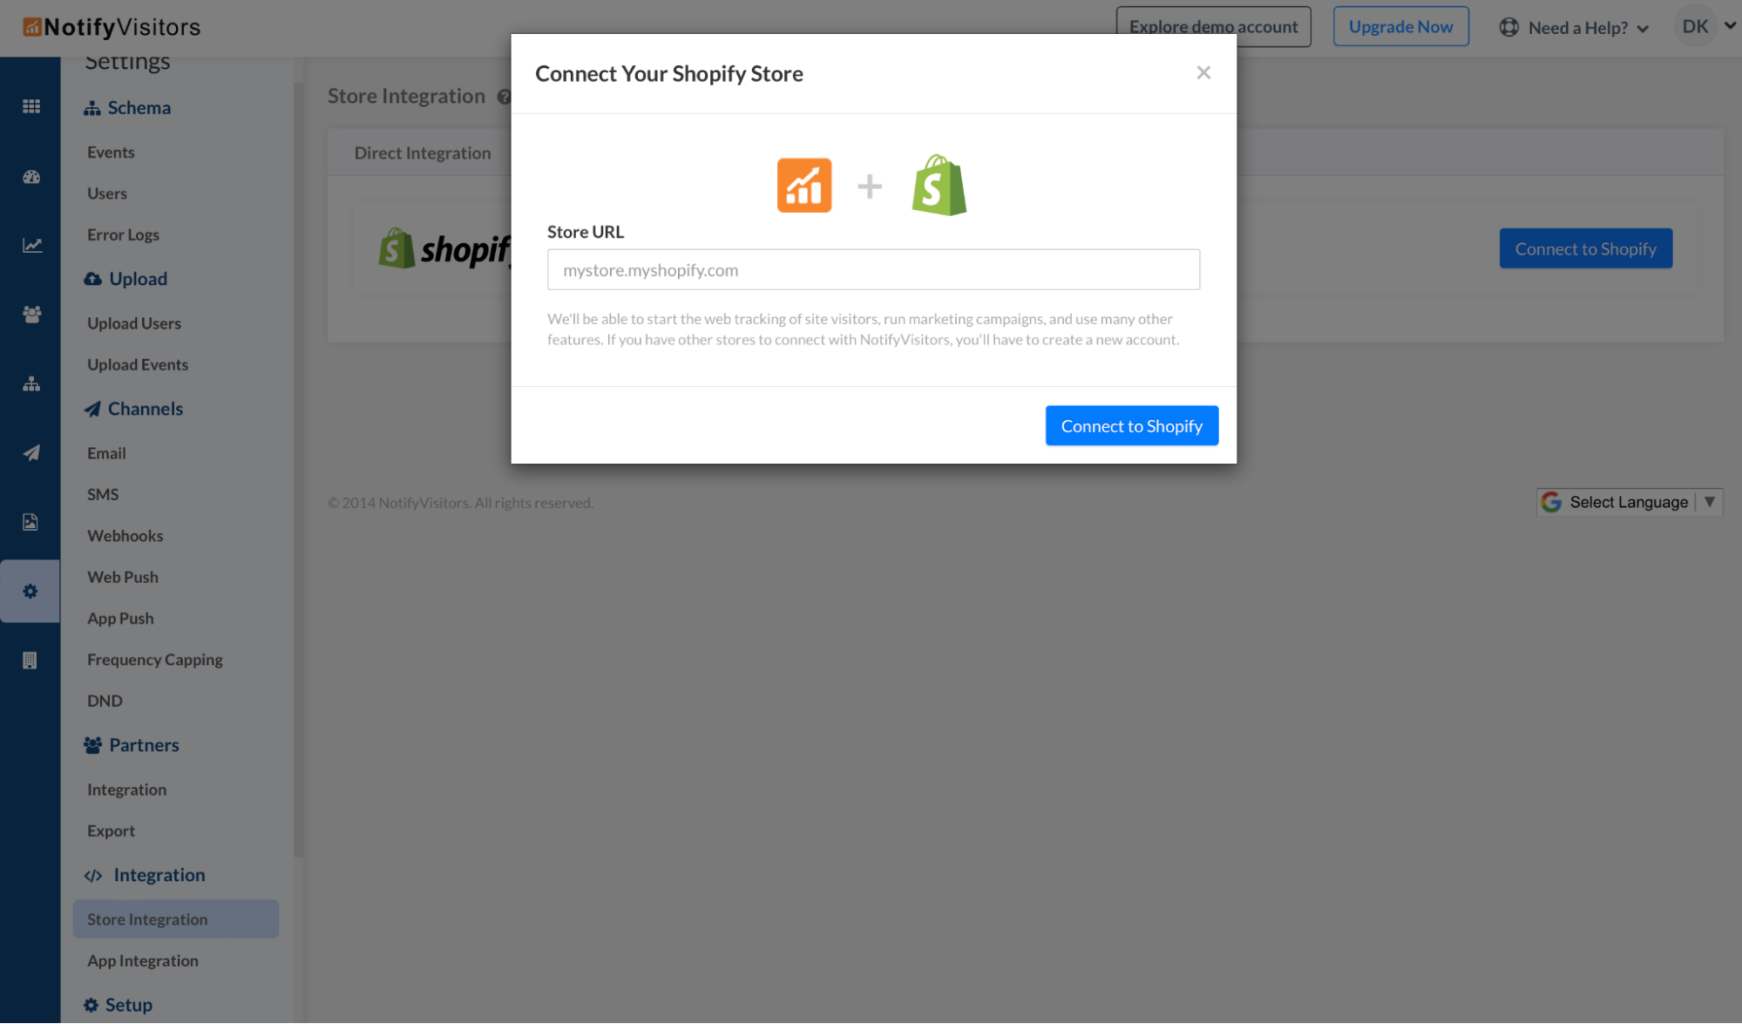
1. If you are an existing user, navigate to the settings menu and select the Store Integration option. Then, click on the “CMS” option and select the option to 'Connect to Shopify'. Enter your store URL and click the "Connect to Shopify" button to complete the process.
You will then be redirected to the Shopify App Store. Follow the same process as before - click on "Add app," review the information about data integration if desired, and click "Install app." Finally, you will be redirected back to the NotifyVisitors dashboard, indicating that your store is now connected.
Similarly just like before, enable your extension and that's it. Your integration process is now complete.
2. And, if you are a non existing user, simply visit the NotifyVisitors website and sign up for an account. Next you will be offered with two options: Sign up with shopify and Sign up with email.
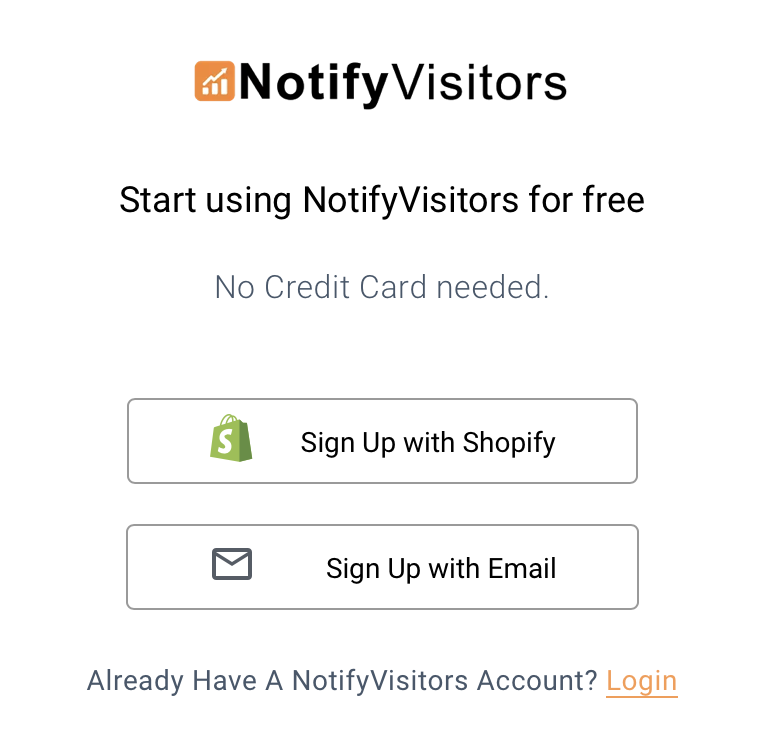
You can sign up with any option you prefer, however signup with shopify is the easiest method for a shopify merchant
a) Sign up with shopify: Click on Sign up with shopify, and you will be redirected to the shopify app store. Next, follow the same process as defined in method 1, i.e, fill in your store URL and login. Next, click on “add app,” review the policy details, and click “install app.”
You will be redirected to NotifyVisitors signup page, fill in your details and click signup. And your store will be connected.
Lastly, click on the "enable shopify app embed" button from the popup that appears on your screen and the extension will be enabled as well.
b) Sign up with email: Alternatively, you can sign up with email, and fill up the required details
and during registration, you'll be prompted to select your platform. Choose Shopify and continue.
This will take you to the integration page, and from here the process is same as defined in method 2.
Start by entering your store URL and then click on 'Connect to Shopify'. Next, click on “add app,” review the policy details, and click “install app.” Once connected don't forget to turn on your extension like earlier.
How To Sync Shopify Contacts With NotifyVisitors?
Synchronizing contacts allow you to seamlessly share all your existing user data to NotifyVisitors.
To sync Shopify user data with NotifyVisitors,
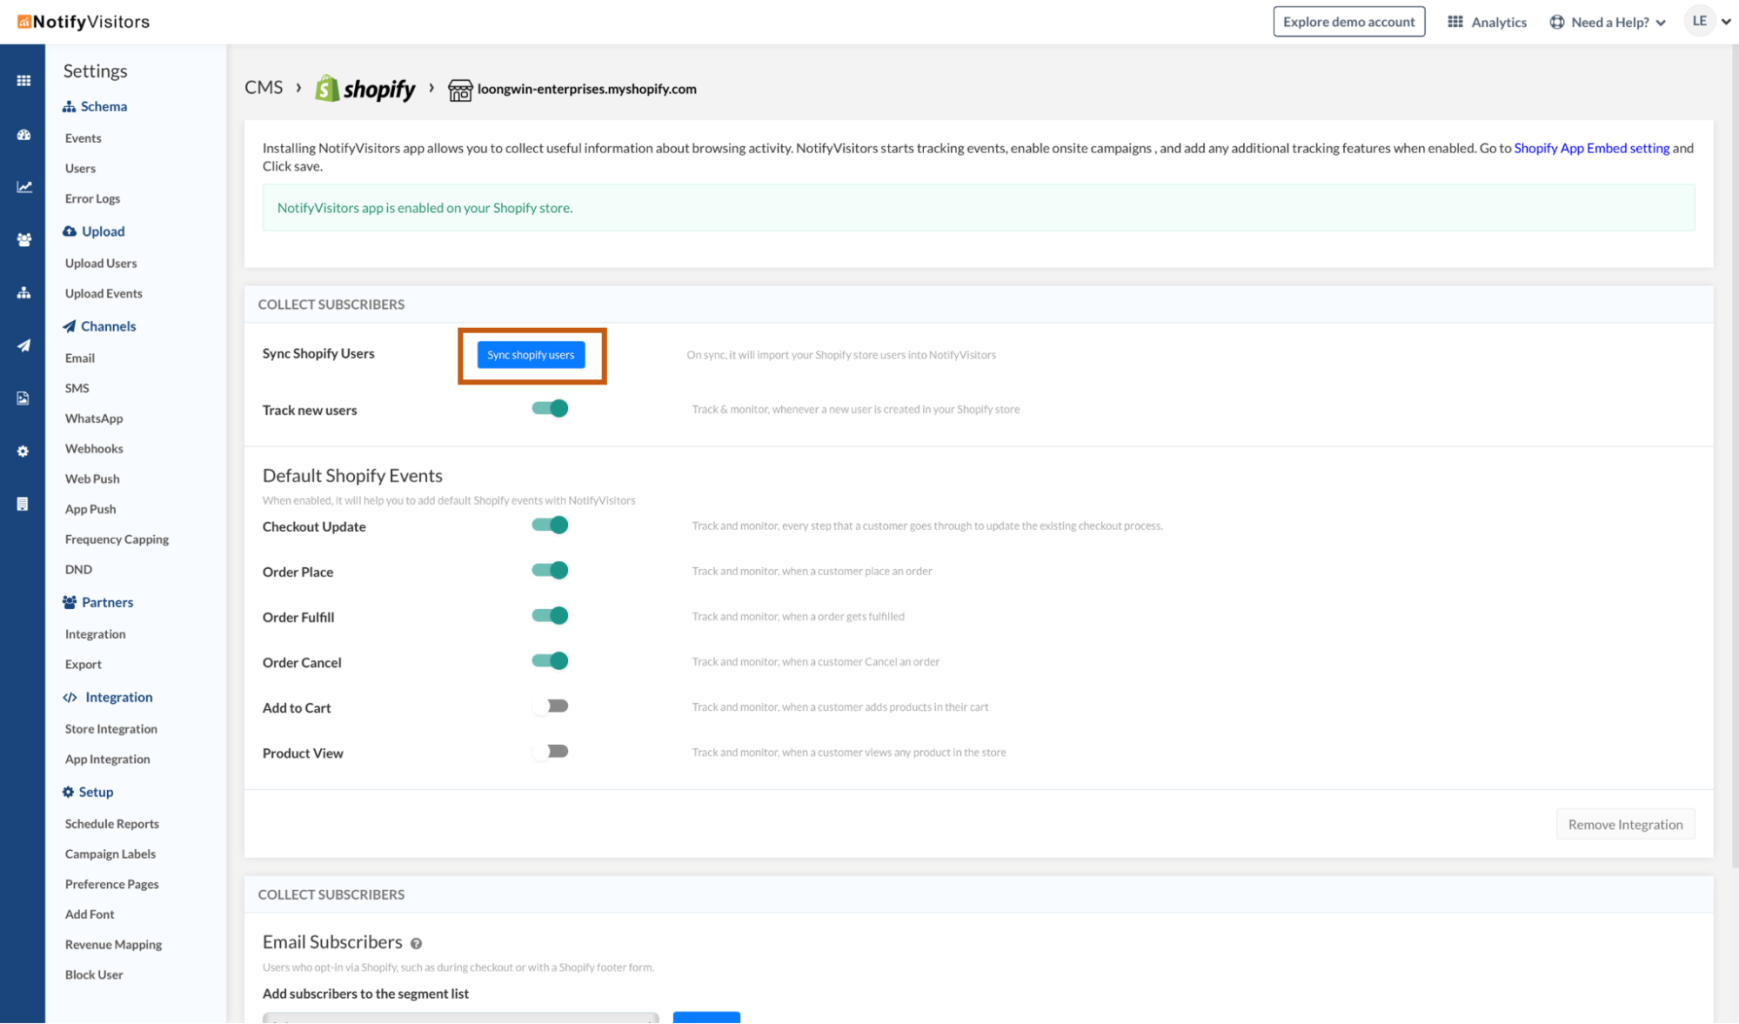
Step 1: Click on “Settings” from this left menu, then Store integrations. On this page click on “CMS.” Once your Shopify store is successfully connected, you'll notice that the "Connect to Shopify" icon has changed to a "Configure" icon.
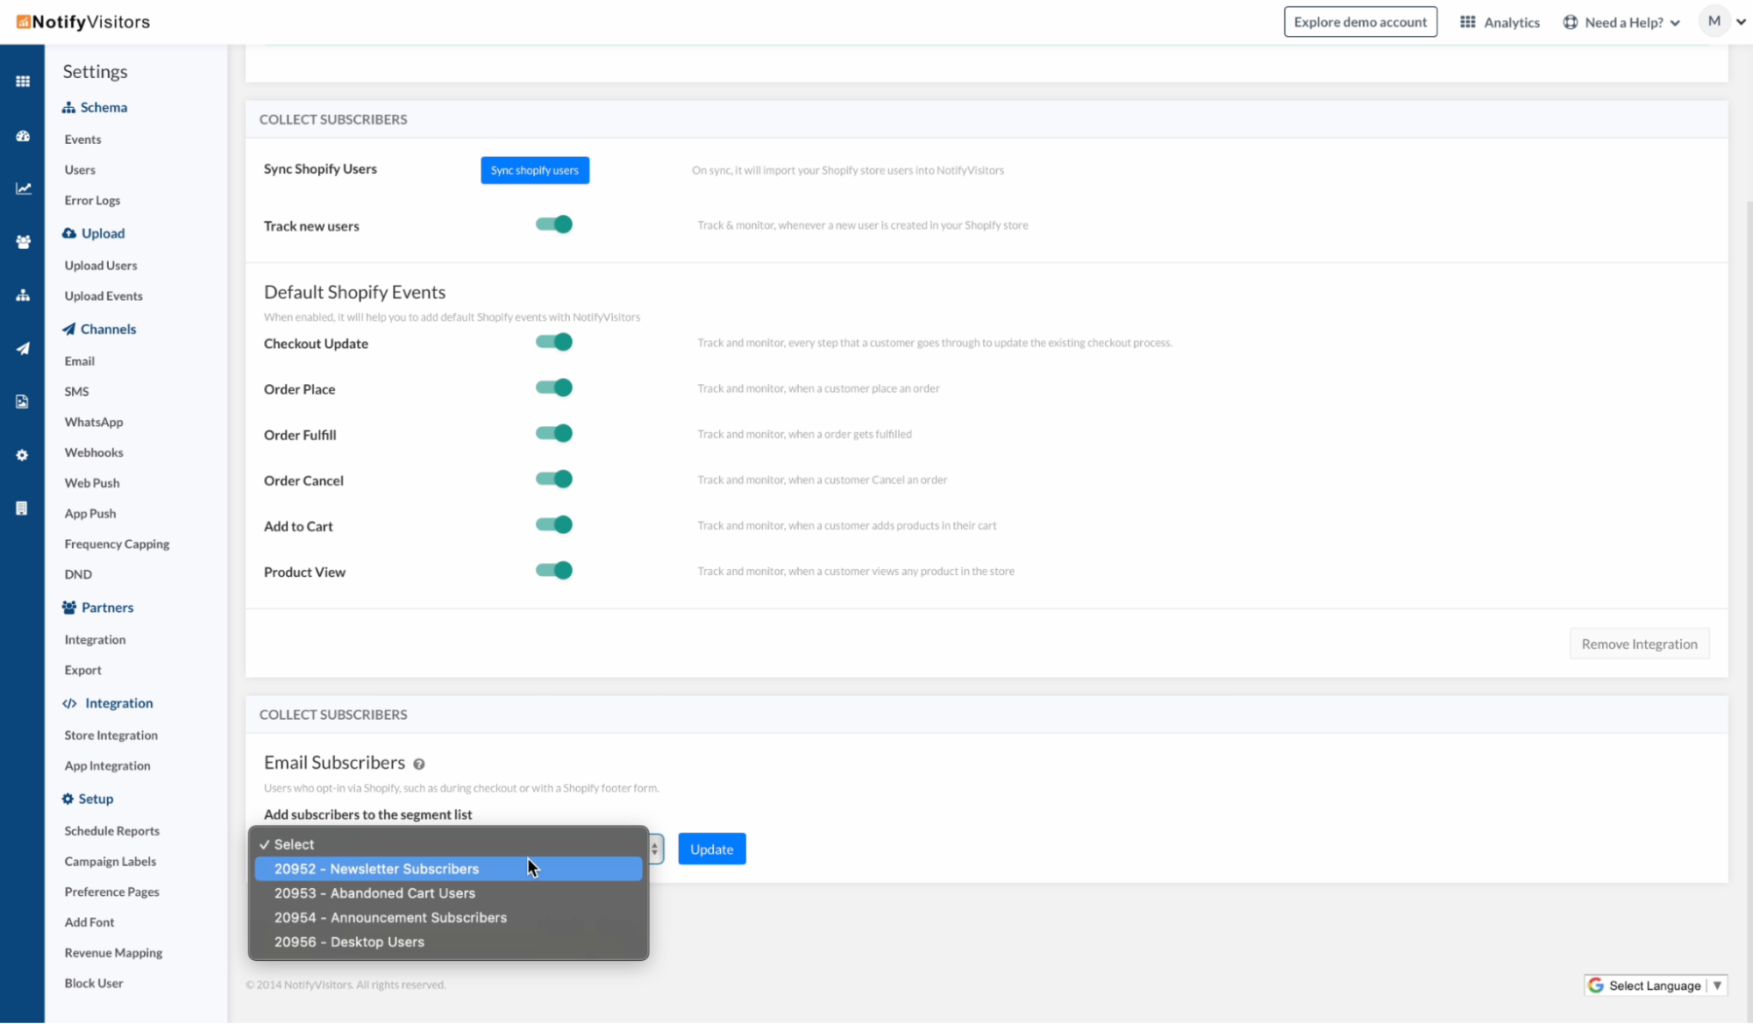
Step 2: Click on this "Configure" icon, and on the next page you will notice a collect subscribers section at the bottom. With this, you can gather email subscribers from your website to a Newsletter segment and launch a personalized welcome series for this list. To do this, simply select a segment list from the drop down menu and then click "Update" to start adding subscribers to the list.
To know more in detail kindly check out our article “Shopify: Sync And Collect Email Subscribers In A Newsletter Segment.”
Also, on this page you can turn on/off the options depending upon the data you want to sync, and once all done click the "Sync Shopify Users" option.
Step 3: After clicking on "Sync your Shopify Contacts", your shopify’s user data will start synchronizing. You can monitor the progress of the synchronization process by navigating to "Settings" and then "Upload Users." The status will change to "Success" once the data has been fully synchronized.

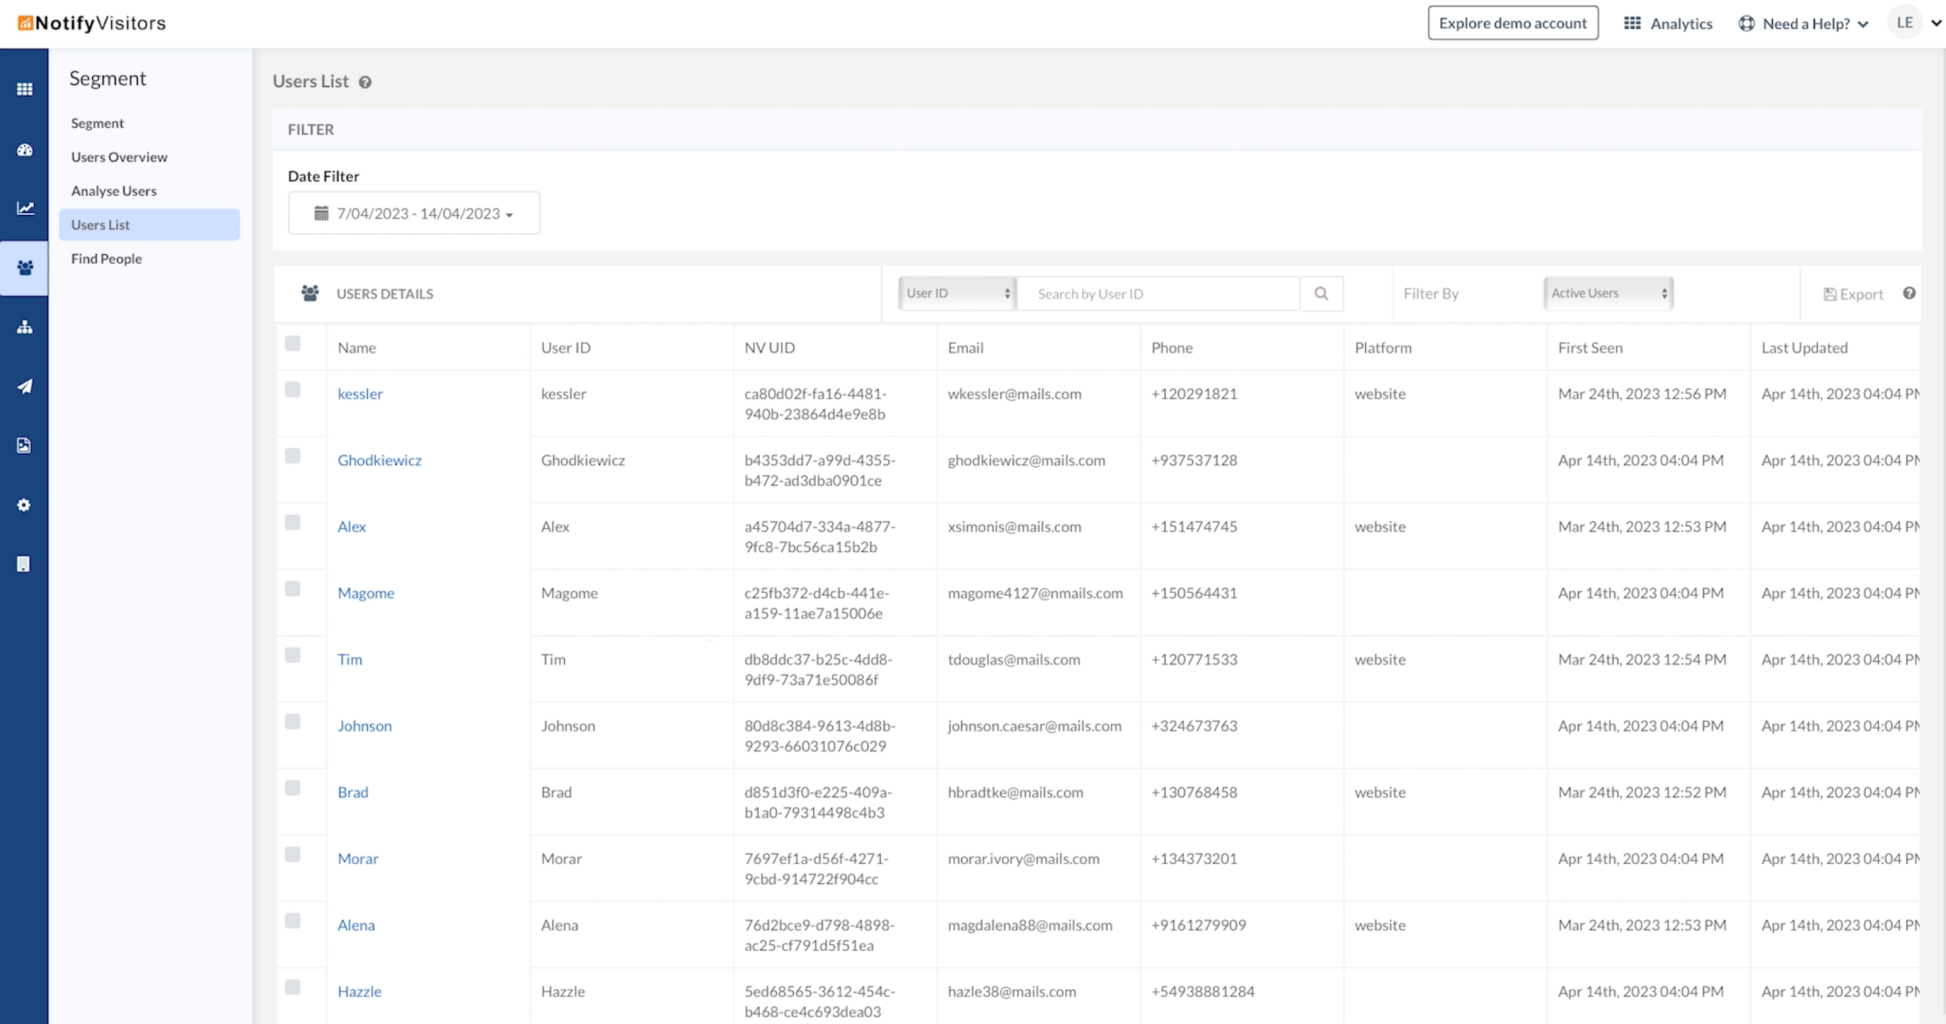
Step 4: To view your synchronized Shopify users, go to the "Segments" section, and then click on "Users List". Here, you will find a comprehensive list of users whose data has been successfully synchronized with NotifyVisitors.
Wrapping Up
Integrating NotifyVisitors into your shopify store can easily be achieved through a few basic steps.
With the help of NotifyVisitors, you can monitor user activity, create personalized consumer journeys, and communicate with them in real-time, ultimately leading to an increase in business growth and an enhancement of the overall customer experience.
Updated over 2 years ago