Android Integration
Configure FCM's Sender ID and Private Key
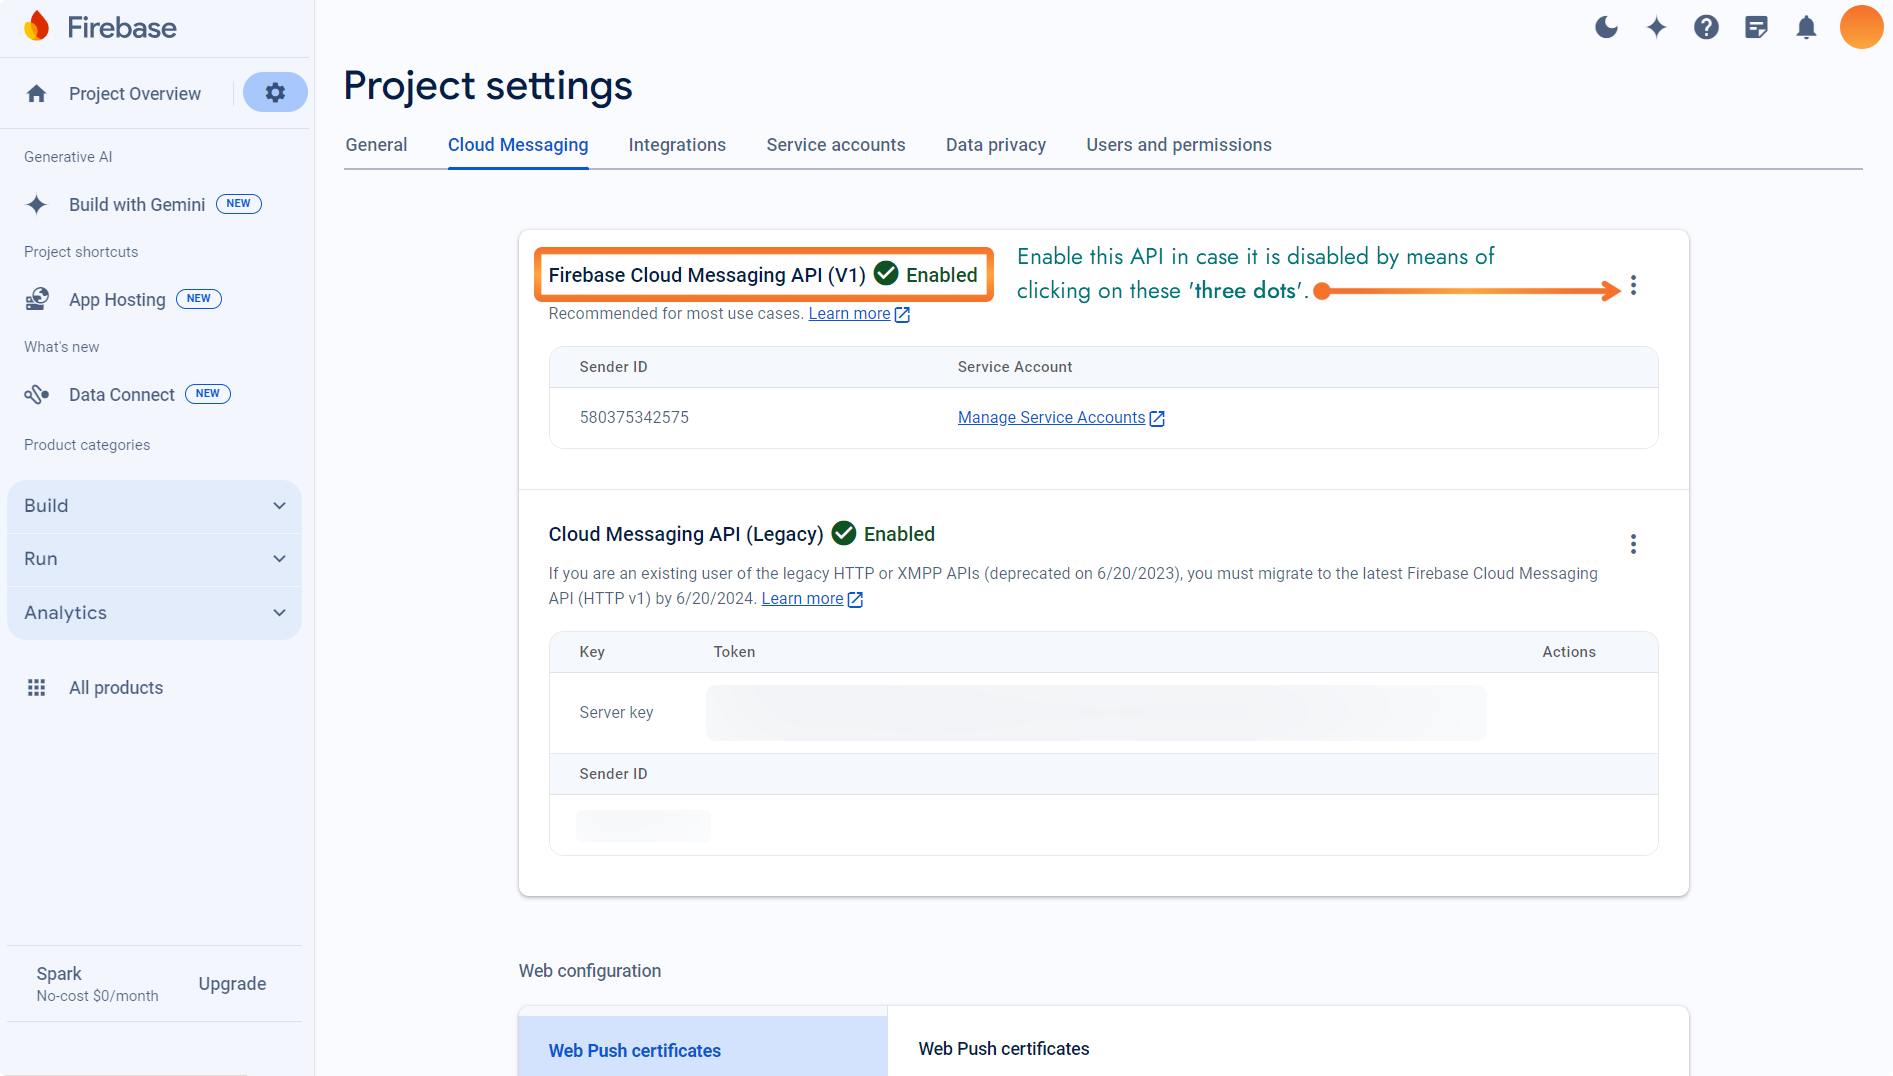
Select the 'Cloud Messaging' tab to find out the 'SENDER ID' for FCM.

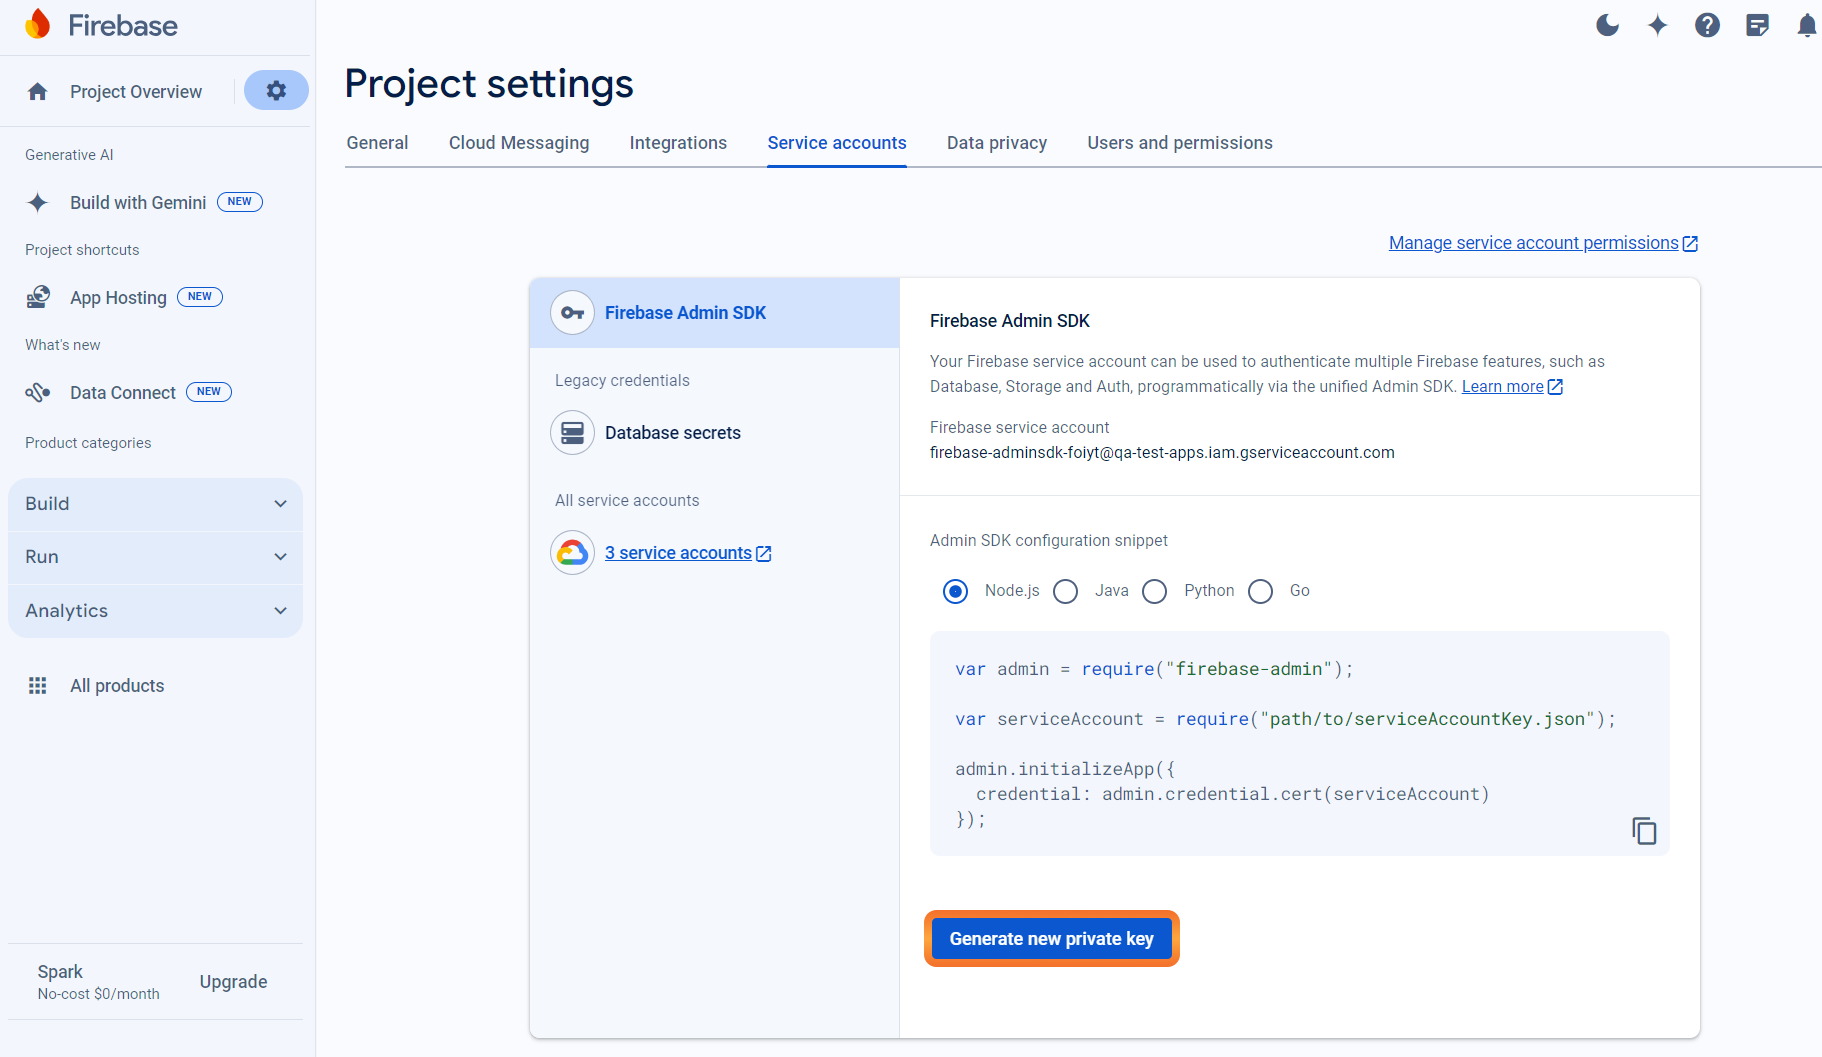
Select the 'Service Accounts' tab to generate 'PRIVATE KEY' for FCM.

Click on the 'Generate new private key' button. This will download a JSON file. Refer below for sample JSON file format.

Store this JSON file on your system.
Login to your NotifyVisitors Account.
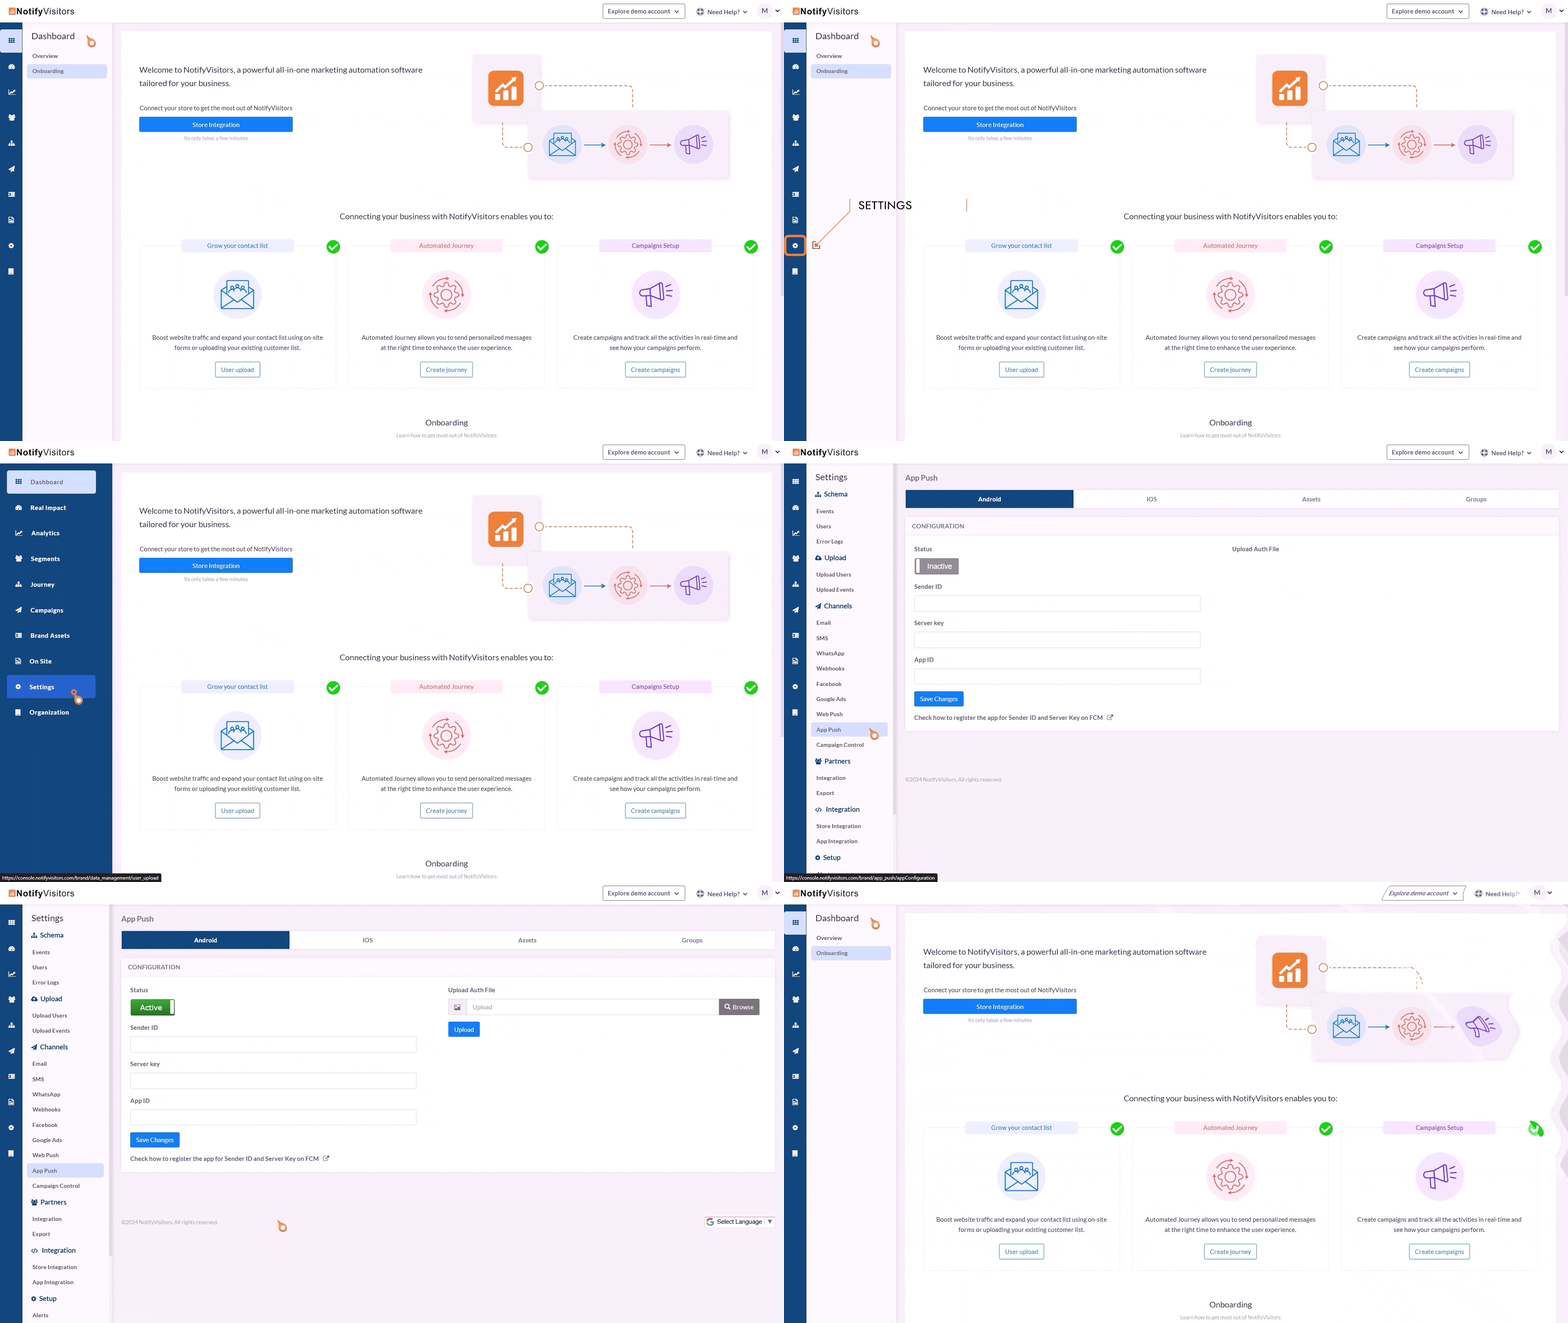
Navigate to Settings > App Push > Android tab.

Upload your downloaded private key JSON file in the 'Upload Auth File' section.
Add 'Sender ID' from your 'Cloud Messaging' section.
Add 'App ID (project ID)' from your downloaded private key JSON file.
Save the changes i.e., click on the button titled 'Save Changes'.
Push Notification Icon
Create a monochrome png icon and the size must be 200×200. The name of the icon should be sm_push_logo.png Paste into your-project/android/app/src/main/res/drawable/.
Note
In the case of Cordova Integration, keep this icon in your project root folder
Configure NotifyVisitors Credentials
The below configuration is supported till plugin v4.0.1.
/* Open the app Config.xml file and paste the below code */

/* Under Android Platform Section */
<config-file parent="application" target="AndroidManifest.xml">
           <meta-data android:name="notifyvisitors_bid" android:value="5499" />
           <meta-data android:name="notifyvisitors_bid_e" android:value="DAXXXXXXXXXXXXXXXXXXXXXXXXX" />
</config-file>
From plugin v4.0.2 onwards use the below configuration,
<platform name = "android">
        …………………
        <config-file parent="plugins/cordova-plugin-notifyvisitors/src/android/NVAppication.java" target="plugins/cordova-plugin-notifyvisitors/src/android/NVAppication.java">
            <preference name="notifyvisitors_bid" value="XXXX" />
            <preference name="notifyvisitors_bid_e" value="XXXXXXXXXXXXXXXXXEXXXXXXXXXXXXXX" />
        </config-file>
        …………………
</platform>
Note:
In the above example, dummy Brand ID and Encryption keys are shown. Kindly login to your Notifyvisitors account to see your credentials.
Updated 10 months ago
