Import User Data
OVERVIEW
You can import the user data who visits your website or engage with your campaigns. Simply convert their existing data into a CSV file format and upload it. You need to follow certain guidelines to avoid any kind of discrepancies.
Understand User Profile Data
The user profile data comprises all the information regarding your users such as their names, date of birth, email id, etc. The attributes that are already defined by NotifyVisitors are system attributes such as the last_name, or email of the users. Another set of attributes is custom attributes. You can add the custom attributes(age, score, membership Id, and place) while uploading the CSV file.
Your CSV file is a mix of system and custom attributes.
While uploading a CSV file, you need to define the system attributes and custom attributes. Also, define their corresponding data types.
Prerequisites of CSV file
Your upload will only be successful if your file complies with the CSV standards.
-
The size of the file should never exceed 50 MB.
-
Your file must have a unique user id for every user.
-
The attribute values shall be of the following data types :Boolean, integer, string or array.
Steps to upload CSV file in NotifyVisitors
How To Access
To upload users using a CSV file, navigate to the settings section and select “Upload Users.”
.jpg")
Uploading CSV file
Next, click the “Upload / Create User Data” button to upload the CSV file.
.jpg")
Choose the file that you have created manually.
.jpg")
Once you upload the file, define its variables :
-
CSV column : These are the attributes that you created in the excel and uploaded as a CSV file.
-
Data type: Select the data type for the attributes that you have uploaded, whether they belong to string,
integer, Boolean or array category. -
Operation : You can use the following operations on profile properties :
a. set : You can use this operation to replace the current value in any user attribute.
b. delete : This operation will be used to delete any user property, for example you can remove the
property, email and all the values in it.c. increment : The following operation will enable you to increase the integer property.
For e.g. Lifetime Value.d. decrement : Decrement will allow you to decrease the value of integer property.
e. add : Add will help you to add multiple values in the array property, for example, if you will pass
"abcd,qwer" in excel, both these values will be merged to the existing values of the user.f. remove : This operation will remove the multiple values in the array property
-
Attributes : Map the CSV columns with the attributes that are already configured in the system. You can
create a custom attribute as well from here, if it is not present in the list. You can scroll down from the
drop- down menu and create a custom attribute and save it.
.jpg")
Once you define all the attributes and their values, click on the next button.
Upload now or schedule for later
In the next window, you’ll see an option to choose a segment for your upload. Here, you can decide whether you’d like to upload the file immediately by selecting “Upload Now” or schedule it for a later time by choosing “Upload Later.”
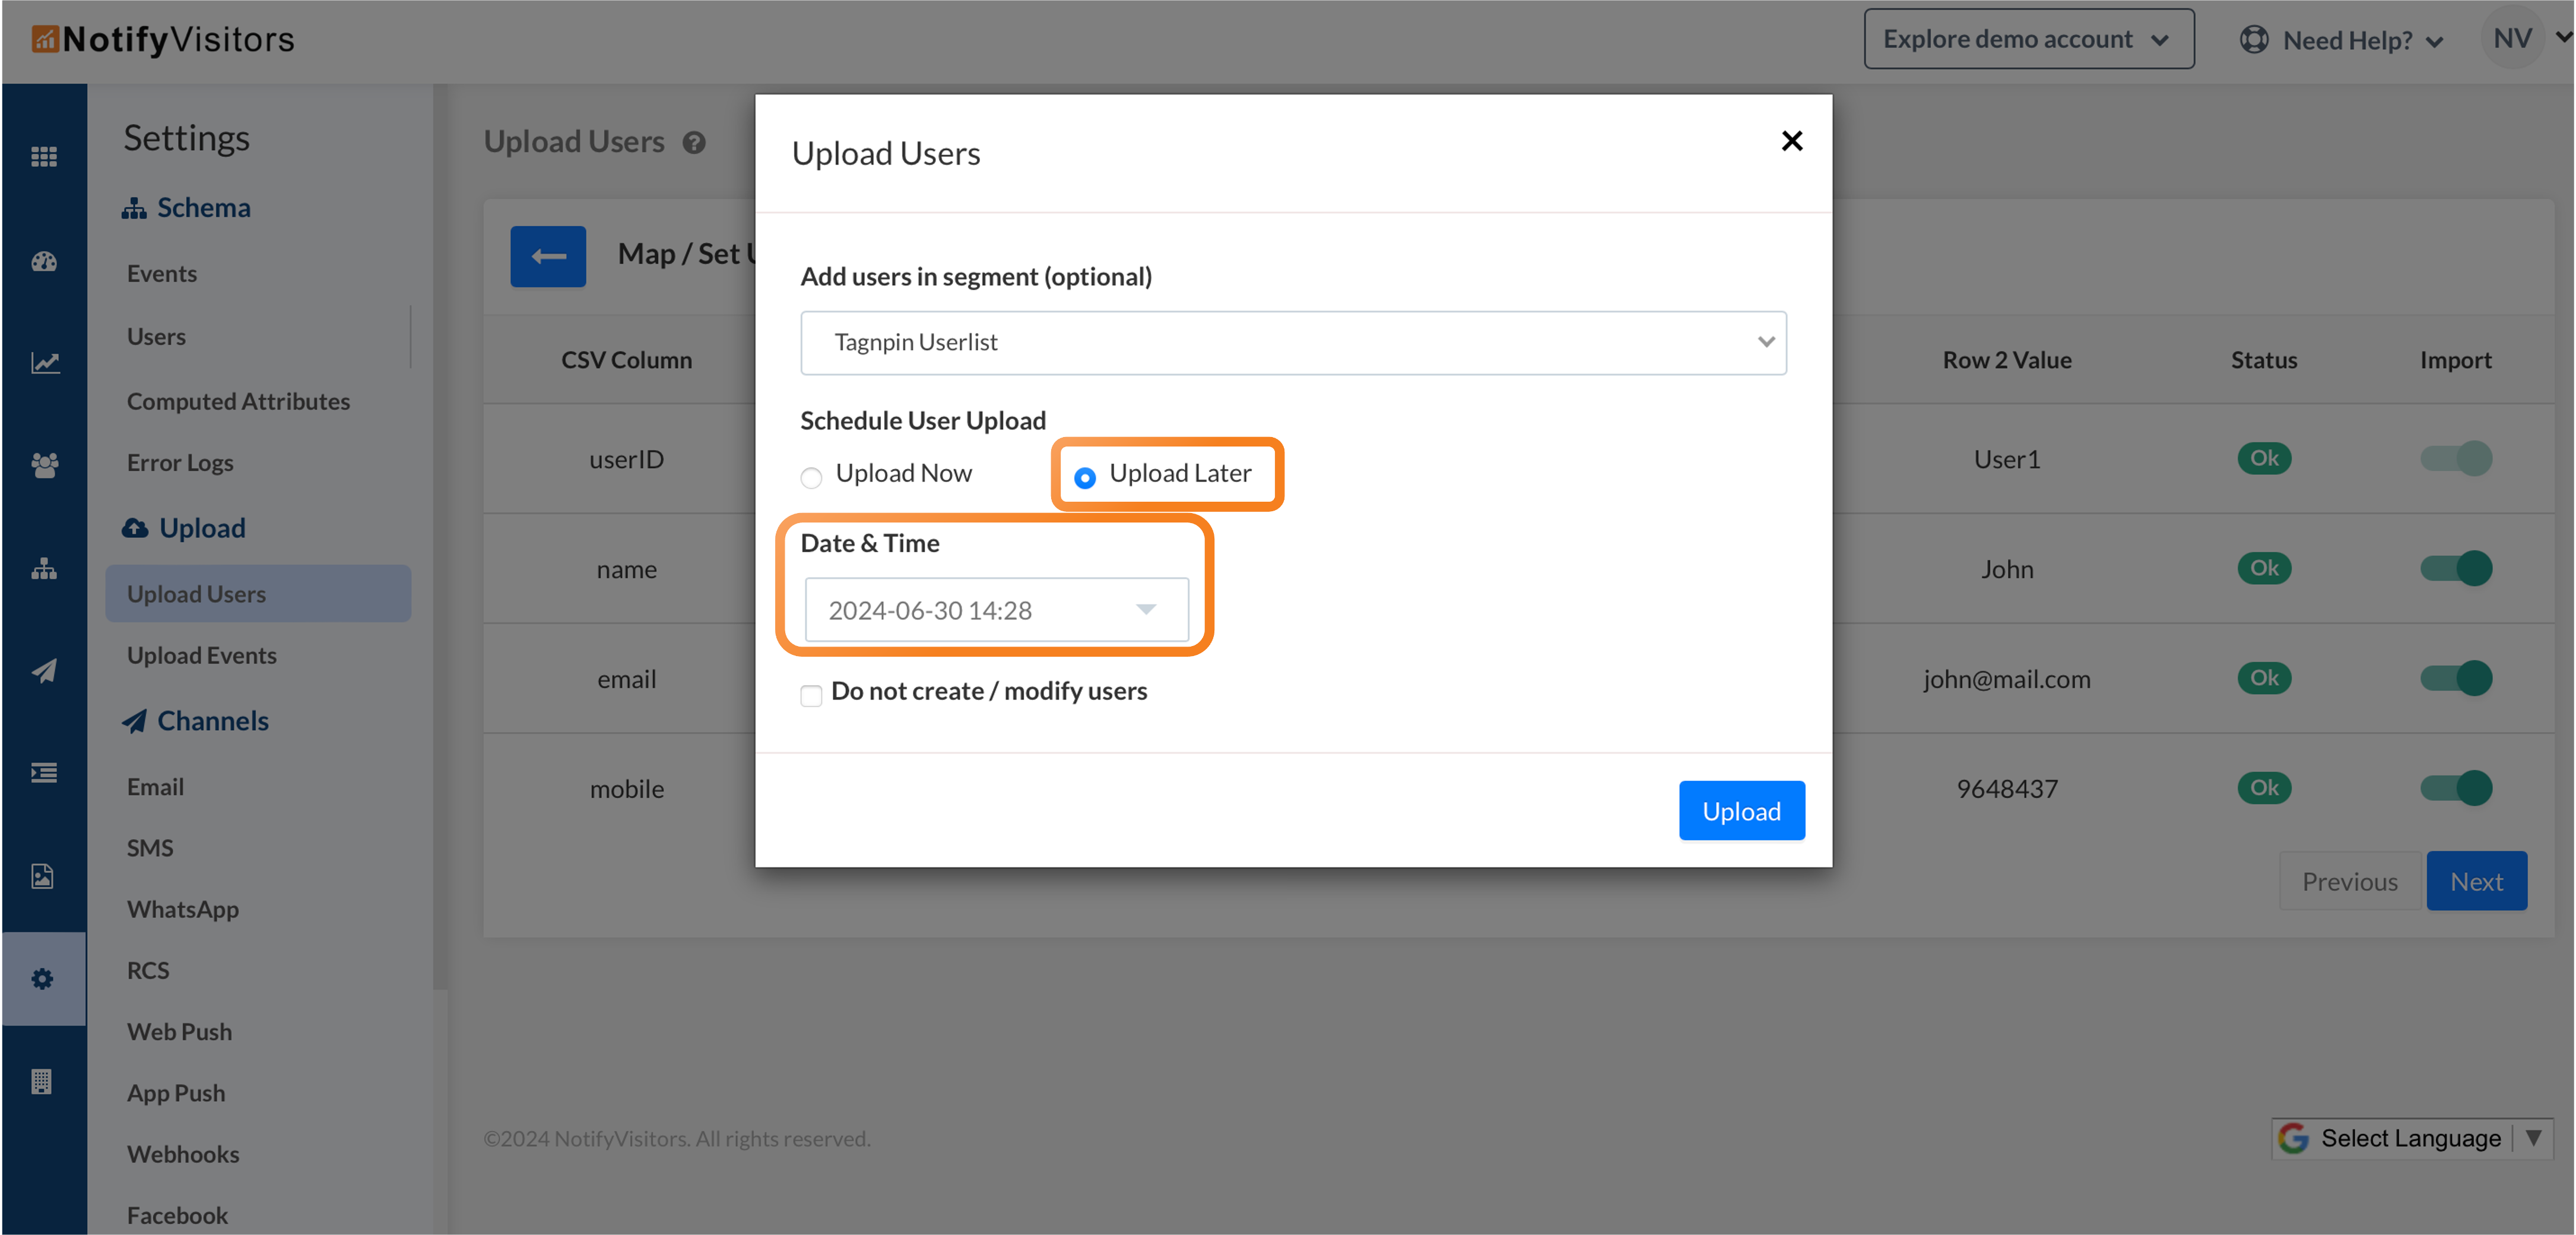
By clicking on the upload later button, a scheduler will open, allowing you to specify a date and time for the upload within the next seven days. After setting your preferred upload time, click the upload button to confirm.
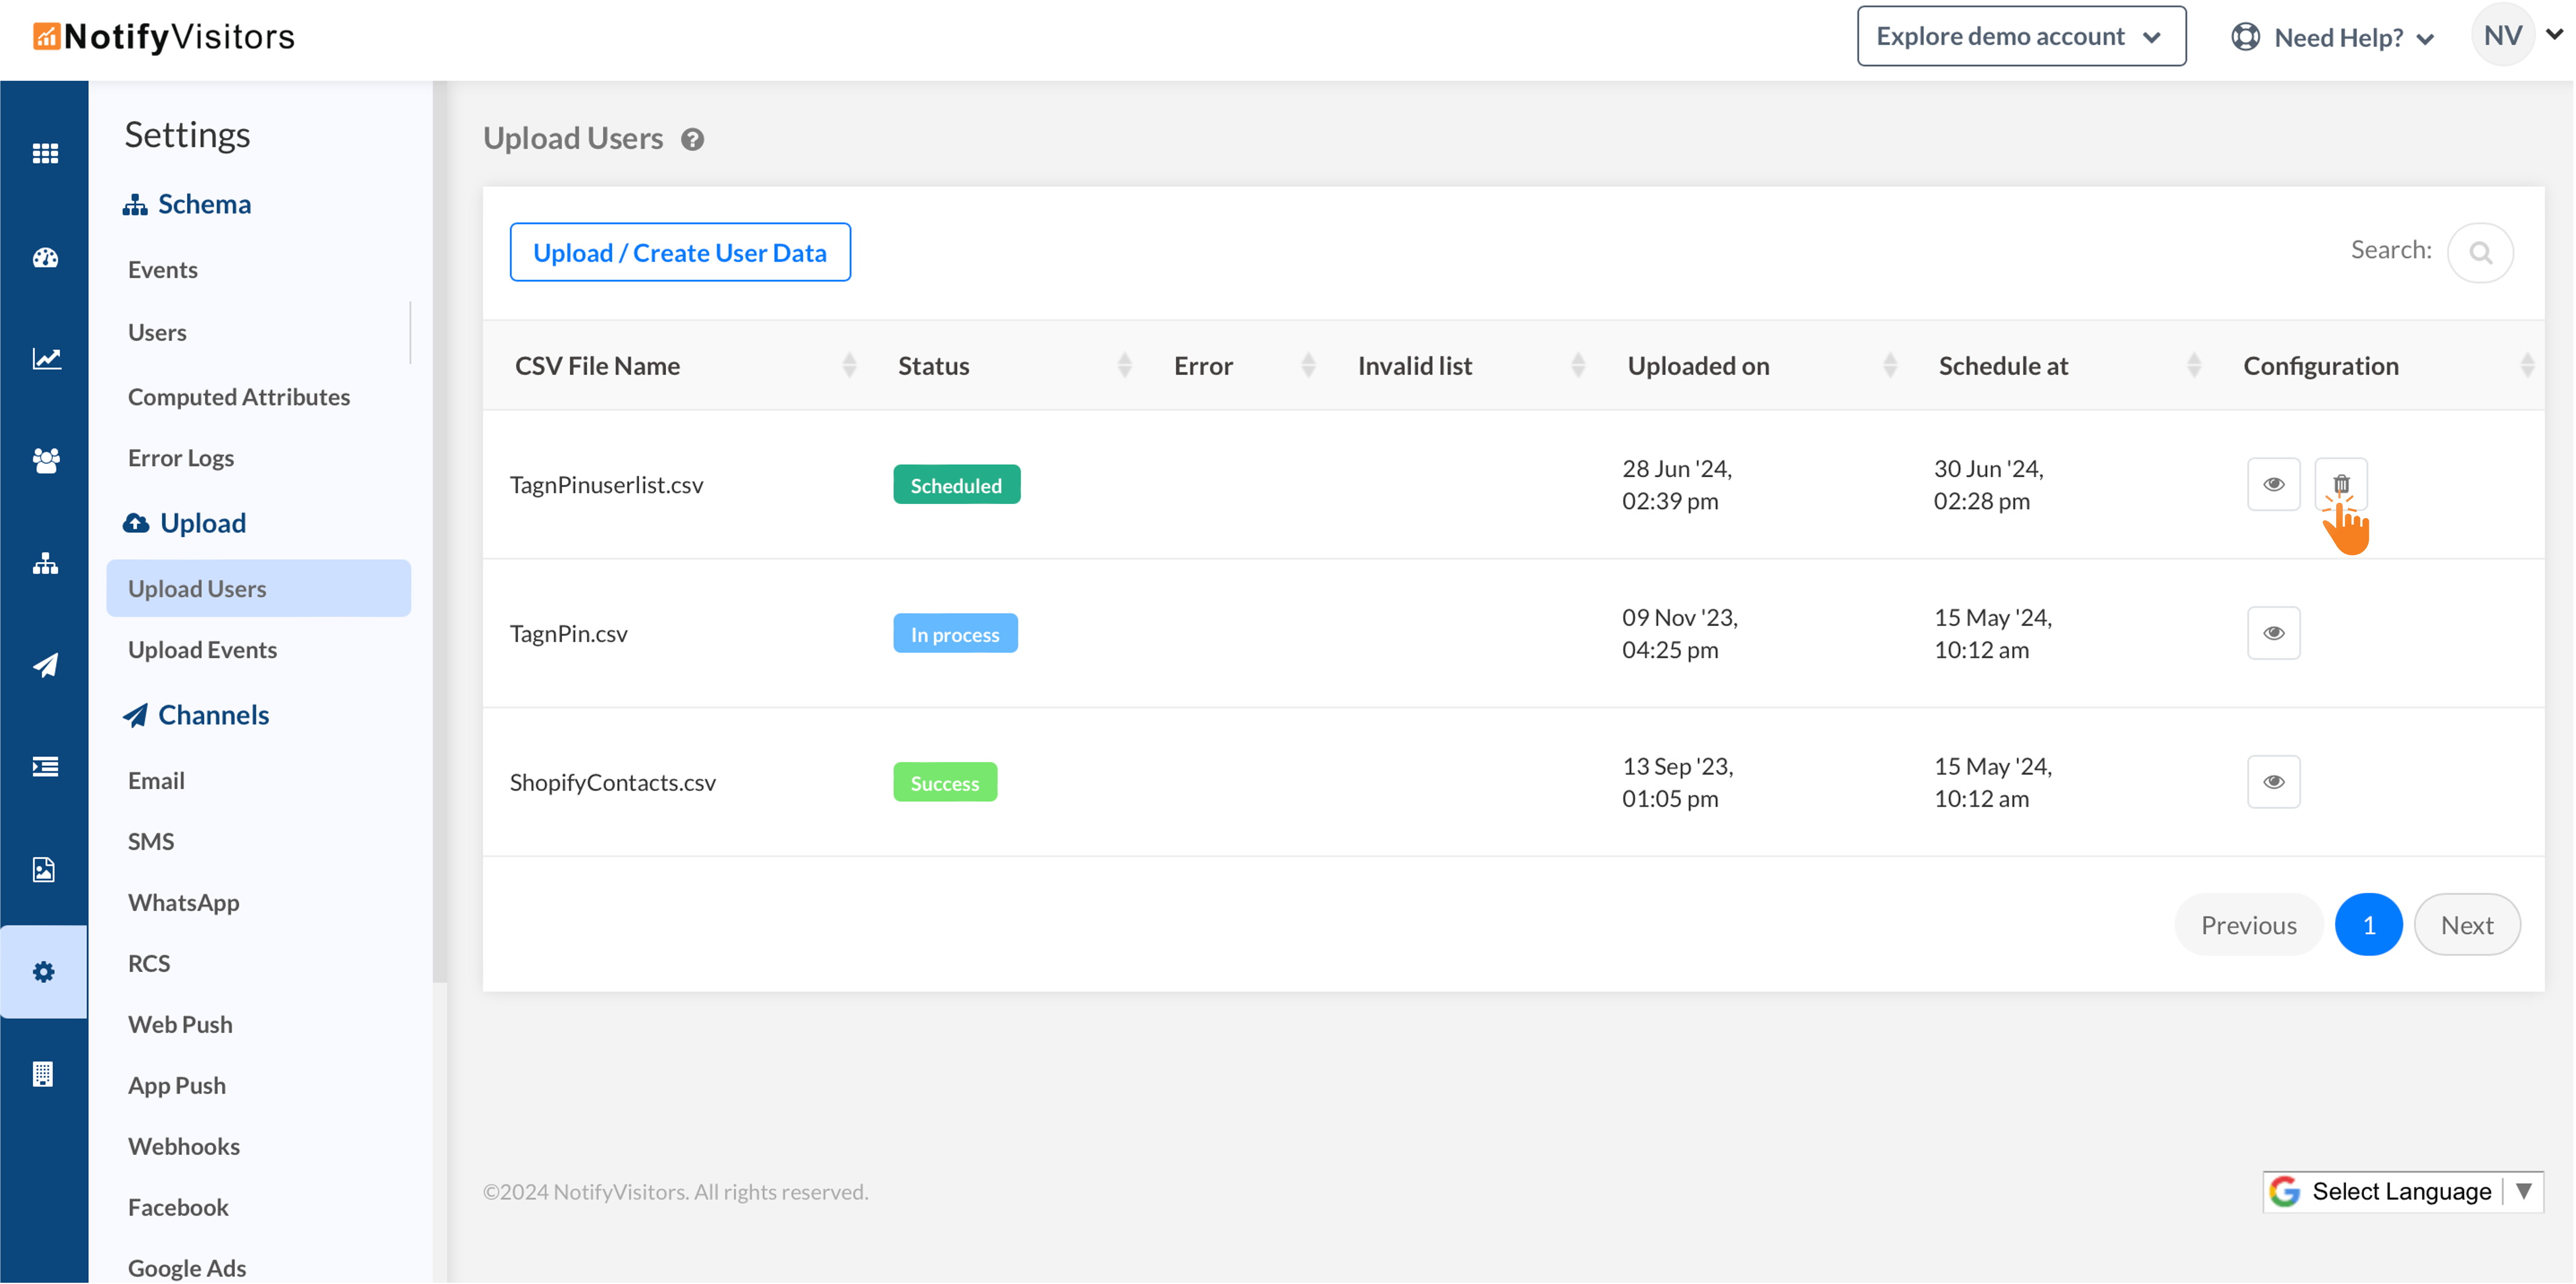
Status of the CSV file
You can check the validation of the uploaded file through the following statuses:
-
Error : Error status signifies the fault in the file that you have uploaded. If you have left any row empty while creating the file, it will show the error status.
-
Success: The following status shows that your file has been successfully uploaded.
-
Scheduled : The scheduled status signifies that the file you uploaded is still in process of being uploaded.
.jpg")
Cancel Schedule
If you need to cancel the scheduled upload before it occurs, simply go to your scheduled user list and click the delete button next to the file.
Validate Uploaded Users
You can view the uploaded users and their attributes by navigating to the SEGMENTS > USERS LIST section.
.jpg")
Updated 12 months ago