iOS Integration
Push Notification
1. Configure in NotifyVisitors Panel
a. Generate APNS Auth Key or APNS Certificate from Your Apple Developer Account:
You need to upload either “APNS Auth Key (recommended)” or “APNS Push Certificate” and some details from your Apple Developer Account into your notifyvisitos. For assistance to generate one of these certificates you can refer to the one of the following doc but we recommend you to use APNS Auth Key instead of APNS Push Certificate because it expires every year and you need to renew and reupload it each year.
b. Upload APNS Auth Key (.p8) or APNS Certificate (.pem) file in Notifyvisitors Account:
- After completing the previous step (a) you have either a .p8 file (recommended) or a .pem file (make sure to use the correct .pem file as described in the documentation because you will generate 3 different .pem files in that doc.). You need to upload this file in your NotifyVisitors account.
- Goto your NotifyVisitors panel and under any one of Analytics Product and now from the left side menu goto Settings >> App Push (under Channel section) >> iOS tab.
- Now make sure status should be Active if not make it active state.
- Select your “Authentication Type” as per the file created in the step (a). If you have created APNS Auth key (i.e. .p8 file) then select APNs Auth Key but if you have created APNS Push Certificate (i.e. .pem file) then select APNs Certificate option.
- Provide the others details as shown on this page from your Apple developer account and click on Save Changes button after providing the details. Make sure the given details must be correct and case sensitive so if details are mismatched then push may not be delivered to the device.
- Upload the .p8 file if you have selected “APNS Auth Key” or upload the correct .pem file (as described in doc) if you have selected the “APNS Certificate” option as created in previous steps.
- Now you can go to your app and configure push notifications as described in next step and after that step you can come back to your panel to create and send push notification from NotifyVisitors panel to your iOS devices.
2. Configure in your App
After completing the above Configure in Notifyvisitors Panel part, you need to configure the following steps in your app which includes Enabling the Push Notifications Capability and Configure Notification Service Extension in order to complete the push notification integration process. Let’s discuss each step one by one in detail.
First, go to your Cordova Project Root Folder >> platforms >> ios and open your iOS project in Xcode by double clicking on the .xcworkspace file and once your project is opened in Xcode, simply follow the steps mentioned below:
a. Configure Push in SignIn and Capabilities:
Select your app's main target, next go to the Signing & Capabilities tab, click on + symbol present at the left corner of the tab, then add Push Notifications.
Alert
In case you upgrade Xcode and Push Notifications was already added in its previous version then remove the Push Notifications. Then add Push Notifications once again to configure it properly for the upgraded devices.

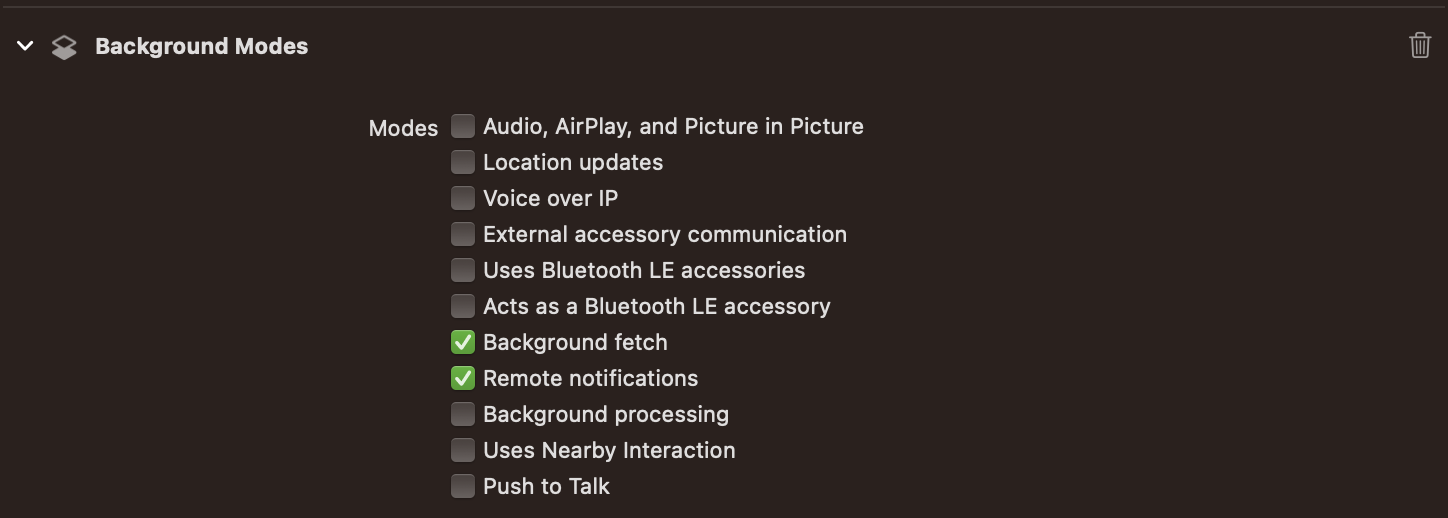
Again in the Signing & Capabilities tab if “Background Modes” is not already added then click on the + symbol again and add Background Modes make sure to select 2 checkboxes. If it is already added then make sure to select 2 checkboxes (i.e. Background fetch, Remote notifications) as shown in the screenshot below.
b. Enable Rich Media Content by using Notification Service Extension:
Till the above steps are completed you will be able to receive only text content (i.e. title and message text) in push notifications and also delivery count can not be tracked in NotifyVistors panel. You need to configure Notification Service Extension along with AppGroup properly to complete Push integration and it will enable your push notification to receive rich media (image, audio or video) and also NotifyVisitors used it to enable you to add Action buttons, badge counts and to track delivery counts in your NotifyVisitors panel.
You need to refer to our Notification Service Extension guide for detailed configuration steps for the same.
Updated 5 days ago