This guide will help you quickly start using our REST API for managing customer data. Learn how to set up, authenticate, and make your first API calls, enabling you to manage user profiles, log events, and harness the full power of our Customer Data Platform.
With NotifyVisitors API, you can -
- Track users and their event activities
- Send personalized campaigns to each user for Push, Email, SMS
- Schedule one time campaigns to targeted segments for Push, Email, SMS
- Retrieve reports for all your campaigns
API Authentication
NotifyVisitors requires a Brand ID and API Key to be included in the header of each API call. Each NotifyVisitors account is automatically assigned a unique REST API key, which remains valid for the account's entire lifetime.
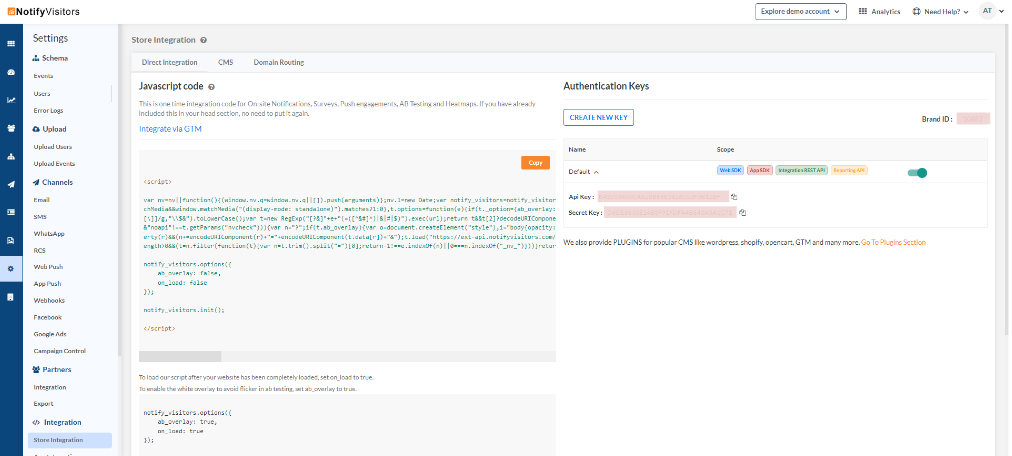
If your API key is accidentally compromised or shared with a third party, you can generate a new key and deactivate the compromised one from the Store Integration section.
curl --request POST \
  --url https://analytics.notifyvisitors.com/api/v1/user/create \
  --header 'accept: application/json' \
  --header 'content-type: application/json' \
  --header 'x-api-key: YOUR_API_KEY' \
  --header 'x-brand-id: YOUR_BRAND_ID' \
  --data '{"nv":[{"userID":"1234"",user_attributes":{name:'John', email:'[email protected]', mobile:'+919899999999'
  }}]}'
Note:
Note:
- Replace YOUR_API_KEY with NotifyVisitors' API key.
- Replace YOUR_BRAND_ID with NotifyVisitors' Brand id .
Getting API Key
Login to the NotifyVisitors account.
Navigate to the Settings > Store Integration section
API Authentication for Partner Apps
As a Partner App, when a client grants access to the NotifyVisitors, an access token is returned. This token must be included as an authorization bearer token in the header of each API call.
curl --request POST \
  --url https://analytics.notifyvisitors.com/api/v1/user/create \
  --header 'content-type: application/json' \
  --header 'Authorization: Bearer ACCESS_TOKEN' \
  --data '{"nv":[{"userID":"1234"",user_attributes":{name:'John', email:'[email protected]', mobile:'+919899999999'
  }}]}'
API Rate Limit
The default rate limits for following API endpoints is mentioned in the table below.
| Endpoint | Rate Limit |
|---|---|
| User API | 100 per minute |
| Event API | 500 per minute |
| Campaign API | 500 per minute |
| Reporting API | 50 per minute |
An HTTP response code of 429 would be sent if you exceed these limits.
You will also get the following headers in the response for you to programmatically keep a track of the limits:
| Header Name | What It Means | Sample Value |
|---|---|---|
| X-RateLimit-Remaining | How many more requests you can make in that minute | 499 |
CONTACT SUPPORT :
If you want to increase this limit, feel free to contact us on [email protected]
Date Format
The date format for the data will be in the following format :
yyyy-MM-ddTHH:mm:ss
2013-01-26T07:31+0000
Errors
Errors will be shown using the standard HTTP error code syntax. Find the below description for the error codes :
| 400 | Invalid resource |
| 401 | Invalid auth |
| 404 | Invalid URL |